
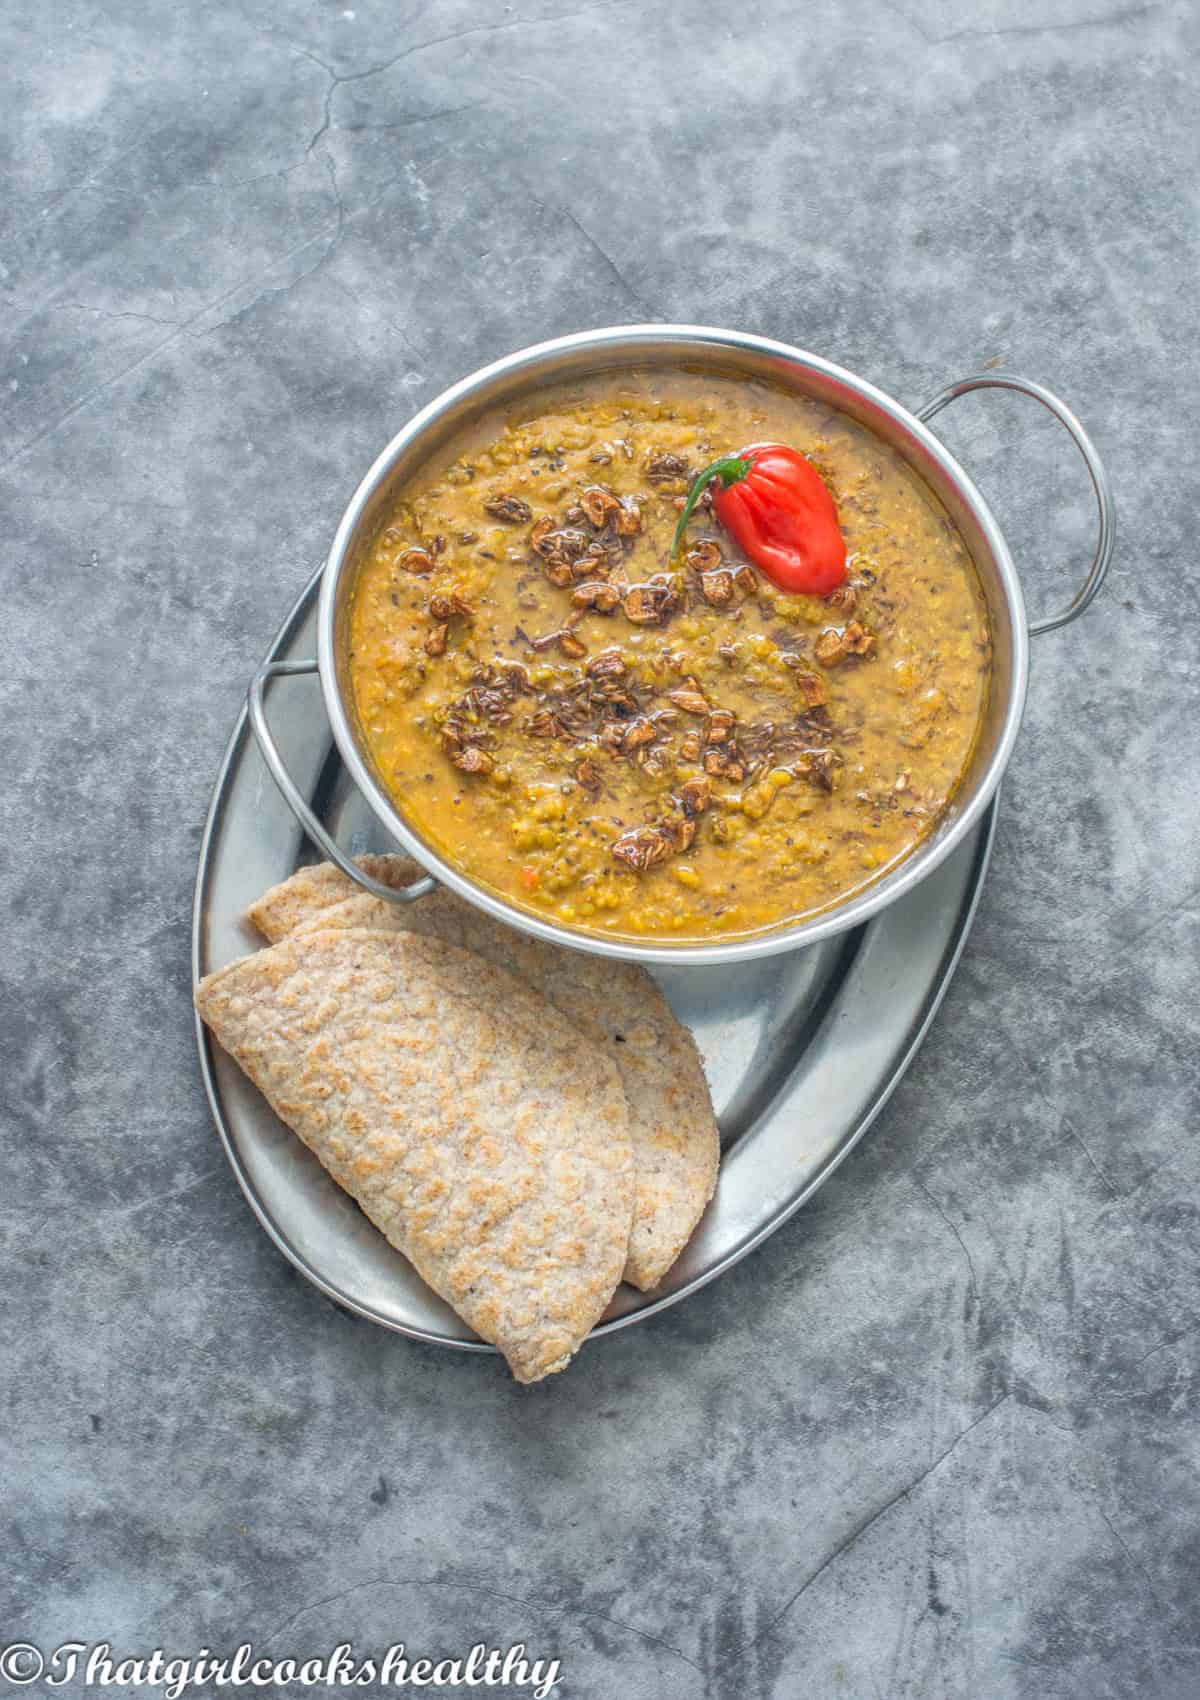
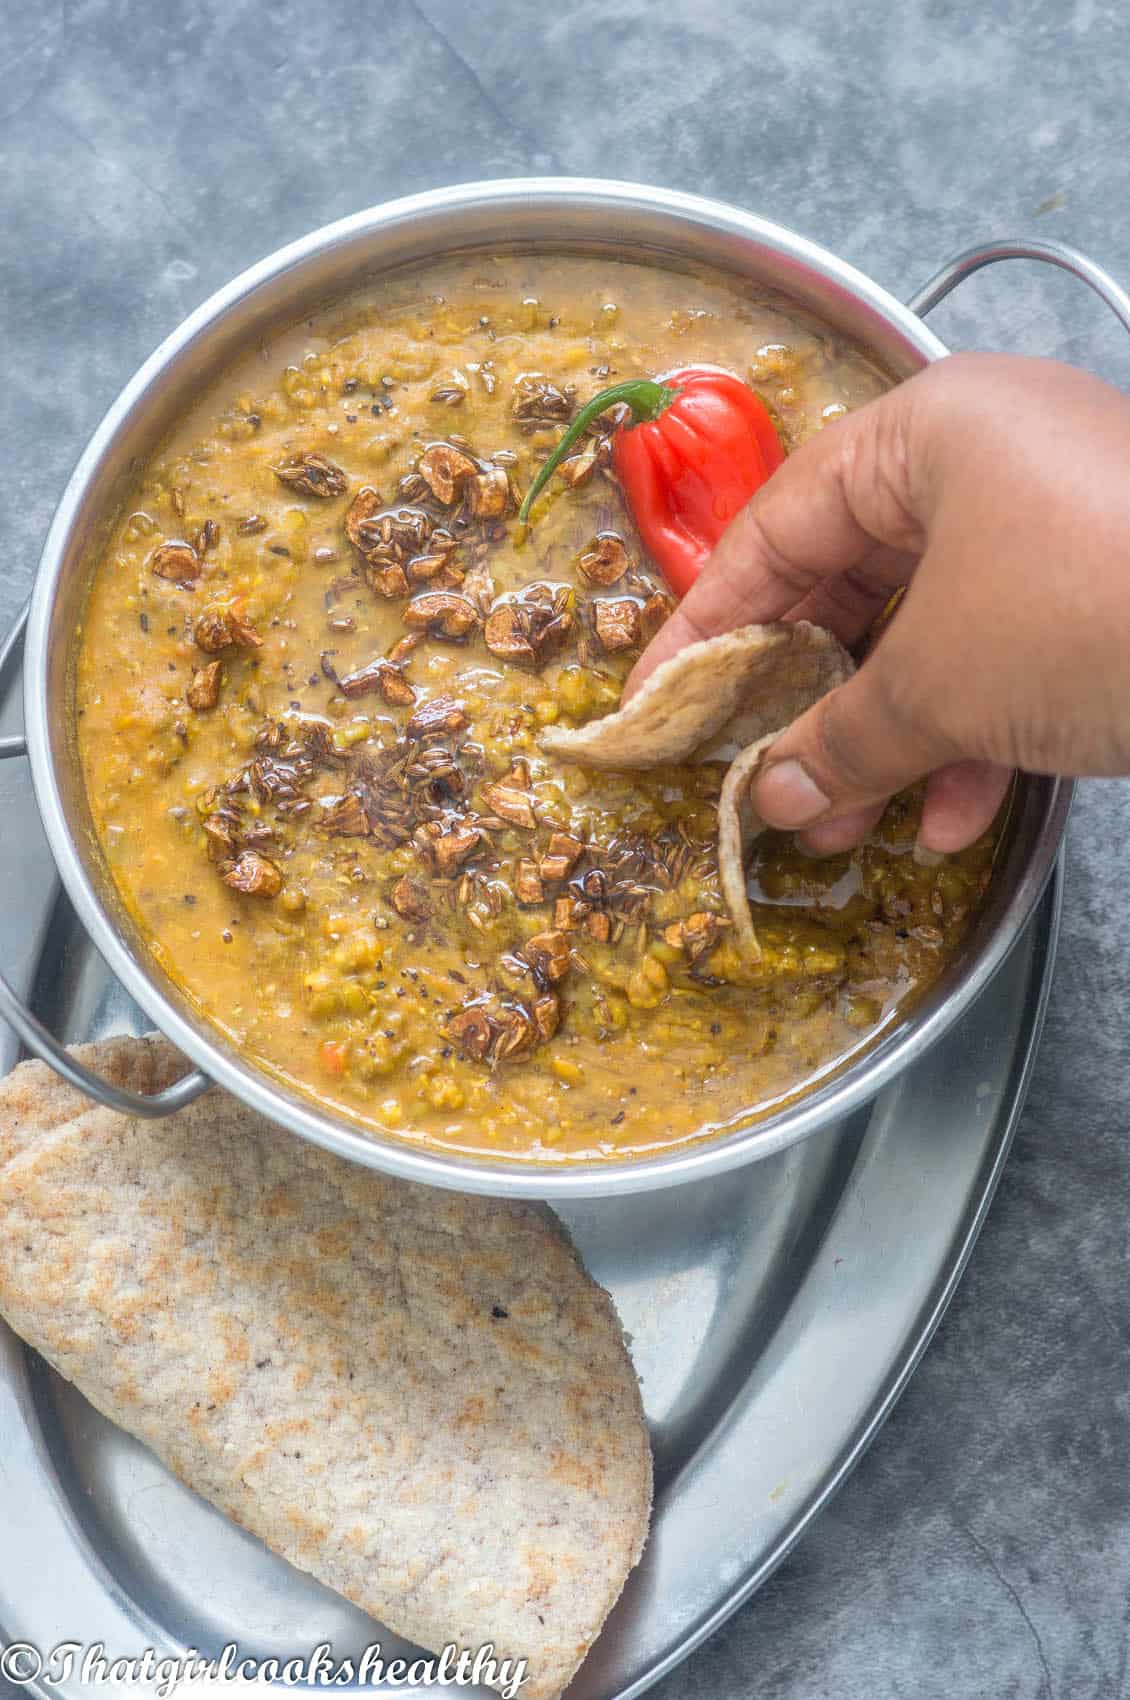
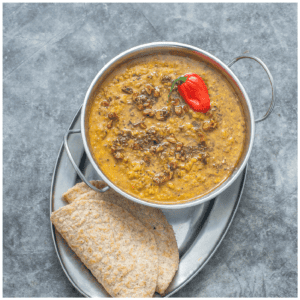
Learn how to make this delicious and wholesome mung bean dhal using whole green mung beans, tomatoes, aromatics and warming spices. The mung beans are slowly simmered until tender then finished with a flavourful garlic and cumin chunkay.
Jump to:
Calling all of my dhal lovers, I have another tasty recipe for you to try.
If you are looking for another way to incorporate more legumes into your diet then you definitely need to give this mung bean dhal a try.
This recipe is made using whole green mung beans, also known as green gram. They are soaked beforehand and then slowly simmered with onion, garlic, ginger, tomatoes and a handful of spices until beautifully soft and tender.
Once the mung beans have cooked, I like to break some of them down using my stick blender or swizzle stick. You don't want to completely puree everything into a smooth consistency; the idea is to break down some of those beans while still leaving some texture.
And of course, we cannot forget about the chunkay!
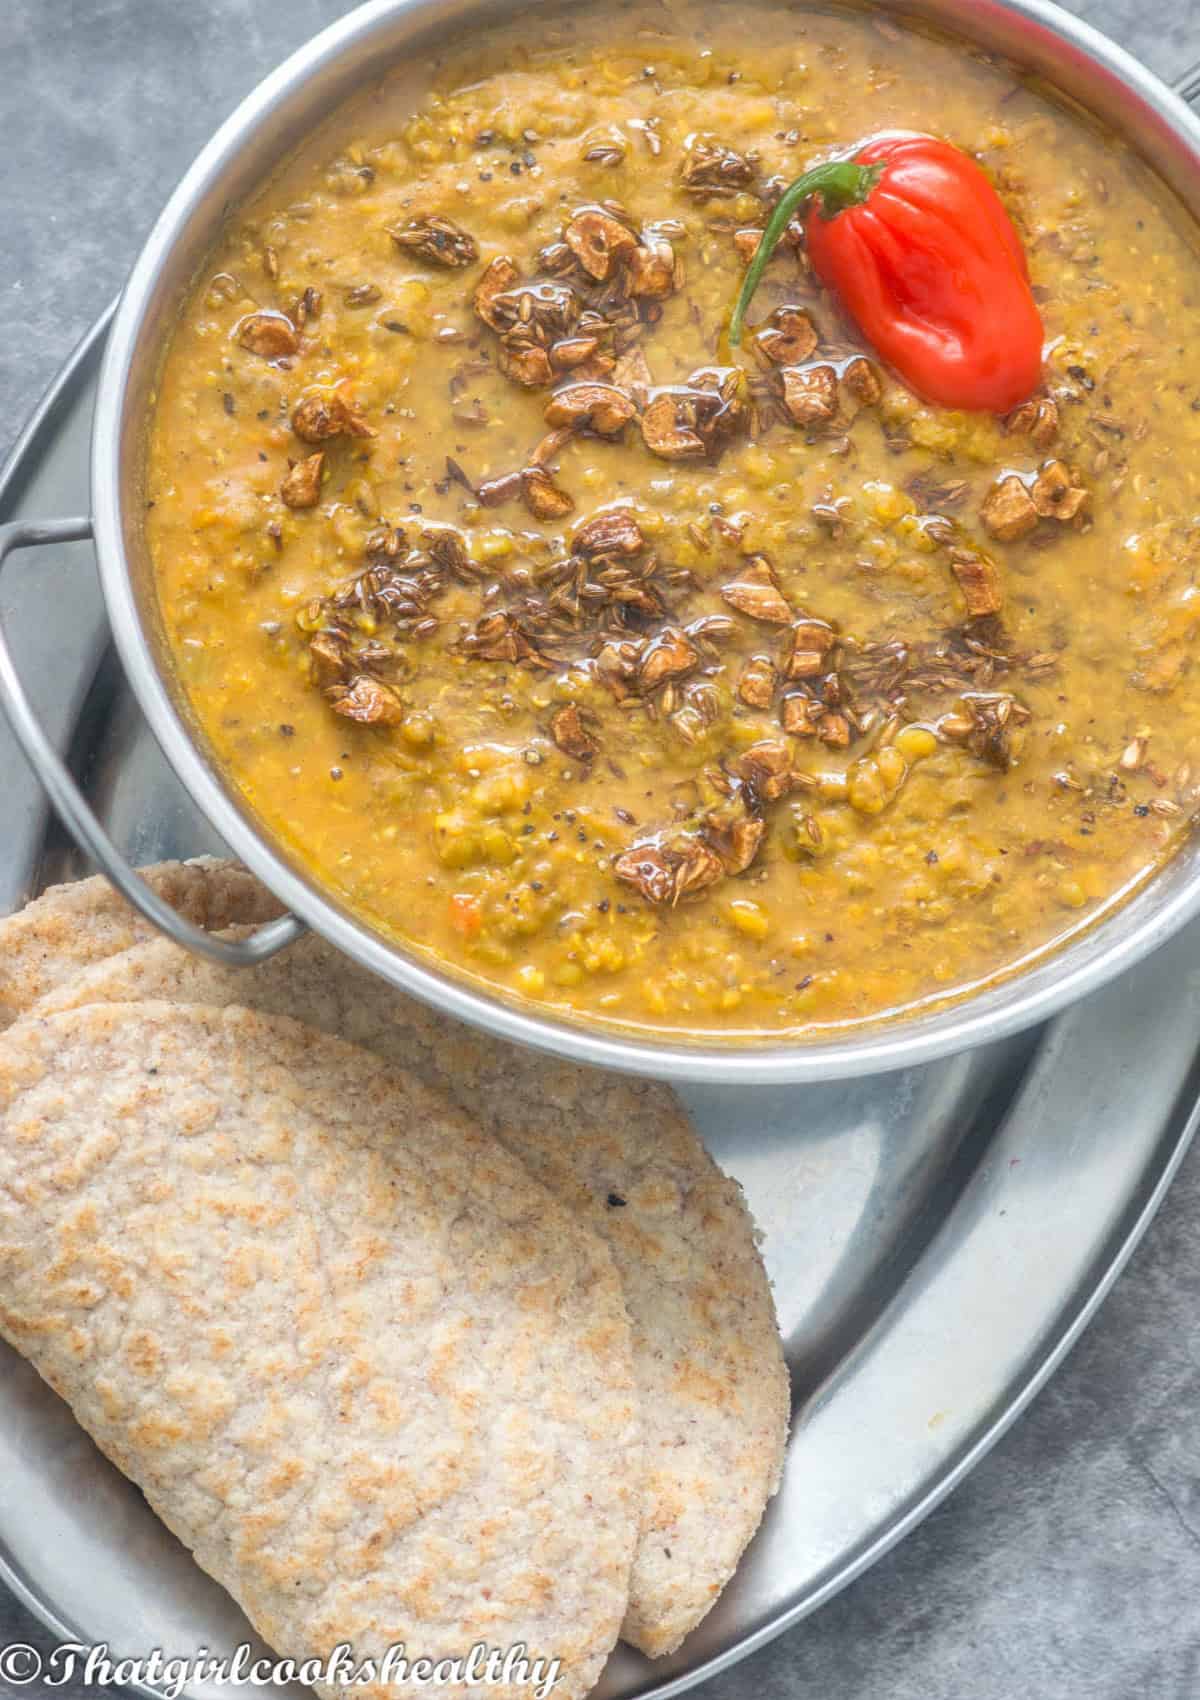
If you aren't familiar with chunkay, this is where some oil is heated separately with aromatics and spices before the hot infused oil is poured directly over the dhal.
For this recipe I'm keeping things relatively simple with garlic and cumin. It may not sound like much, but that final step adds another delicious layer of flavour to the dhal.
This mung bean dhal is completely meat-free, dairy-free and made using relatively inexpensive ingredients. Serve it with some rice or your favourite flatbread and you have yourself a hearty and comforting meal.
What Are Mung Beans?
Mung beans are small green legumes that are widely used throughout Asian, Indian and Caribbean cooking.
You may also come across them labelled as green gram, moong beans or green mung beans.
For this recipe I'm using the whole green mung bean rather than split mung beans. Whole mung beans retain their green outer skin and take longer to cook, which is why I recommend soaking them beforehand.
Once cooked, they become lovely and tender with an earthy, slightly nutty flavour that works incredibly well with spices.
Mung Bean Dhal vs Split Mung Dal
It's worth mentioning that there are several forms of mung beans available, so make sure you purchase the correct type for this recipe.
I'm using whole dried green mung beans. These are small, oval-shaped beans with their green skins still intact.
Split mung dal has been split and may have the outer skin removed, resulting in a yellow-coloured lentil. It cooks much quicker than whole mung beans and therefore isn't a direct substitute using the cooking method and timings given below.
What Is Chunkay?
If you're not familiar with the term chunkay, it is essentially a Caribbean method of tempering spices and aromatics in hot oil.
You may also come across different spellings or variations of the word depending on where in the Caribbean you are from.
The oil is heated before ingredients such as garlic, cumin seeds and other aromatics are added and cooked until fragrant. This hot seasoned oil is then carefully poured over the cooked dhal.
Don't be tempted to skip this step!
Although the dhal already has plenty of flavour from the aromatics and spices, the chunkay adds another layer of flavour and really helps to finish everything off.
Reasons to Make This Mung Bean Dhal
- It's completely vegan friendly.
- It's naturally dairy free.
- It's made using whole green mung beans.
- Most of the ingredients are inexpensive pantry staples.
- You can adjust the amount of Scotch bonnet according to your preference.
- The texture can be as chunky or broken down as you like.
- It's finished with a delicious garlic and cumin chunkay.
- It pairs perfectly with rice or flatbread.
- It's great for making ahead.
- The recipe is naturally gluten free.
Ingredients You Will Need
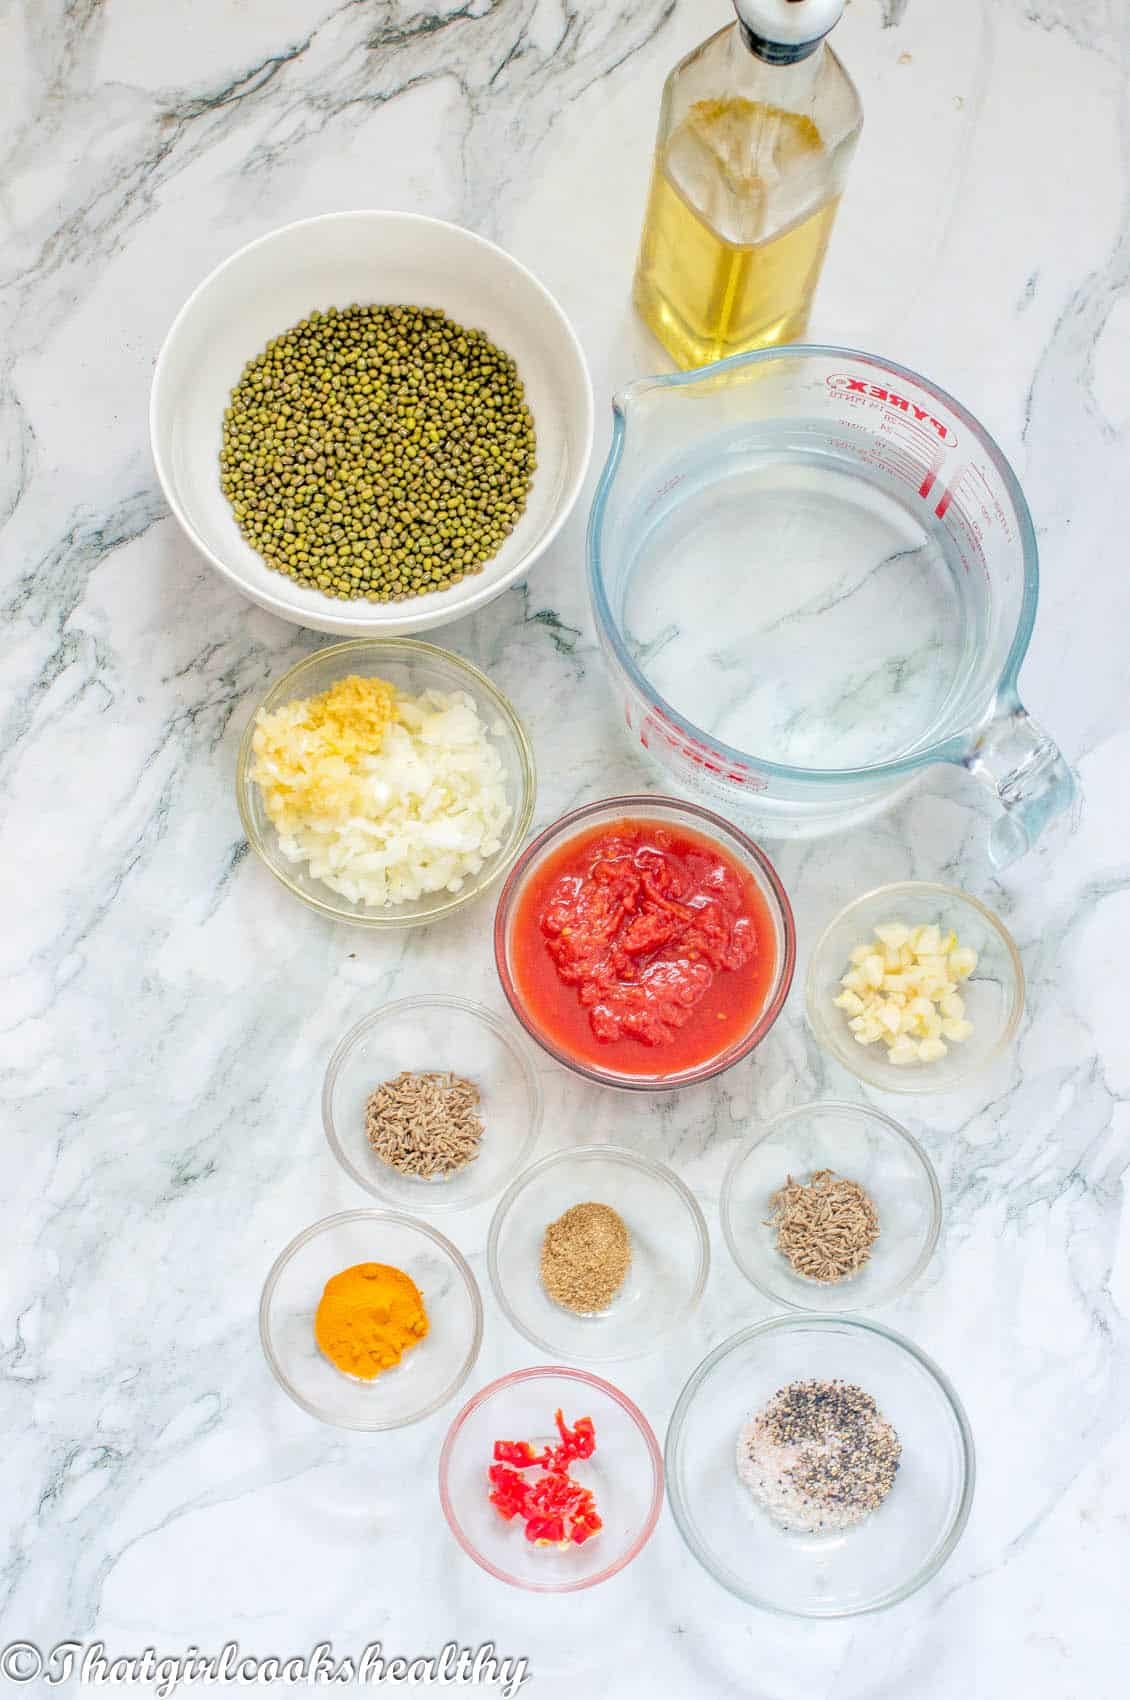
- Mung beans - I'm using dried whole green mung beans. The beans need to be rinsed and soaked for several hours before cooking so they soften more readily.
- Onion - You will need one medium onion, chopped. The onion forms part of the flavour base for the dhal and is sauteed with the garlic, ginger and tomatoes.
- Garlic - I'm using garlic cloves in the dhal itself. Fresh garlic adds plenty of flavour and we're also going to use some additional garlic when preparing the chunkay.
- Ginger - You will need a small amount of fresh ginger. Ginger works really well with the garlic and spices and adds some warmth to the dhal.
- Tomatoes - I'm using chopped tomatoes. The tomatoes are cooked with the onion, garlic and ginger until everything has softened.
- Cumin seeds - You will need a small amount of cumin seeds for the dhal. The cumin seeds are cooked in the olive oil first until they become aromatic, which helps to release their flavour.
- Turmeric - The turmeric gives the dhal that lovely golden hue.
- Ground coriander - You will need a little ground coriander. This has a warm, slightly citrusy flavour that complements the cumin and turmeric.
- Scotch bonnet - ½ of a Scotch bonnet is more than enough, chopped. Feel free to use less or omit it altogether if you don't care for too much heat.
- Black pepper - Black pepper to season the dhal.
- Pink salt - Pink salt to enhance the taste. You can always adjust this according to your taste.
- Water - You will need approximately 3 cups of water to cook the mung beans. Keep some additional water nearby because you may need to add more while the beans are simmering.
- Olive oil - Olive oil to saute the cumin seeds and aromatics.
THE STEPS
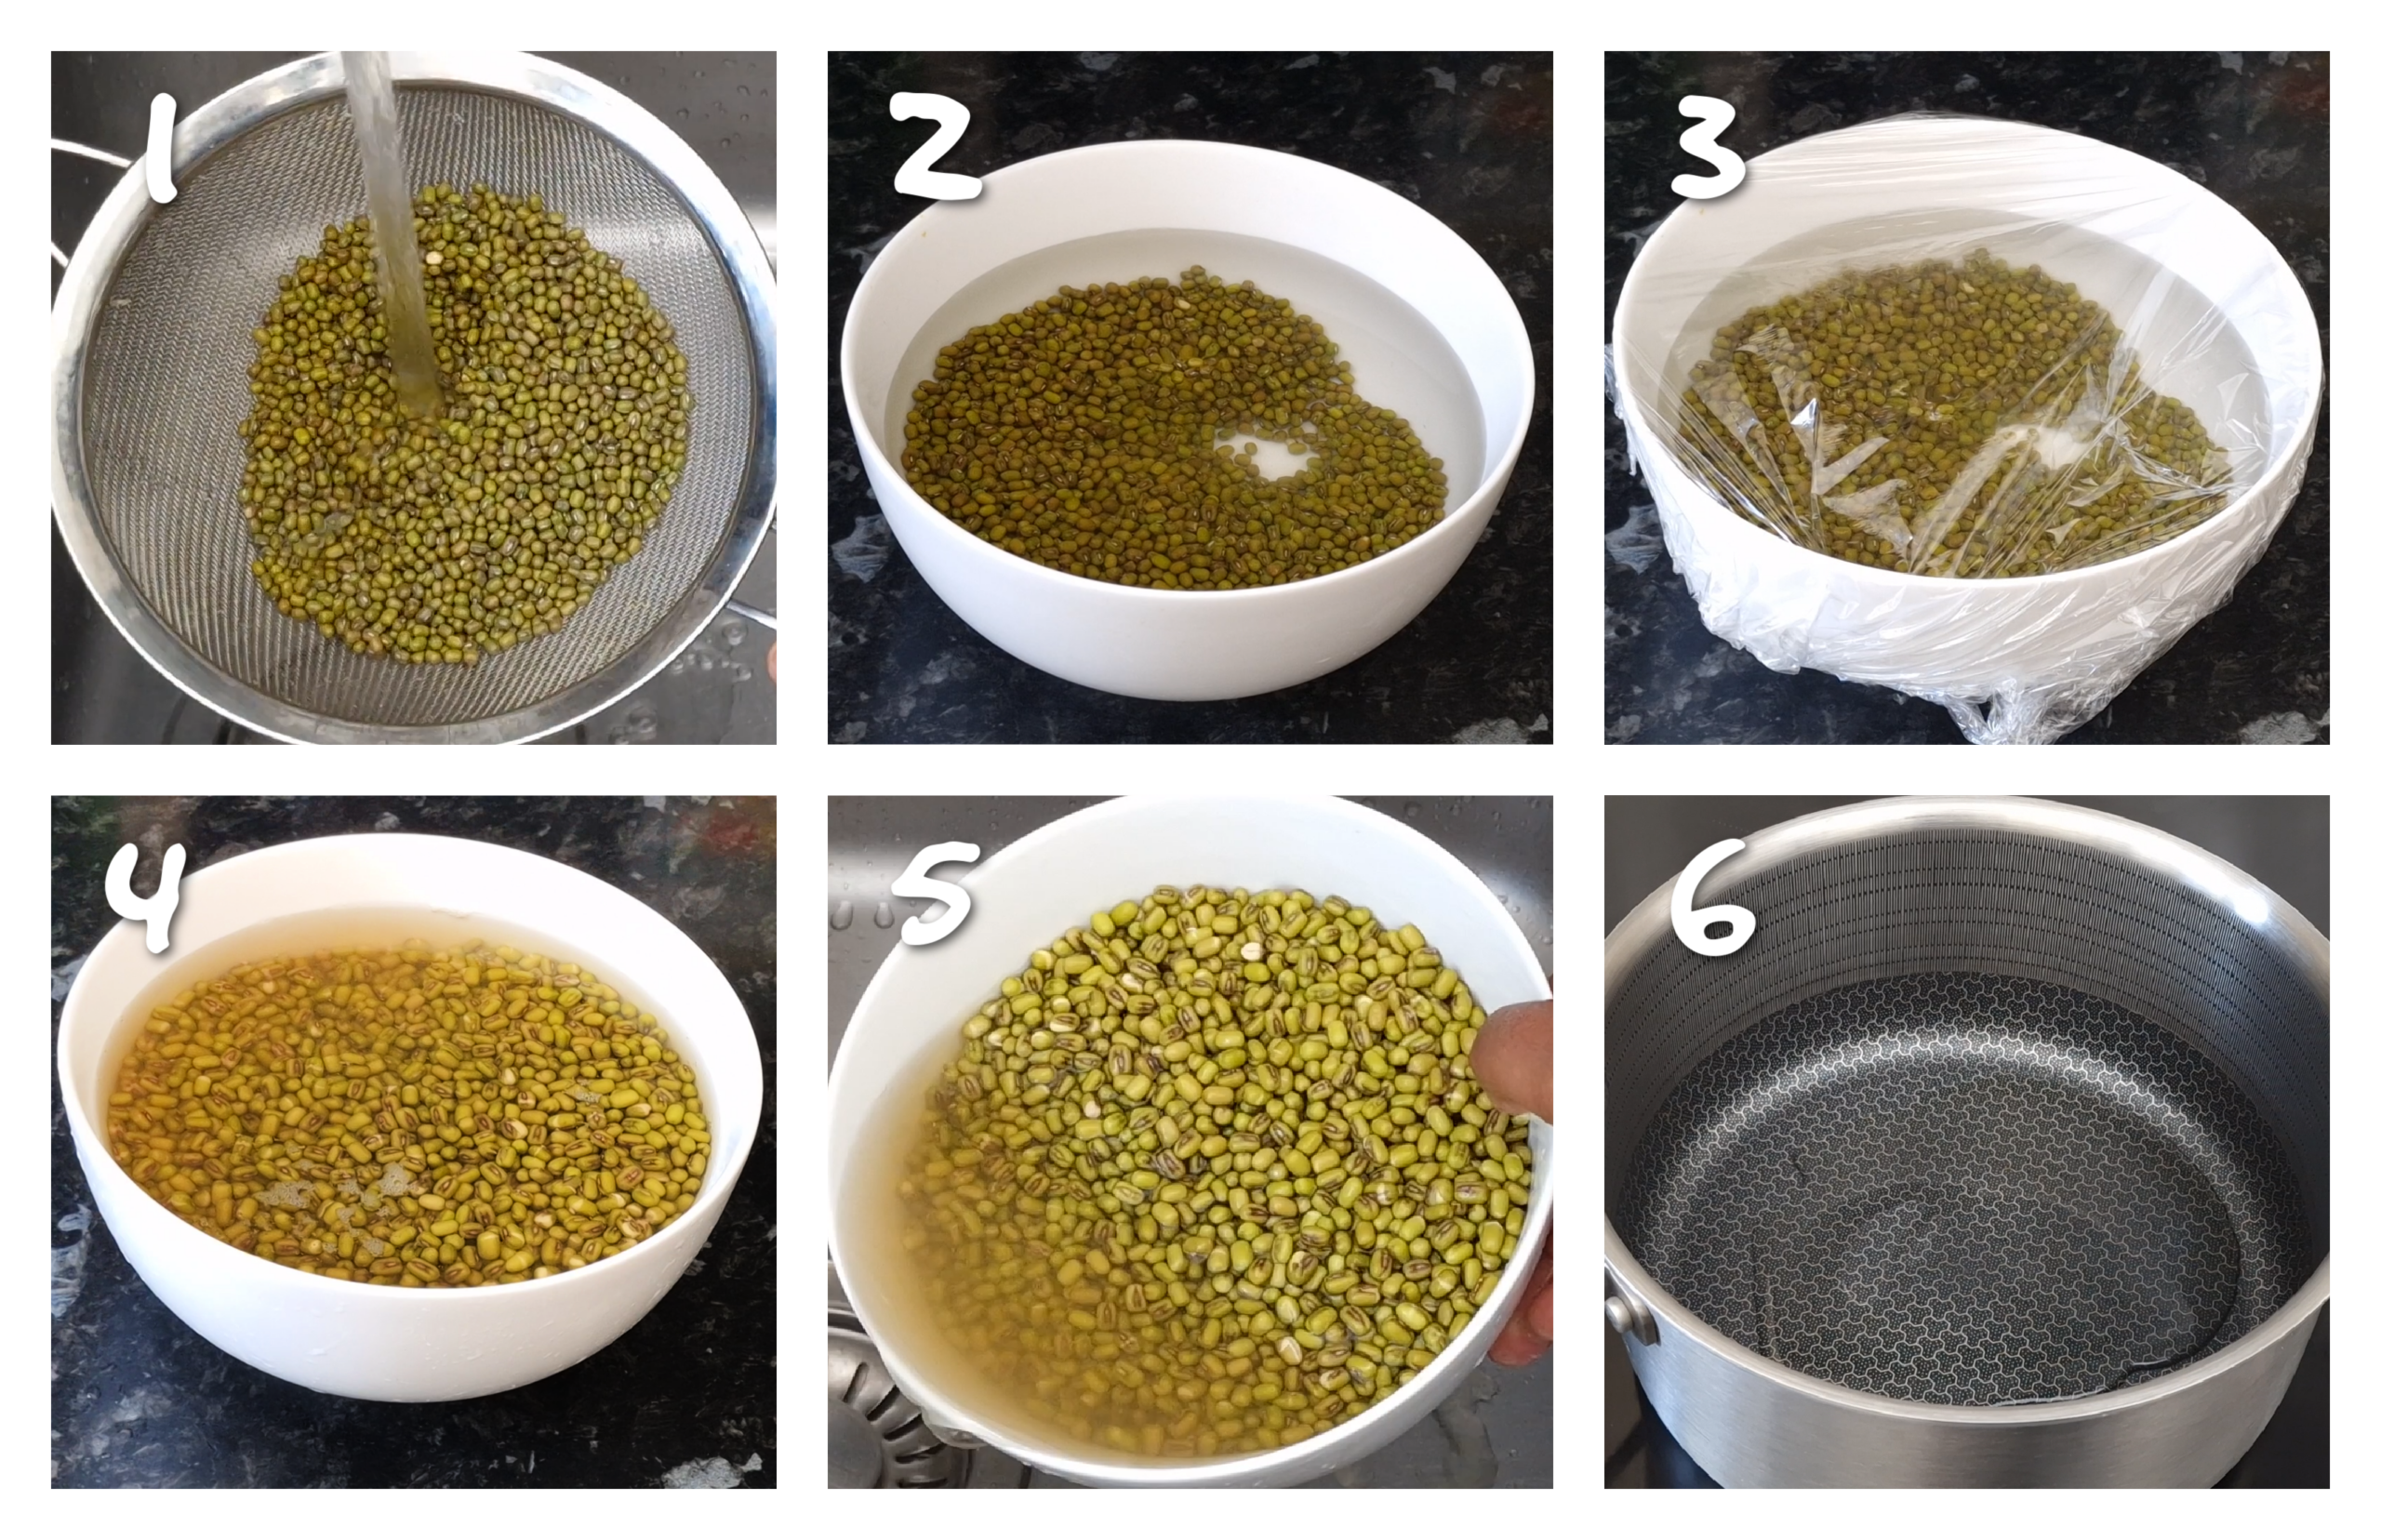
- Place the mung beans in a fine mesh sieve and rinse them several times with cold water.
- Transfer the mung beans to a medium-sized bowl and fill the bowl with enough water to completely cover the beans.
- Wrap the bowl with saran wrap (cling film) and leave the mung beans to soak for several hours or overnight if you have the time.
- Once soaked, drain off the soaking water then set aside.
- Heat 2 tablespoons of olive oil in a medium-sized non-stick saucepan over medium-high heat.
- Add the cumin seeds and cook for approximately one minute or until they become aromatic. Make sure they don't burn.
- Reduce the heat to medium, add the onion, garlic, ginger and chopped tomatoes.
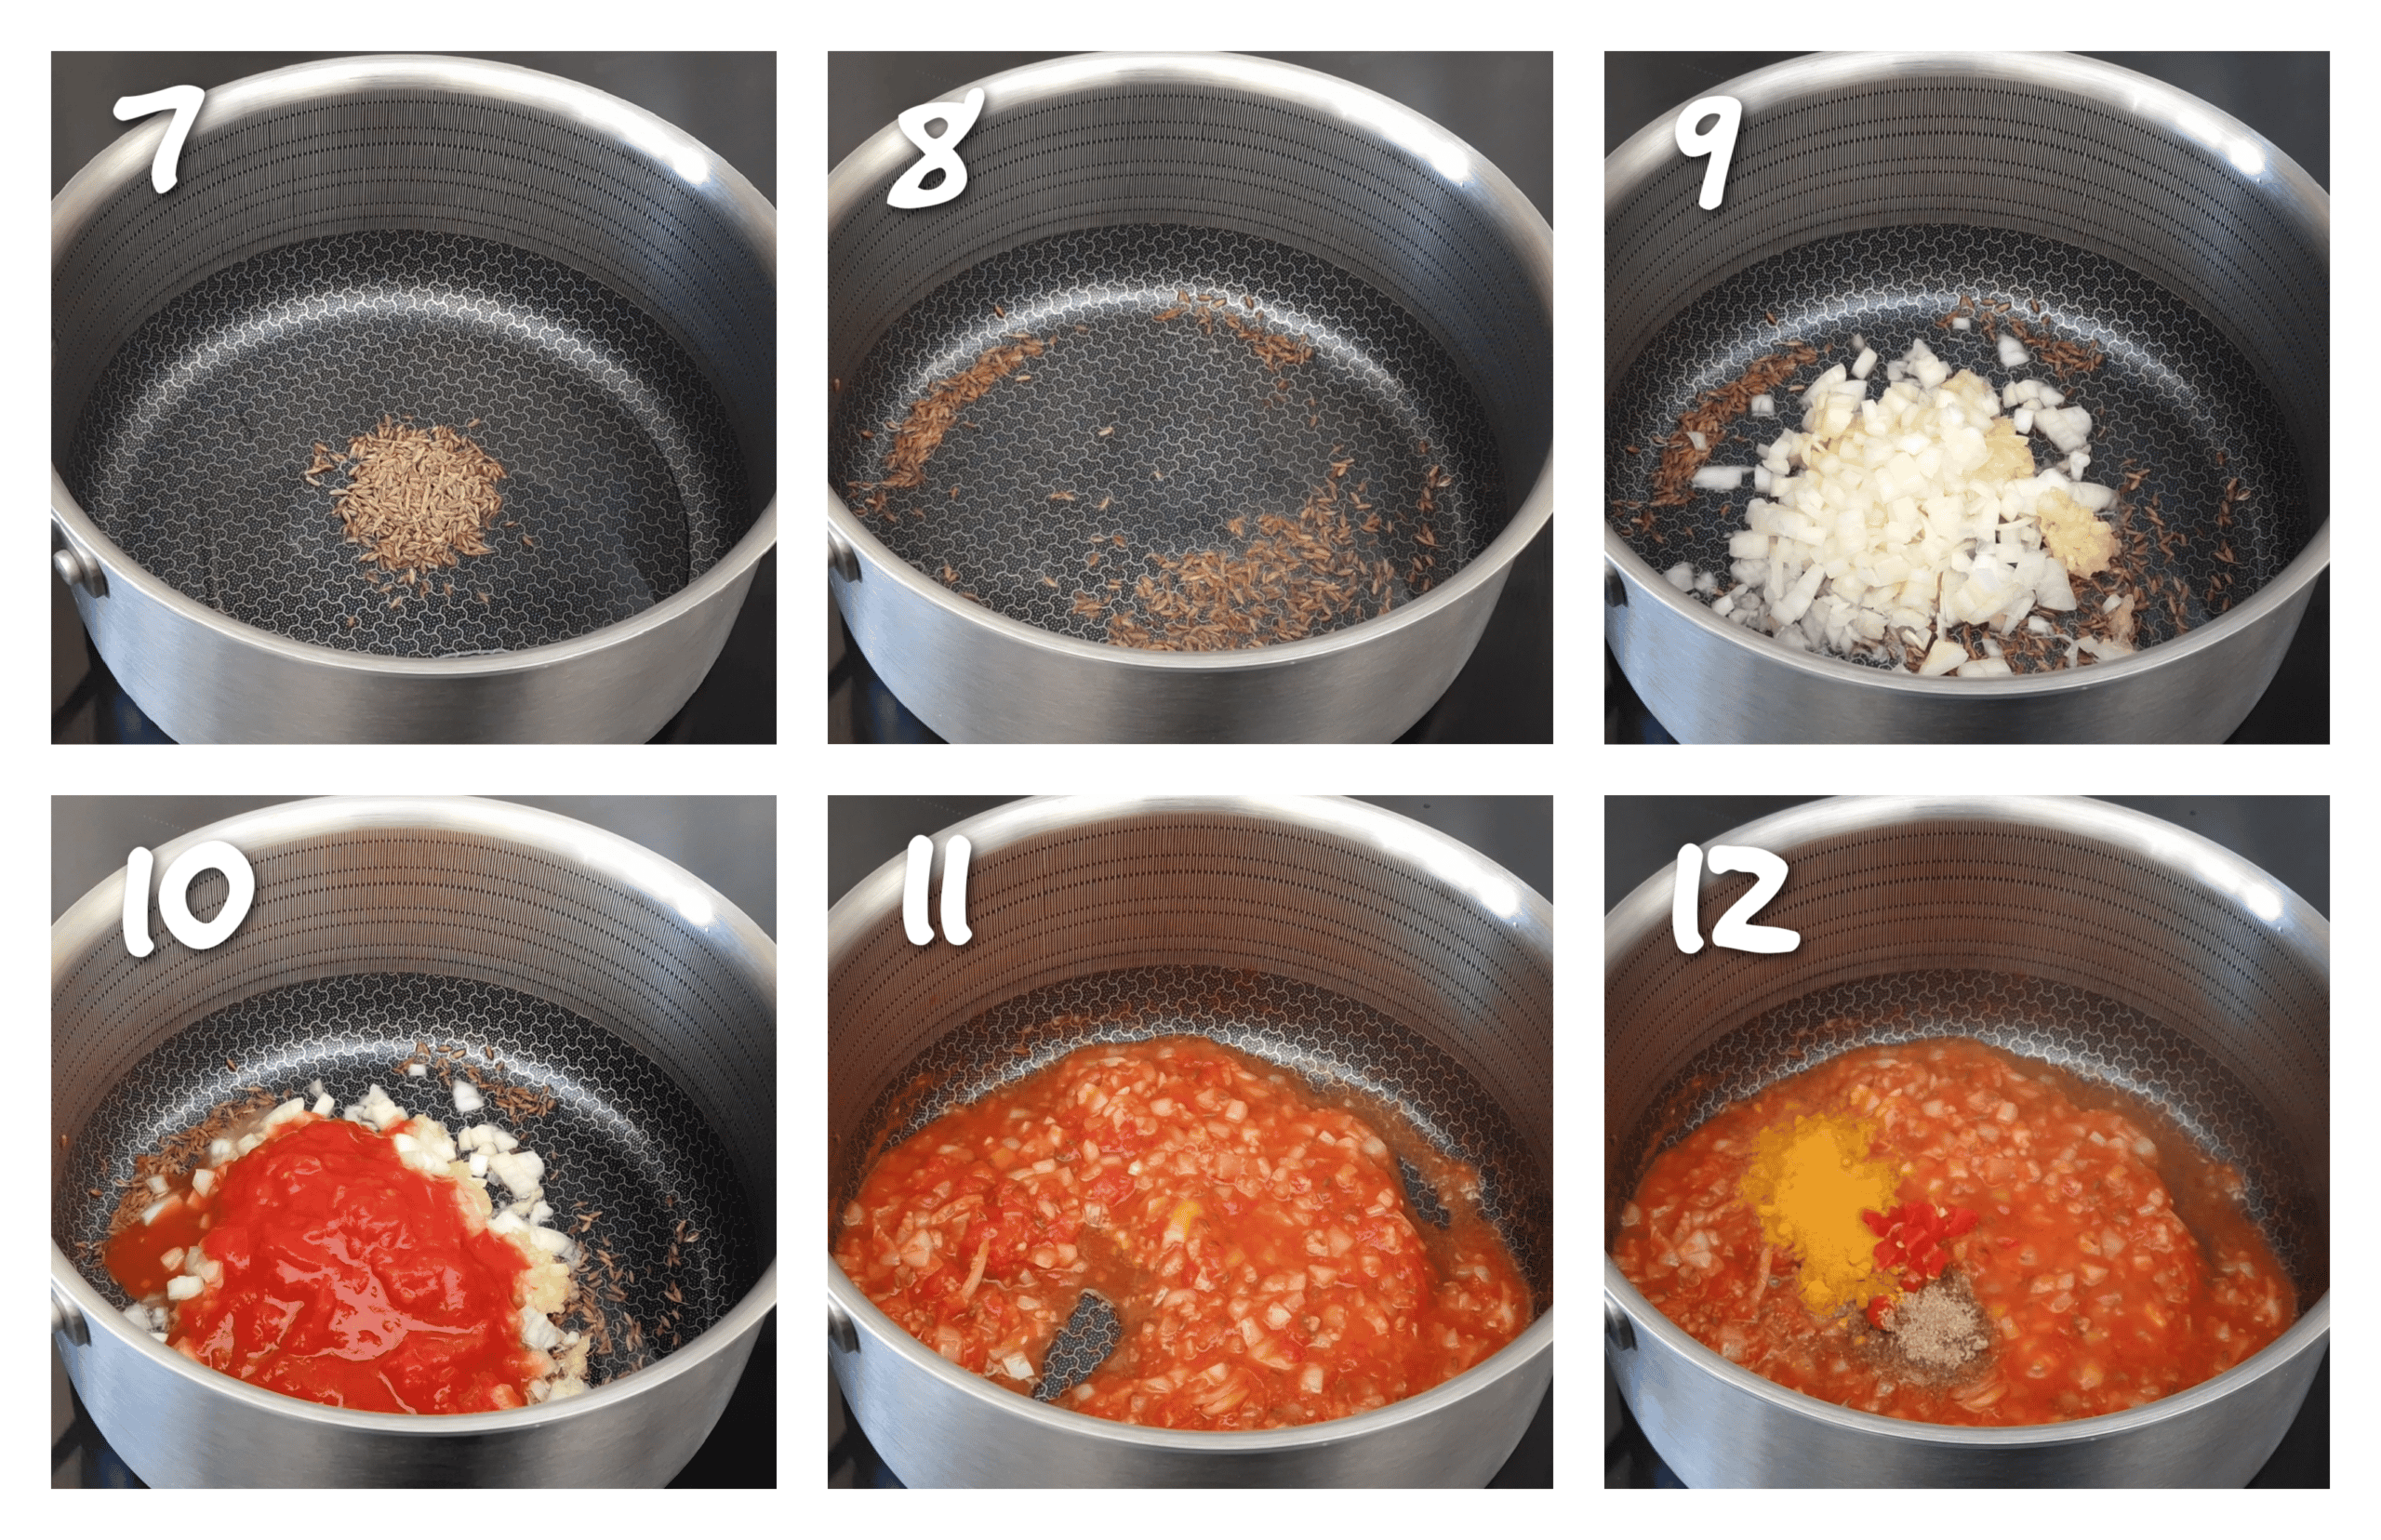
- Saute until the onion is soft and translucent and the tomatoes have started to soften.
- Add the ground coriander, turmeric, scotch bonnet, black pepper and pink salt.
- Stir everything together and continue to cook for a few minutes.
- Add the drained mung beans followed by 3½ cups of water.
- Stir everything together then increase the heat and bring to a rolling boil.
- Once boiling, reduce the heat to medium-low and cover the saucepan with a lid.
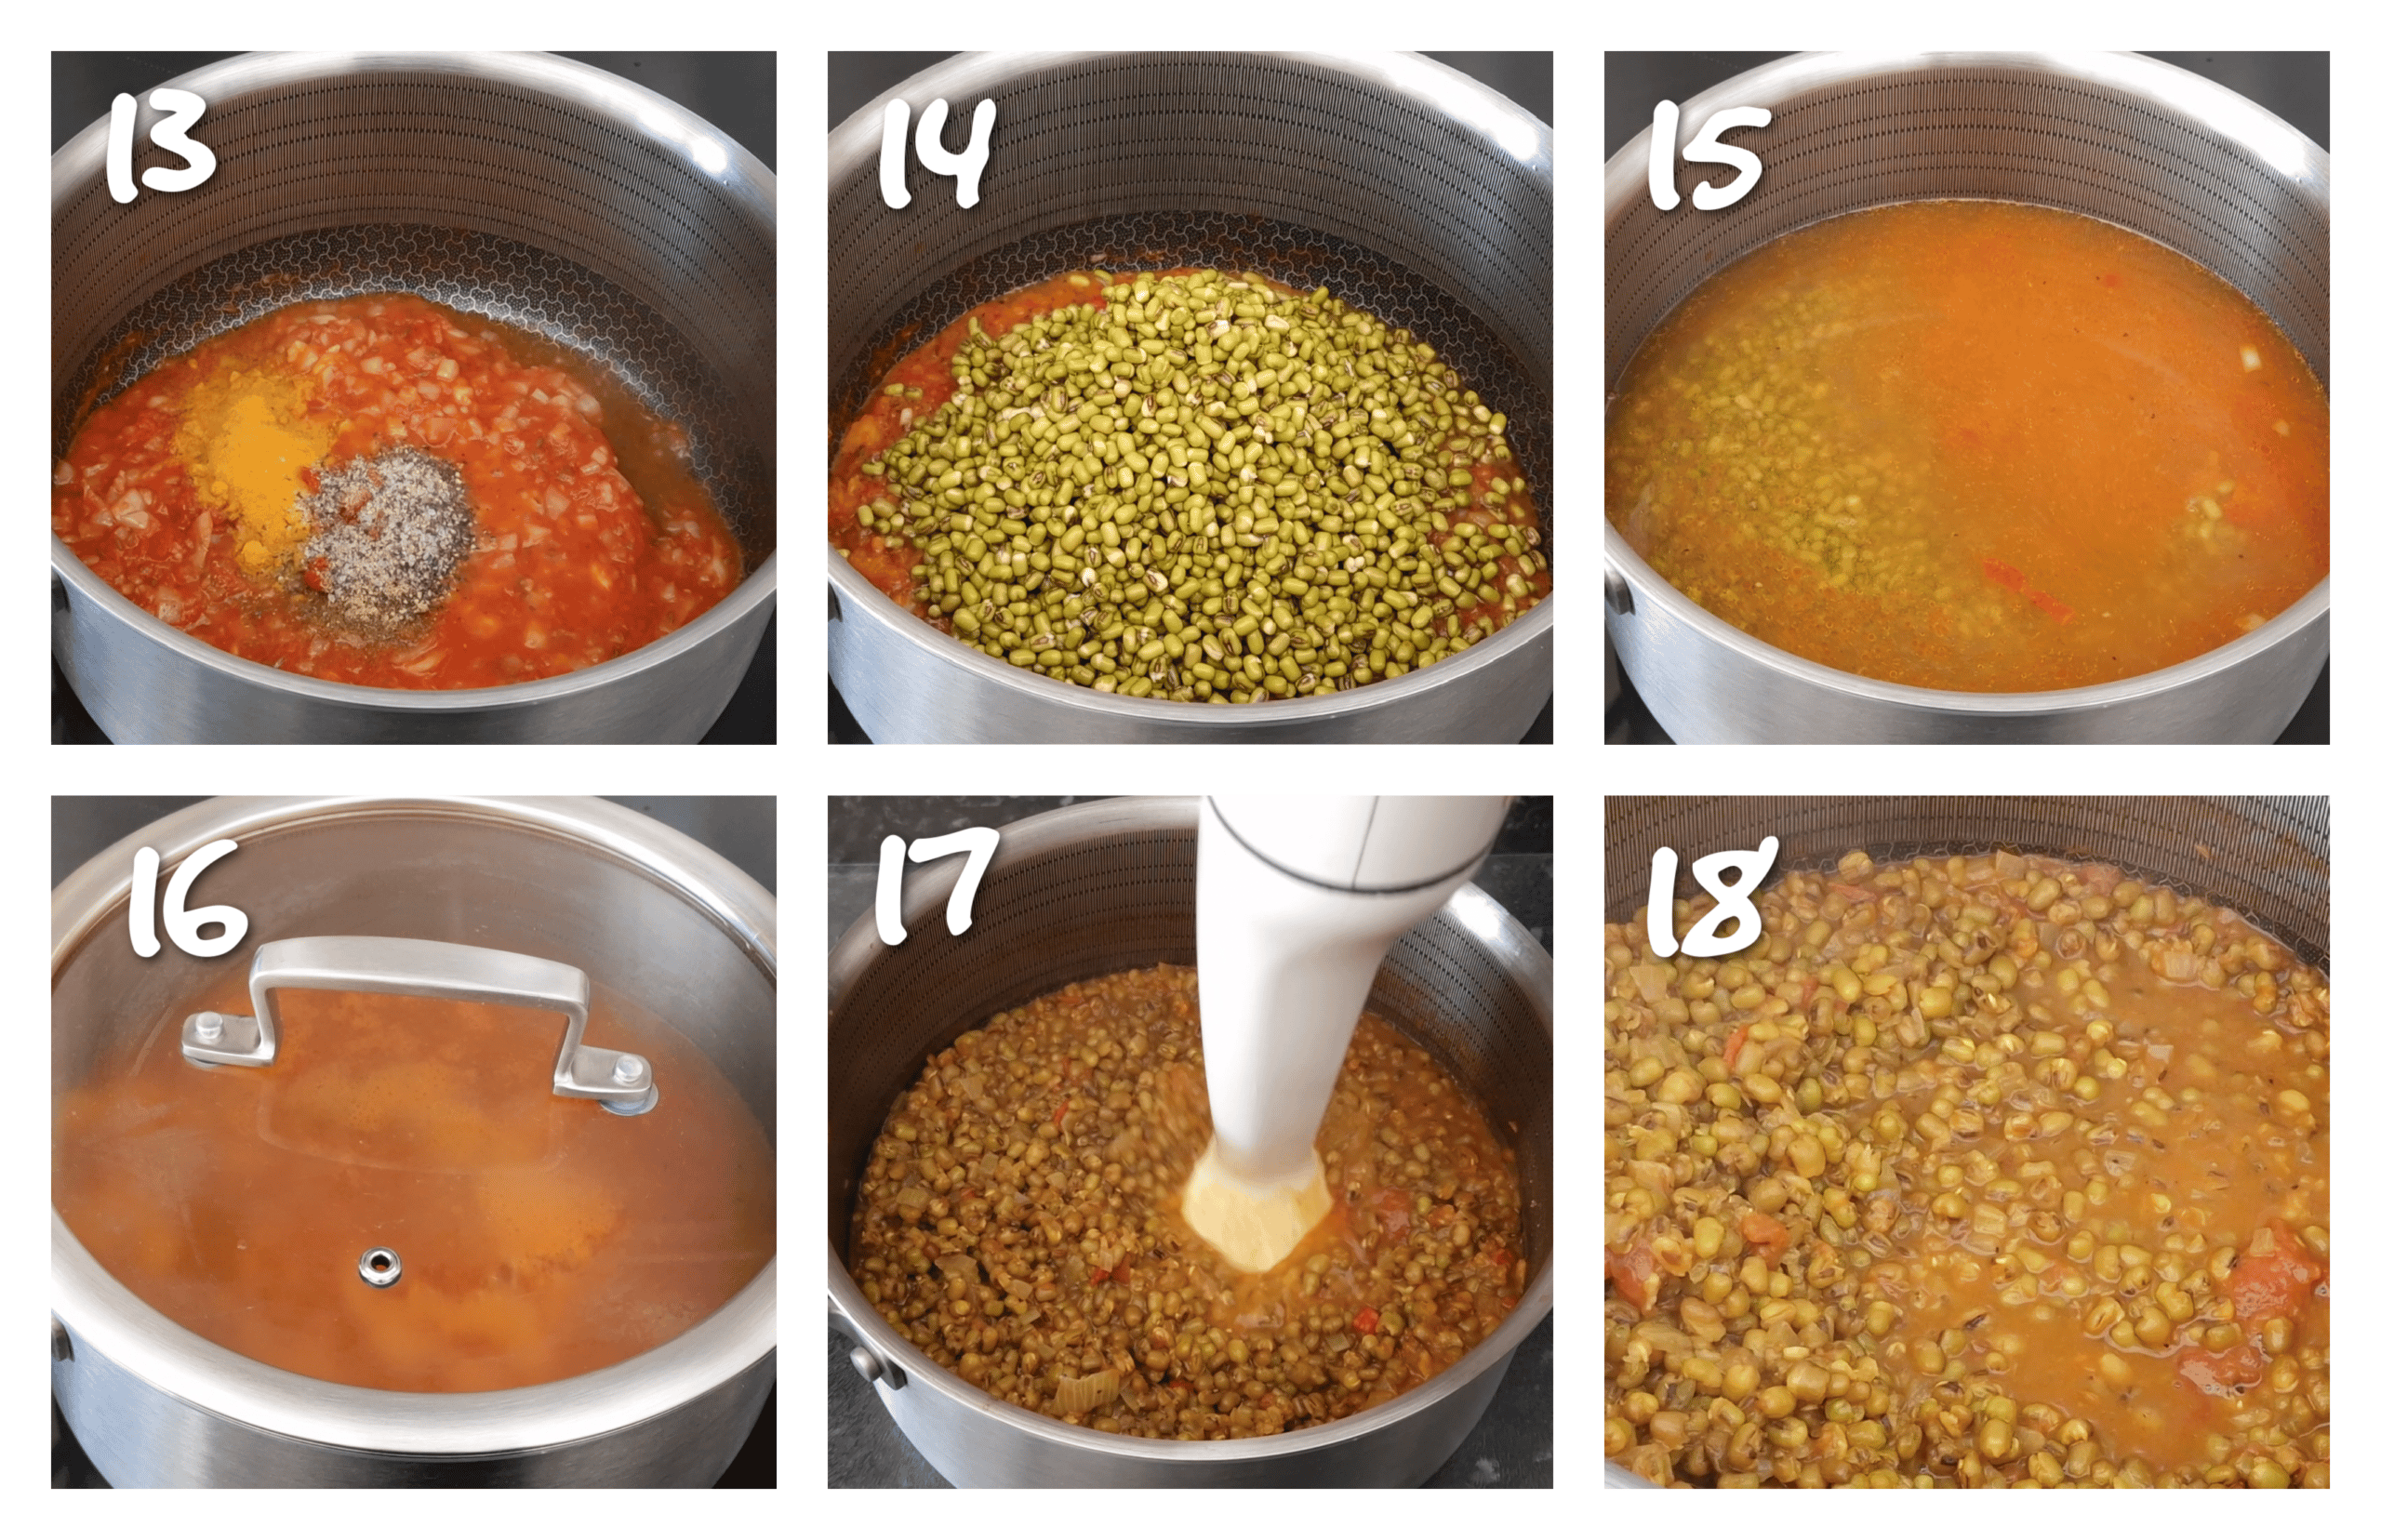
- Simmer for approximately 30-40 minutes or until the mung beans are completely tendr.
- Check the water level halfway through the cooking time. If more water is needed, add approximately ¼ cup at a time and continue to simmer.
- Once the mung beans are tender, remove the saucepan from the heat.
- Use a stick blender or swizzle stick to break down the mung beans until the dhal reaches your desired texture.
- Do a taste test and add more black pepper and pink salt, if needed.
How to Chunkay the Dhal
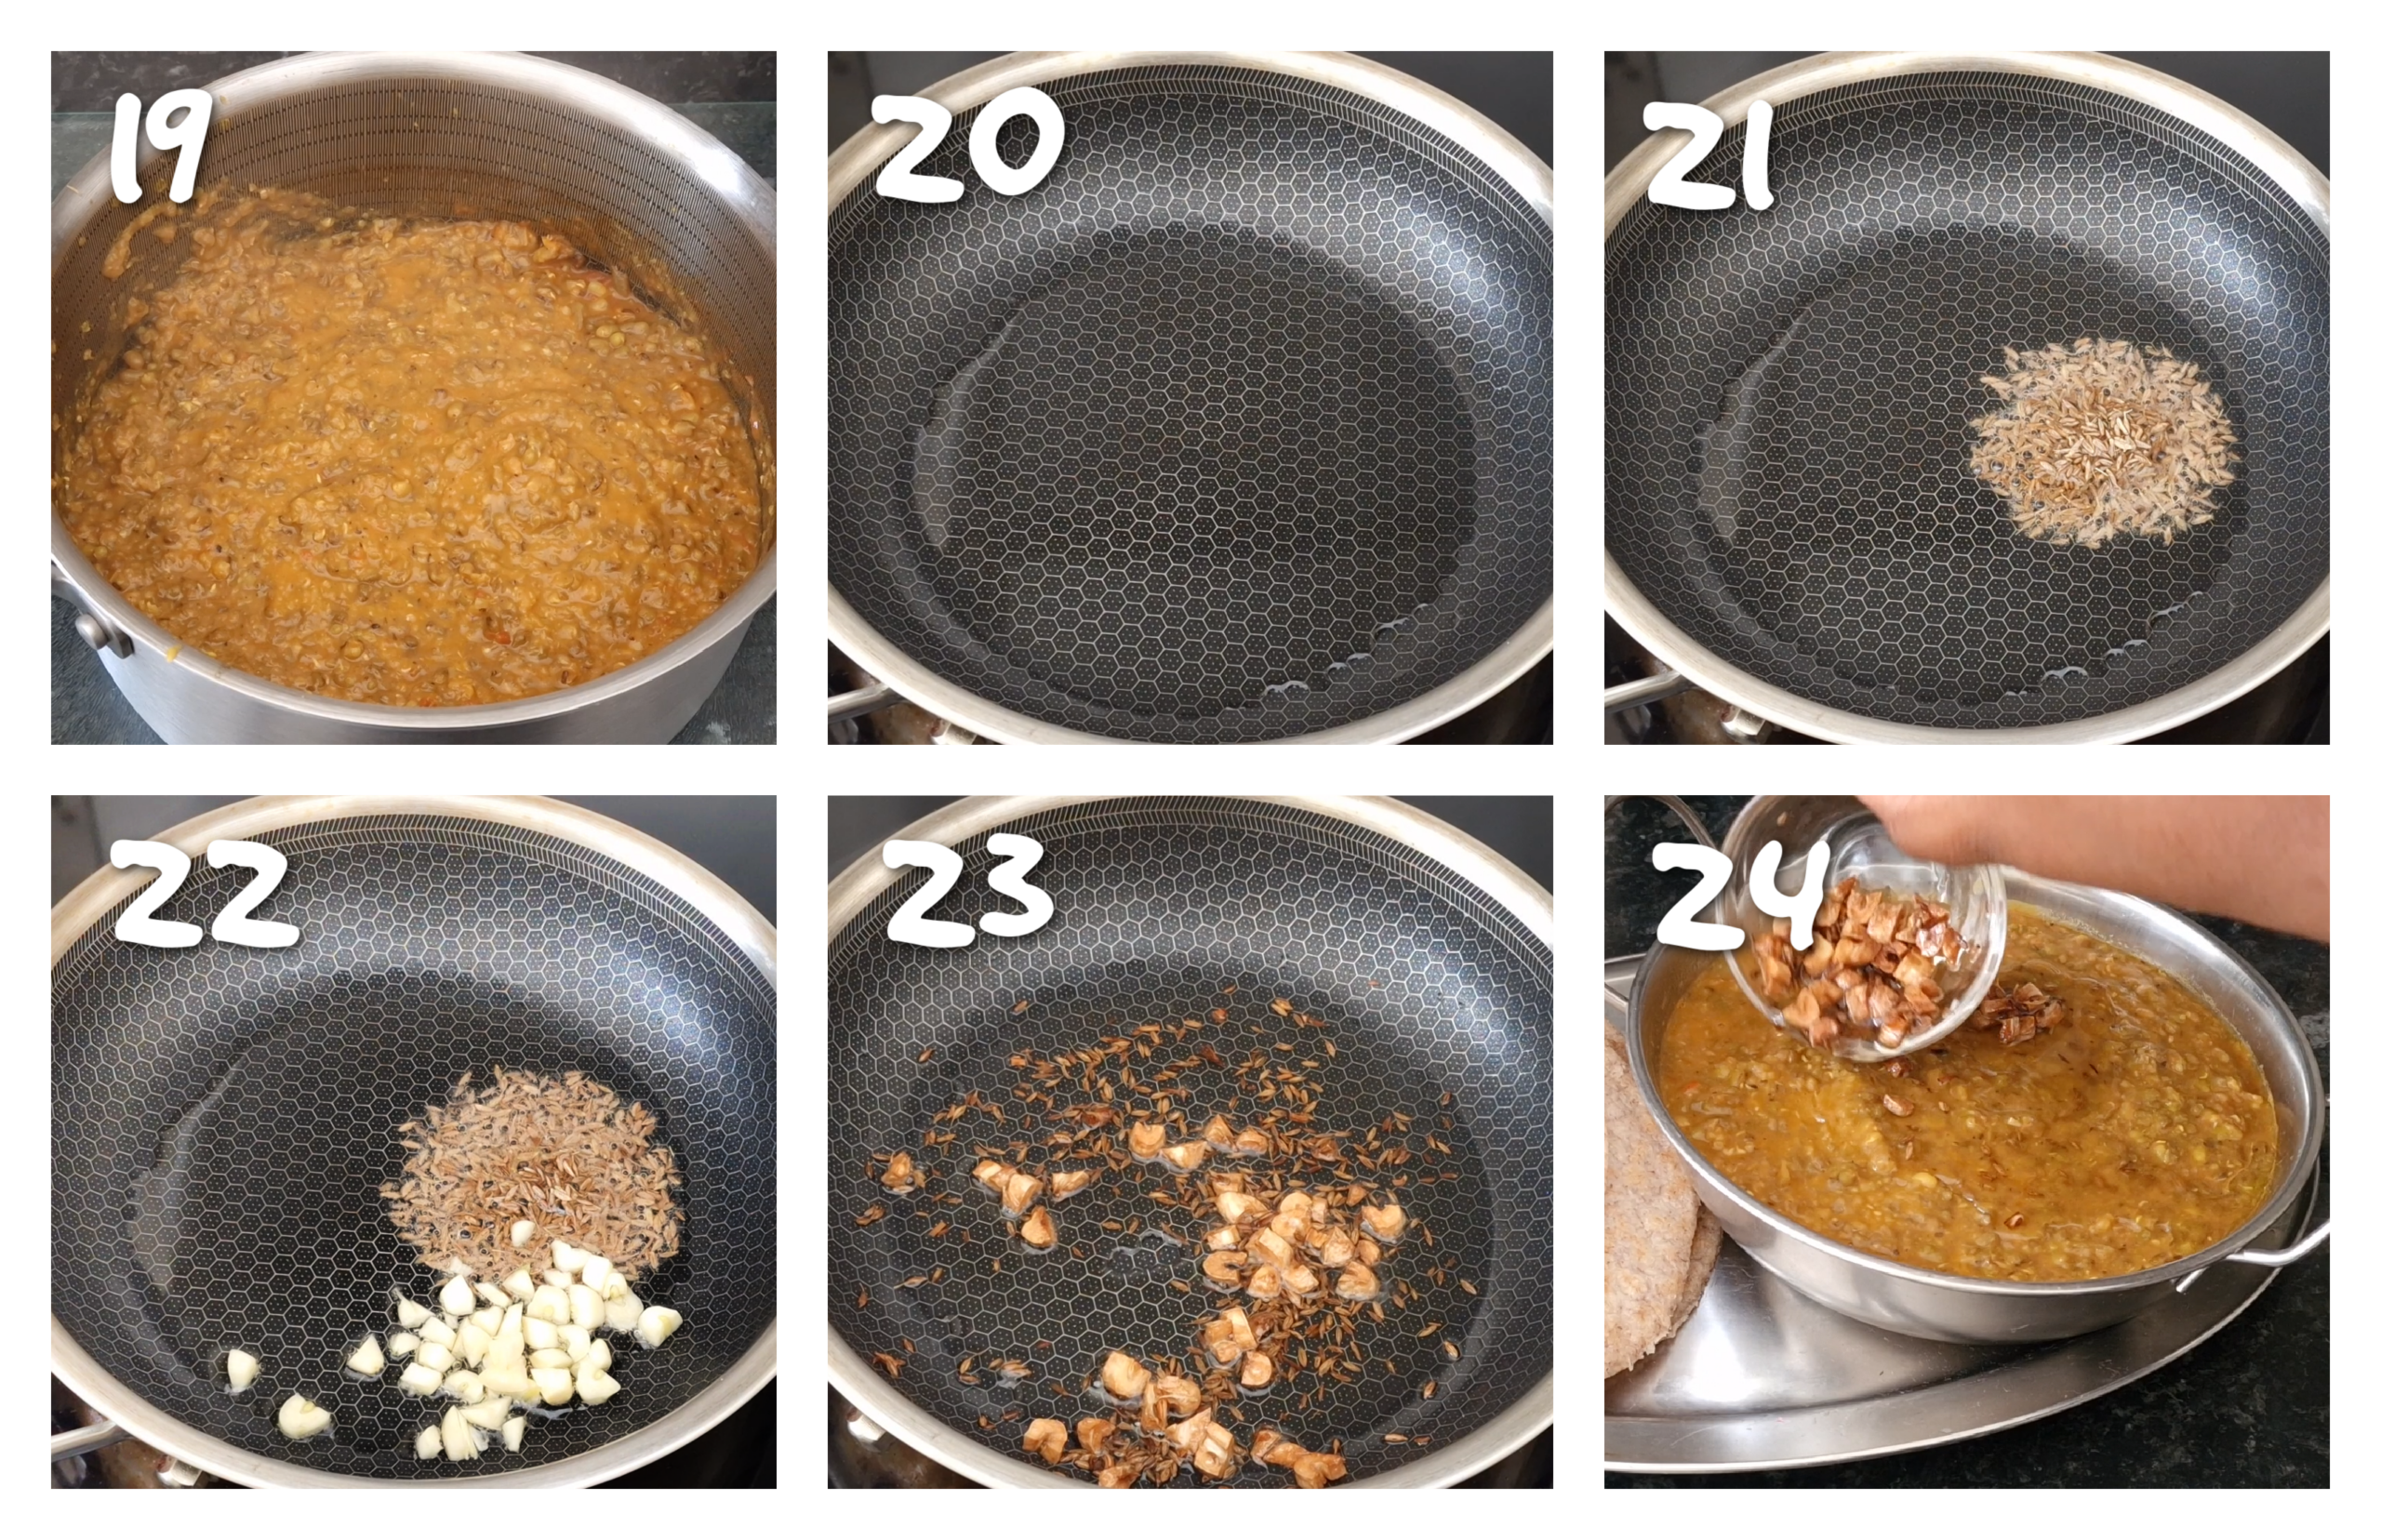
- Heat the olive oil in a small frying pan over medium heat.
- Add the garlic and cumin seeds.
- Temper the garlic and cumin until golden and aromatic, making sure they don't burn.
- Carefully pour the hot infused oil directly over the mung bean dhal.
- Stir the chunkay into the dhal until everything is combined.
- Do a taste test and adjust the seasoning if needed.
- Serve accordingly.
Notes and Tips
- Make sure you are using whole green mung beans and not split yellow mung dal, as the cooking times and preparation will differ.
- Rinse the mung beans several times under cold running water before soaking them.
- I recommend soaking the mung beans for several hours or if you prefer, soak them overnight.
- If your mung beans are still firm after 30-40 minutes, don't panic. Continue to simmer them until completely tender, adding additional water as needed.
- Keep an eye on the water levels while the mung beans are cooking. If the dhal starts to become too dry, add approximately ¼ cup of water at a time.
- Try not to add too much water at once. You can always add more if needed, but adding too much can make the dhal overly watery.
- Make sure the mung beans are completely tender and easy to mash before using the stick blender or swizzle stick.
- You don't need to completely puree the dhal. I personally like to break down some of the mung beans while still retaining some texture.
- Adjust the Scotch bonnet according to your preference. Use less or omit it altogether if you don't care for too much heat.
- Make sure the cumin seeds don't burn when you initially temper them in the olive oil.
- When preparing the chunkay, keep a close eye on the garlic because it can go from golden to burnt very quickly.
- Be extremely careful when pouring the hot chunkay over the dhal because the oil will be very hot and may splutter.
- The dhal will naturally thicken as it cools. If it becomes too thick, simply stir in a small amount of water until you achieve your desired consistency.
- Allow the dhal to cool completely before transferring it to an airtight container and refrigerating for up 2 days.
- When reheating, you may need to add a splash of water to loosen the dhal. Reheat on the stovetop over low-medium heat or in the microwave until piping hot.
- The dhal is also freezer friendly, freeze up until 3 months. Thaw thoroughly before reheating and add a small amount of water if needed to restore the consistency.
mORE DHAL and roti RECIPES TO TRY
- Dhal and Rice (Trinidadian Inspired)
- Trinidadian Style Dhal Recipe (Vegan)
- Dhal Puri Roti (Gluten Free)
- Gluten Free Roti Recipe
- Keto Roti Recipe with Almond Flour
- Baigan Choka (Roasted Eggplant Dip)
- Trinidadian Tomato choka (Vegan, GF, low fat)
**Please comment below and star rate if you have tried my recipes. Support my website by leaving a donation through Buying Me a Coffee. A site to show your appreciation of my hardwork over the years. Let's be friends and engage on YouTube, Facebook and Instagram I also like to pin on Pinterest, where you can find more amazing recipes.**
Mung Bean Dhal
Ingredients
For the mung bean dhal
- 1 cup green mung beans dried
- 2 tbsp olive oil
- 1 teaspoon cumin seeds
- 1 medium onion chopped
- 4 garlic cloves minced
- 1 teaspoon fresh ginger minced
- ½ cup chopped tomatoes
- 1 teaspoon turmeric
- ½ teaspoon ground coriander
- ½ scotch bonnet chopped
- ½ teaspoon black pepper
- ½ teaspoon pink salt
- 3½ cups water plus more if needed
- black pepper and pink salt if needed
For the chunkay
- 2-3 tablespoon olive oil
- 3 garlic cloves chopped
- 1 teaspoon cumin seeds
Instructions
- Place the mung beans in a fine mesh sieve and rinse them several times with cold water.
- Transfer the mung beans to a medium-sized bowl and fill the bowl with enough water to completely cover the beans.
- Wrap the bowl with saran wrap (cling film) and leave the mung beans to soak for several hours or overnight if you have the time.
- Once soaked, drain off the soaking water then set aside.
- Heat 2 tablespoons of olive oil in a medium-sized non-stick saucepan over medium-high heat.
- Add the cumin seeds and cook for approximately one minute or until they become aromatic make sure they don't burn.
- Reduce the heat to medium, add the onion, garlic, ginger and chopped tomatoes.
- Saute until the onion is soft and translucent and the tomatoes have started to soften.
- Add the ground coriander, turmeric, scotch bonnet, black pepper and pink salt.
- Stir everything together and continue to cook for a few minutes.
- Add the drained mung beans followed by 3½ cups of water.
- Stir everything together then increase the heat and bring to a rolling boil.
- Once boiling, reduce the heat to medium-low and cover the saucepan with a lid.
- Simmer for approximately 30-40 minutes or until the mung beans are completely tender.Check the water level halfway through the cooking time. If more water is needed, add approximately ¼ cup at a time and continue to simmer.
- Once the mung beans are tender, remove the saucepan from the heat.
- Use a stick blender or swizzle stick to break down the mung beans until the dhal reaches your desired texture.
- Do a taste test and add more black pepper and pink salt, if needed.
How to chunkay the dhal
- Heat the olive oil in a small frying pan over medium heat.
- Add the garlic and cumin seeds.
- Temper the garlic and cumin until golden and aromatic, making sure they don't burn.
- Carefully pour the hot infused oil directly over the mung bean dhal.
- Stir the chunkay into the dhal until everything is combined.
- Do a taste test and adjust the seasoning if needed.
- Serve accordingly.
Video
Notes
- Make sure you are using whole green mung beans and not split yellow mung dal, as the cooking times and preparation will differ.
- Rinse the mung beans several times under cold running water before soaking them.
- I recommend soaking the mung beans for several hours or if you prefer, soak them overnight.
- If your mung beans are still firm after 30-40 minutes, don't panic. Continue to simmer them until completely tender, adding additional water as needed.
- Keep an eye on the water levels while the mung beans are cooking. If the dhal starts to become too dry, add approximately ¼ cup of water at a time.
- Try not to add too much water at once. You can always add more if needed, but adding too much can make the dhal overly watery.
- Make sure the mung beans are completely tender and easy to mash before using the stick blender or swizzle stick.
- You don't need to completely puree the dhal. I personally like to break down some of the mung beans while still retaining some texture.
- Adjust the Scotch bonnet according to your preference. Use less or omit it altogether if you don't care for too much heat.
- Make sure the cumin seeds don't burn when you initially temper them in the olive oil.
- When preparing the chunkay, keep a close eye on the garlic because it can go from golden to burnt very quickly.
- Be extremely careful when pouring the hot chunkay over the dhal because the oil will be very hot and may splutter.
- The dhal will naturally thicken as it cools. If it becomes too thick, simply stir in a small amount of water until you achieve your desired consistency.
- Allow the dhal to cool completely before transferring it to an airtight container and refrigerating for up 2 days.
- When reheating, you may need to add a splash of water to loosen the dhal. Reheat on the stovetop over low-medium heat or in the microwave until piping hot.
- The dhal is also freezer friendly, freeze up until 3 months. Thaw thoroughly before reheating and add a small amount of water if needed to restore the consistency.

Leave a Reply