
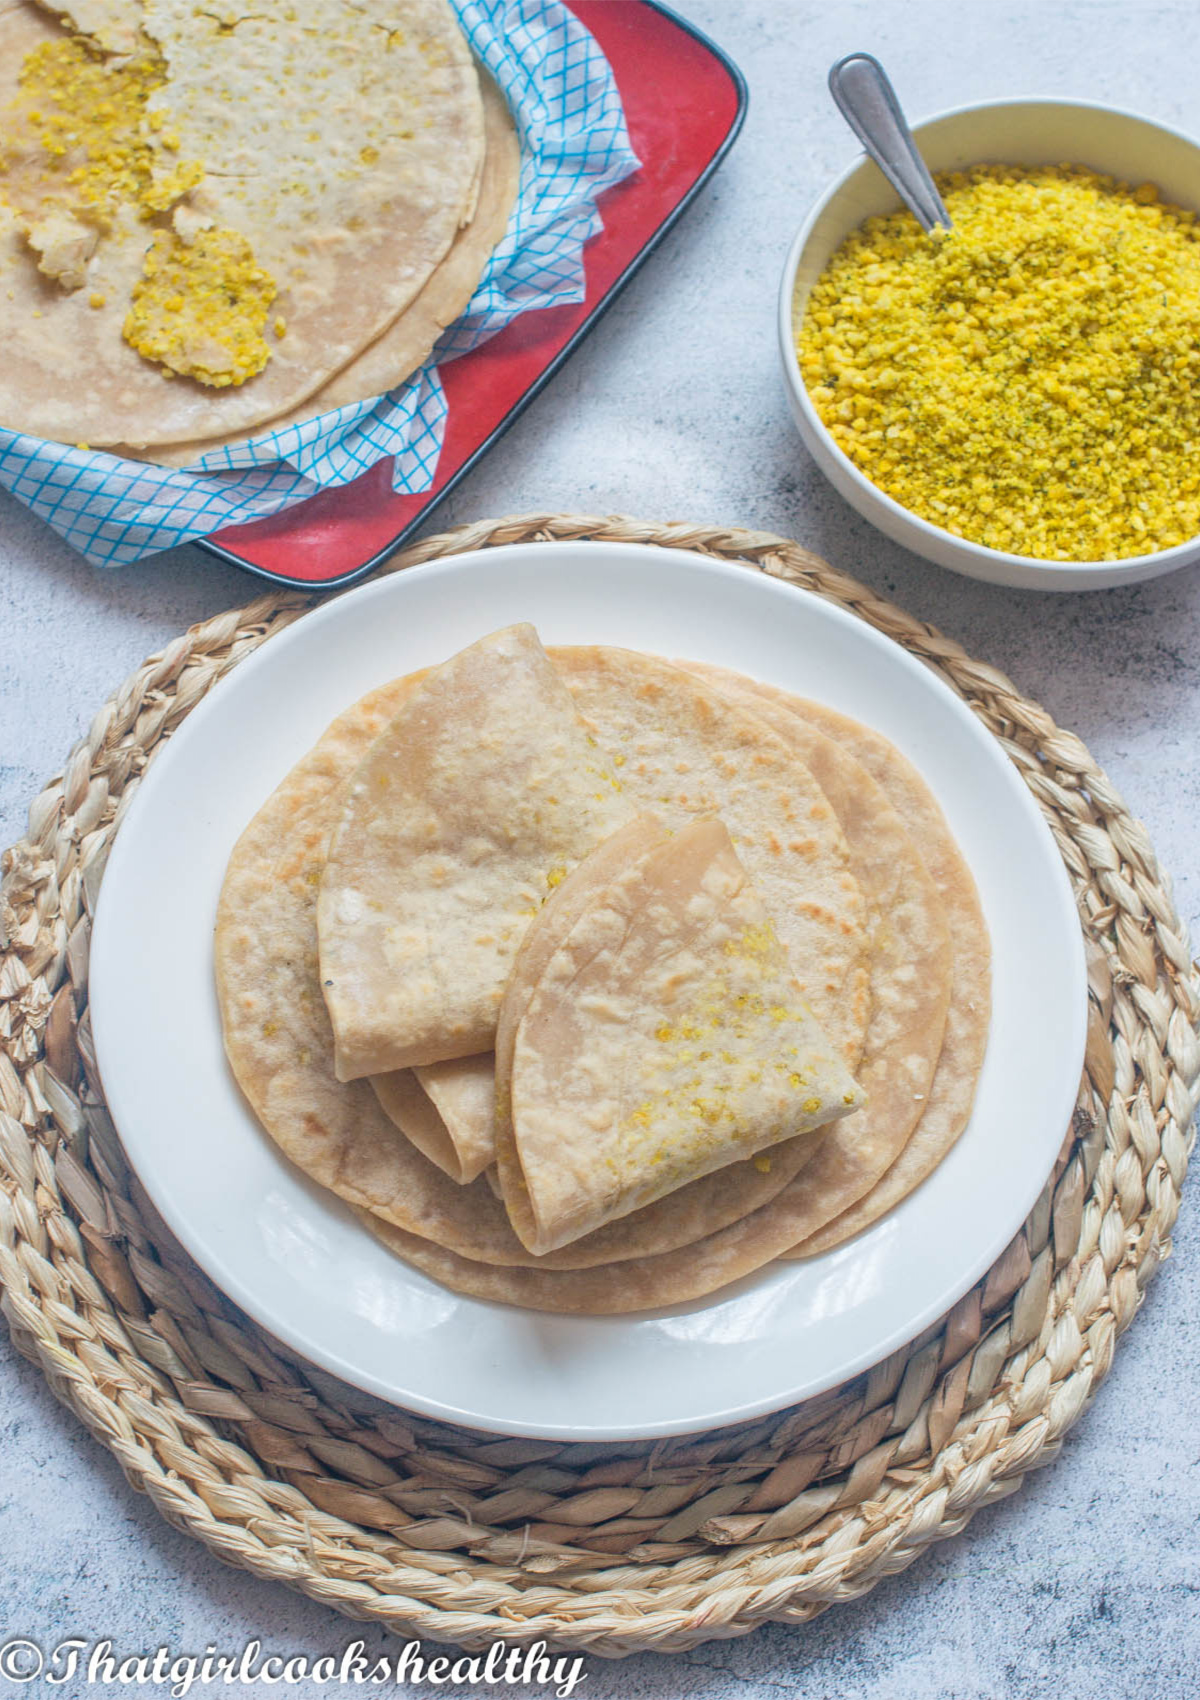
Bring a taste of Trinidad and Tobago (sweet T and T) to your household with this delicious dhal puri roti. Soft roti with a seasoned ground filling made from split peas. My version is gluten free but still as tasty as the original!
Another recipe from the wonderful island of Trinidad and Tobago, I gotta hand it to Trinidad and Tobago and Guyana, both of these Caribbean nations really amaze me with their roti talent.
Today I'm going to show you how to make one of my favourite variations of roti, this one is called Dhal Puri Roti and I will explain what it is shortly.
You see there are so many variations of roti, therefore the word roti is simply an umbrella term.
There is Sada Roti, Buss Up Shut, Dosti, Aloo, Paratha, Sweet Potato Roti, Sugar Roti and Pepper Roti just to name a few and Naan Bread although not exclusive to the Caribbean is another flat bread variation.
The great thing about having so much variety is having the ability to rotate between them.
For example one day you might be in the mood for pepper roti and the next you might want some buss up shut.
What is dhal puri roti?
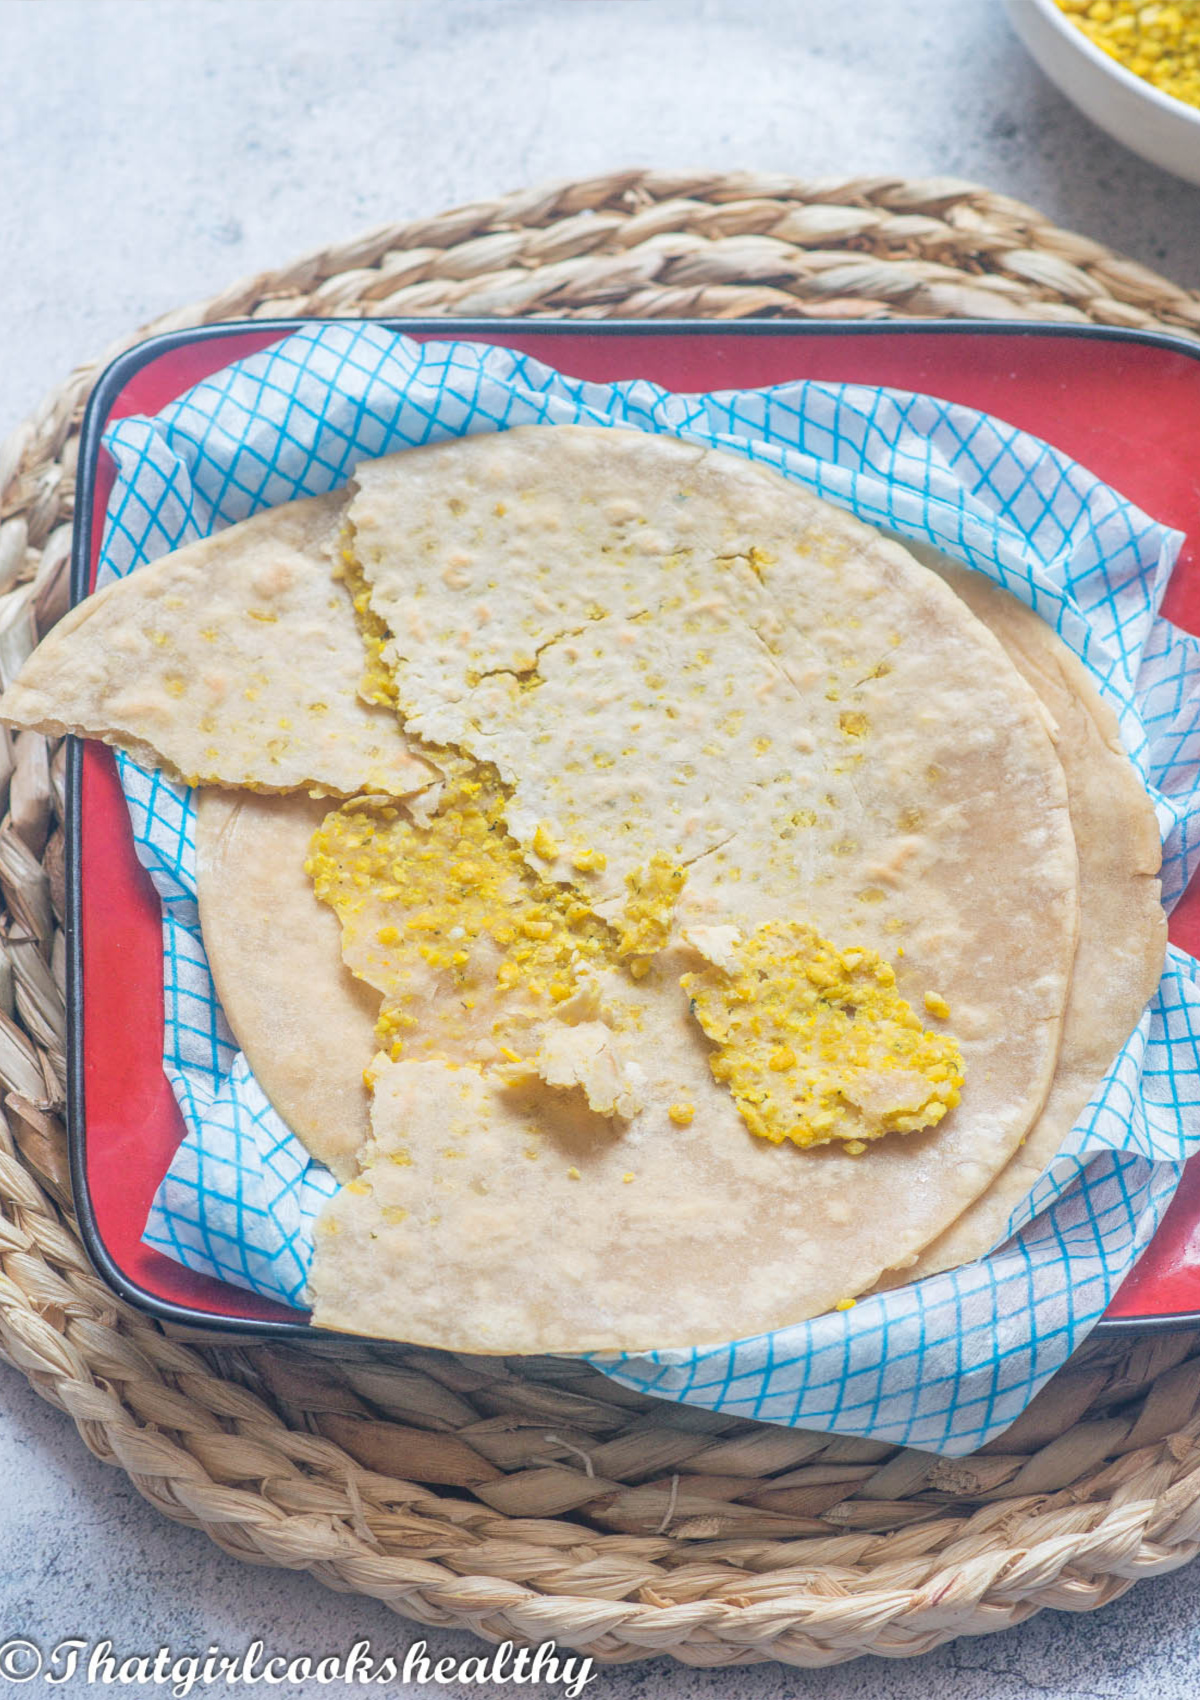
In short, Dhal Puri sometimes spelled "Dhalpourie" "Dalpuri" or "dhalpuri" written as one word is an Indian inspired Caribbean flatbread.
This flatbread is stuffed with a legume (split peas) savoury filling which is often seasoned with scotch bonnet pepper, pink salt, chadon beni, garlic, turmeric and cumin.
The split peas are typically boiled in water with turmeric just until they are soft enough to crush.
Once cooked the water is drained while the split peas are cooled and dried. The seasoning is added to the split peas (some people add afew bits of their seasoning during the boiling stage) and the split peas are then pulsed into a fine texture.
The dough is then prepared and ready and divided into smaller portions for the filling. The filling is added to the small dough balls which are rolled out and cooked on a tawa.
The gluten free version
Now that I have given you a brief account of what dhal puri is, let's talk about making it gluten free.
If you an avid reader of mine then you will already be familiar with my sada roti which based on feedback from my readers, you guys have had great success making it.
This dalpourie roti follows the same principle as would do when making sada roti.
Thankfully you don't need to worry about making another gluten free flour blend or adding/or replacing a specific flour.
This will make the recipe a lot easier to follow, especially for those of you who are familar with my sada roti recipe.
You will need to follow that recipe, the only thing that is slightly different is I added ¼ cup more of cassava flour to accommodate the filling.
Still continue to measure out the ingredients to the TEE when making your dough, please don't get too comfortable.
It is always best when working with gluten free recipes to measure, measure and measure some more!
Also, I find the dough can be alittle drying at times, especially when it is resting in between the filling stage and also while it is cooking.
As per instructions, use vegan butter, a damp cloth and wet hands where I have stated to avoid any excessive dryness.
The steps
To boil the split peas
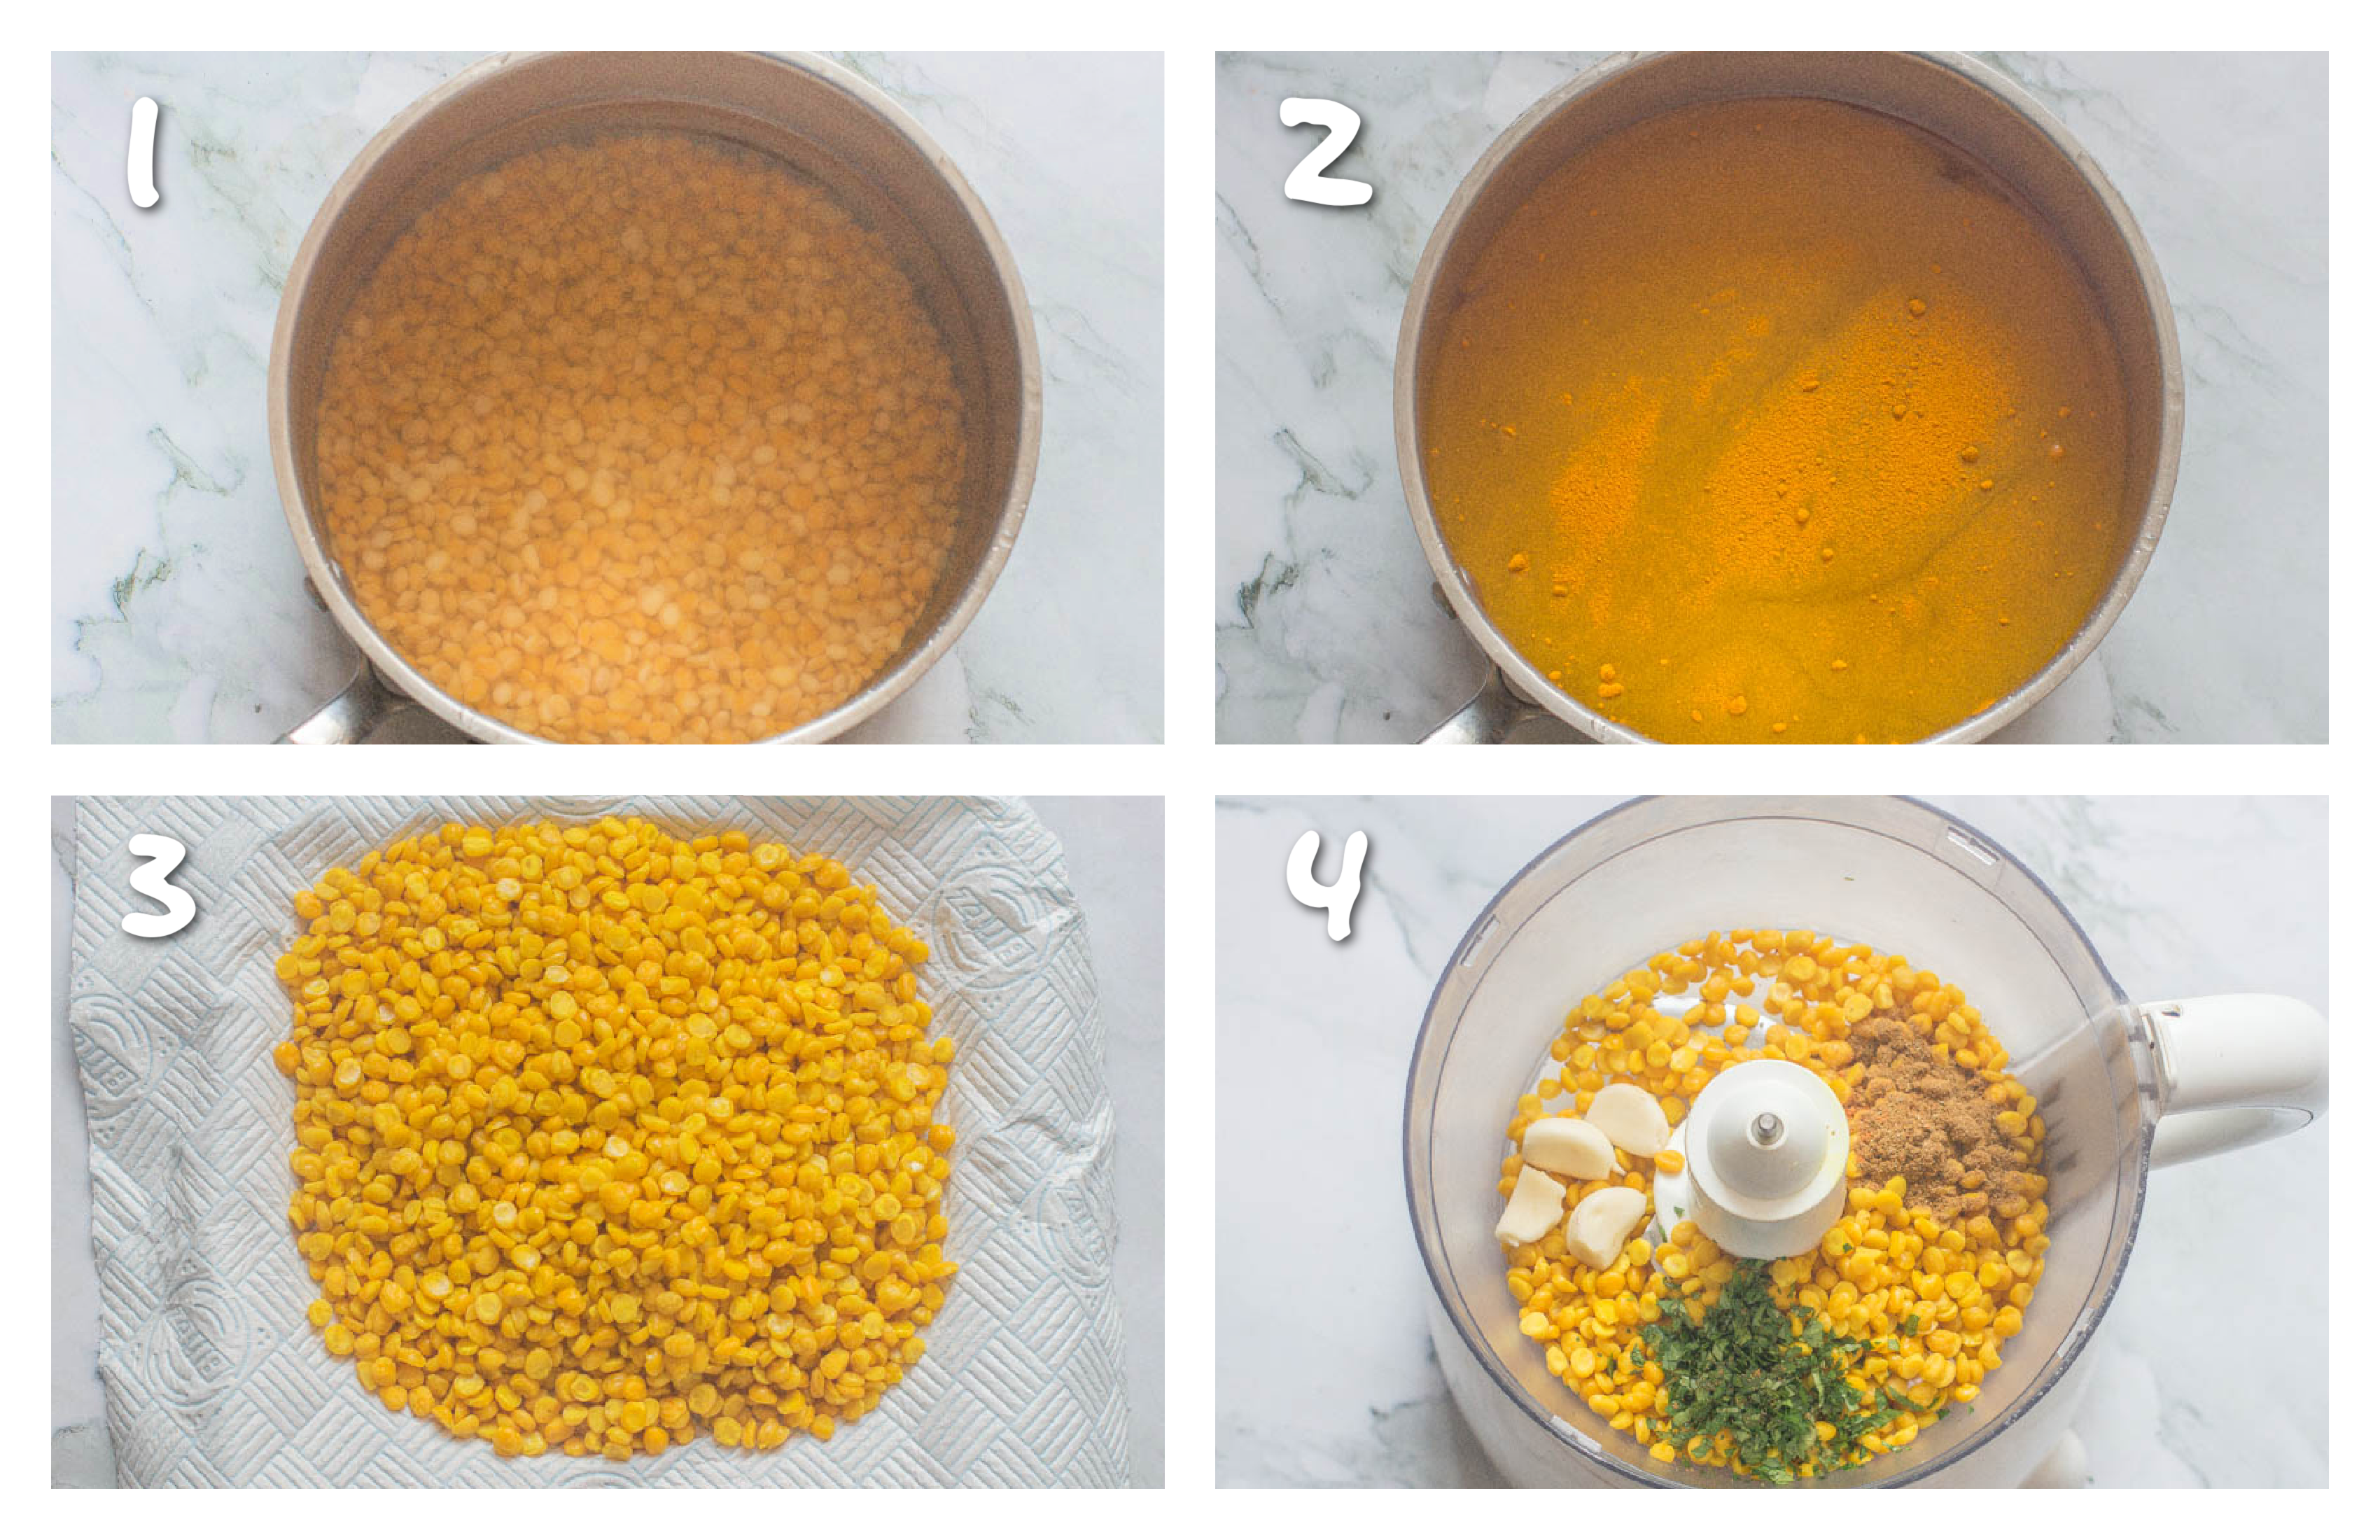
- Rinse the split peas several times to eliminate any debris and/or any old peas.
- Once rinsed, bring a large saucepan with 5 cups of water to boiling point.
- Carefully add the split peas to the saucepan of water along with the turmeric.
- Reduce the heat to medium and allow to simmer for roughly 15-20 minutes. You want the split peas to be tender to the point of being able to squash, so keep an eye on them and test them.
- Once the split peas have cooked, drain off the water and allow to cool then blot dry with paper towel (you don't want any excess water).
To make the filling
- Add ⅓ of the split peas to the food processor with the cumin, scotch bonnet, chadon beni, garlic cloves, cumin and pink salt.
- Pulse the mixture until it is ground (but not like a paste).
- Remove the ground split peas from the food processor and transfer into a medium sized bowl.
- Continue to pulse the remaining split peas into a ground texture.
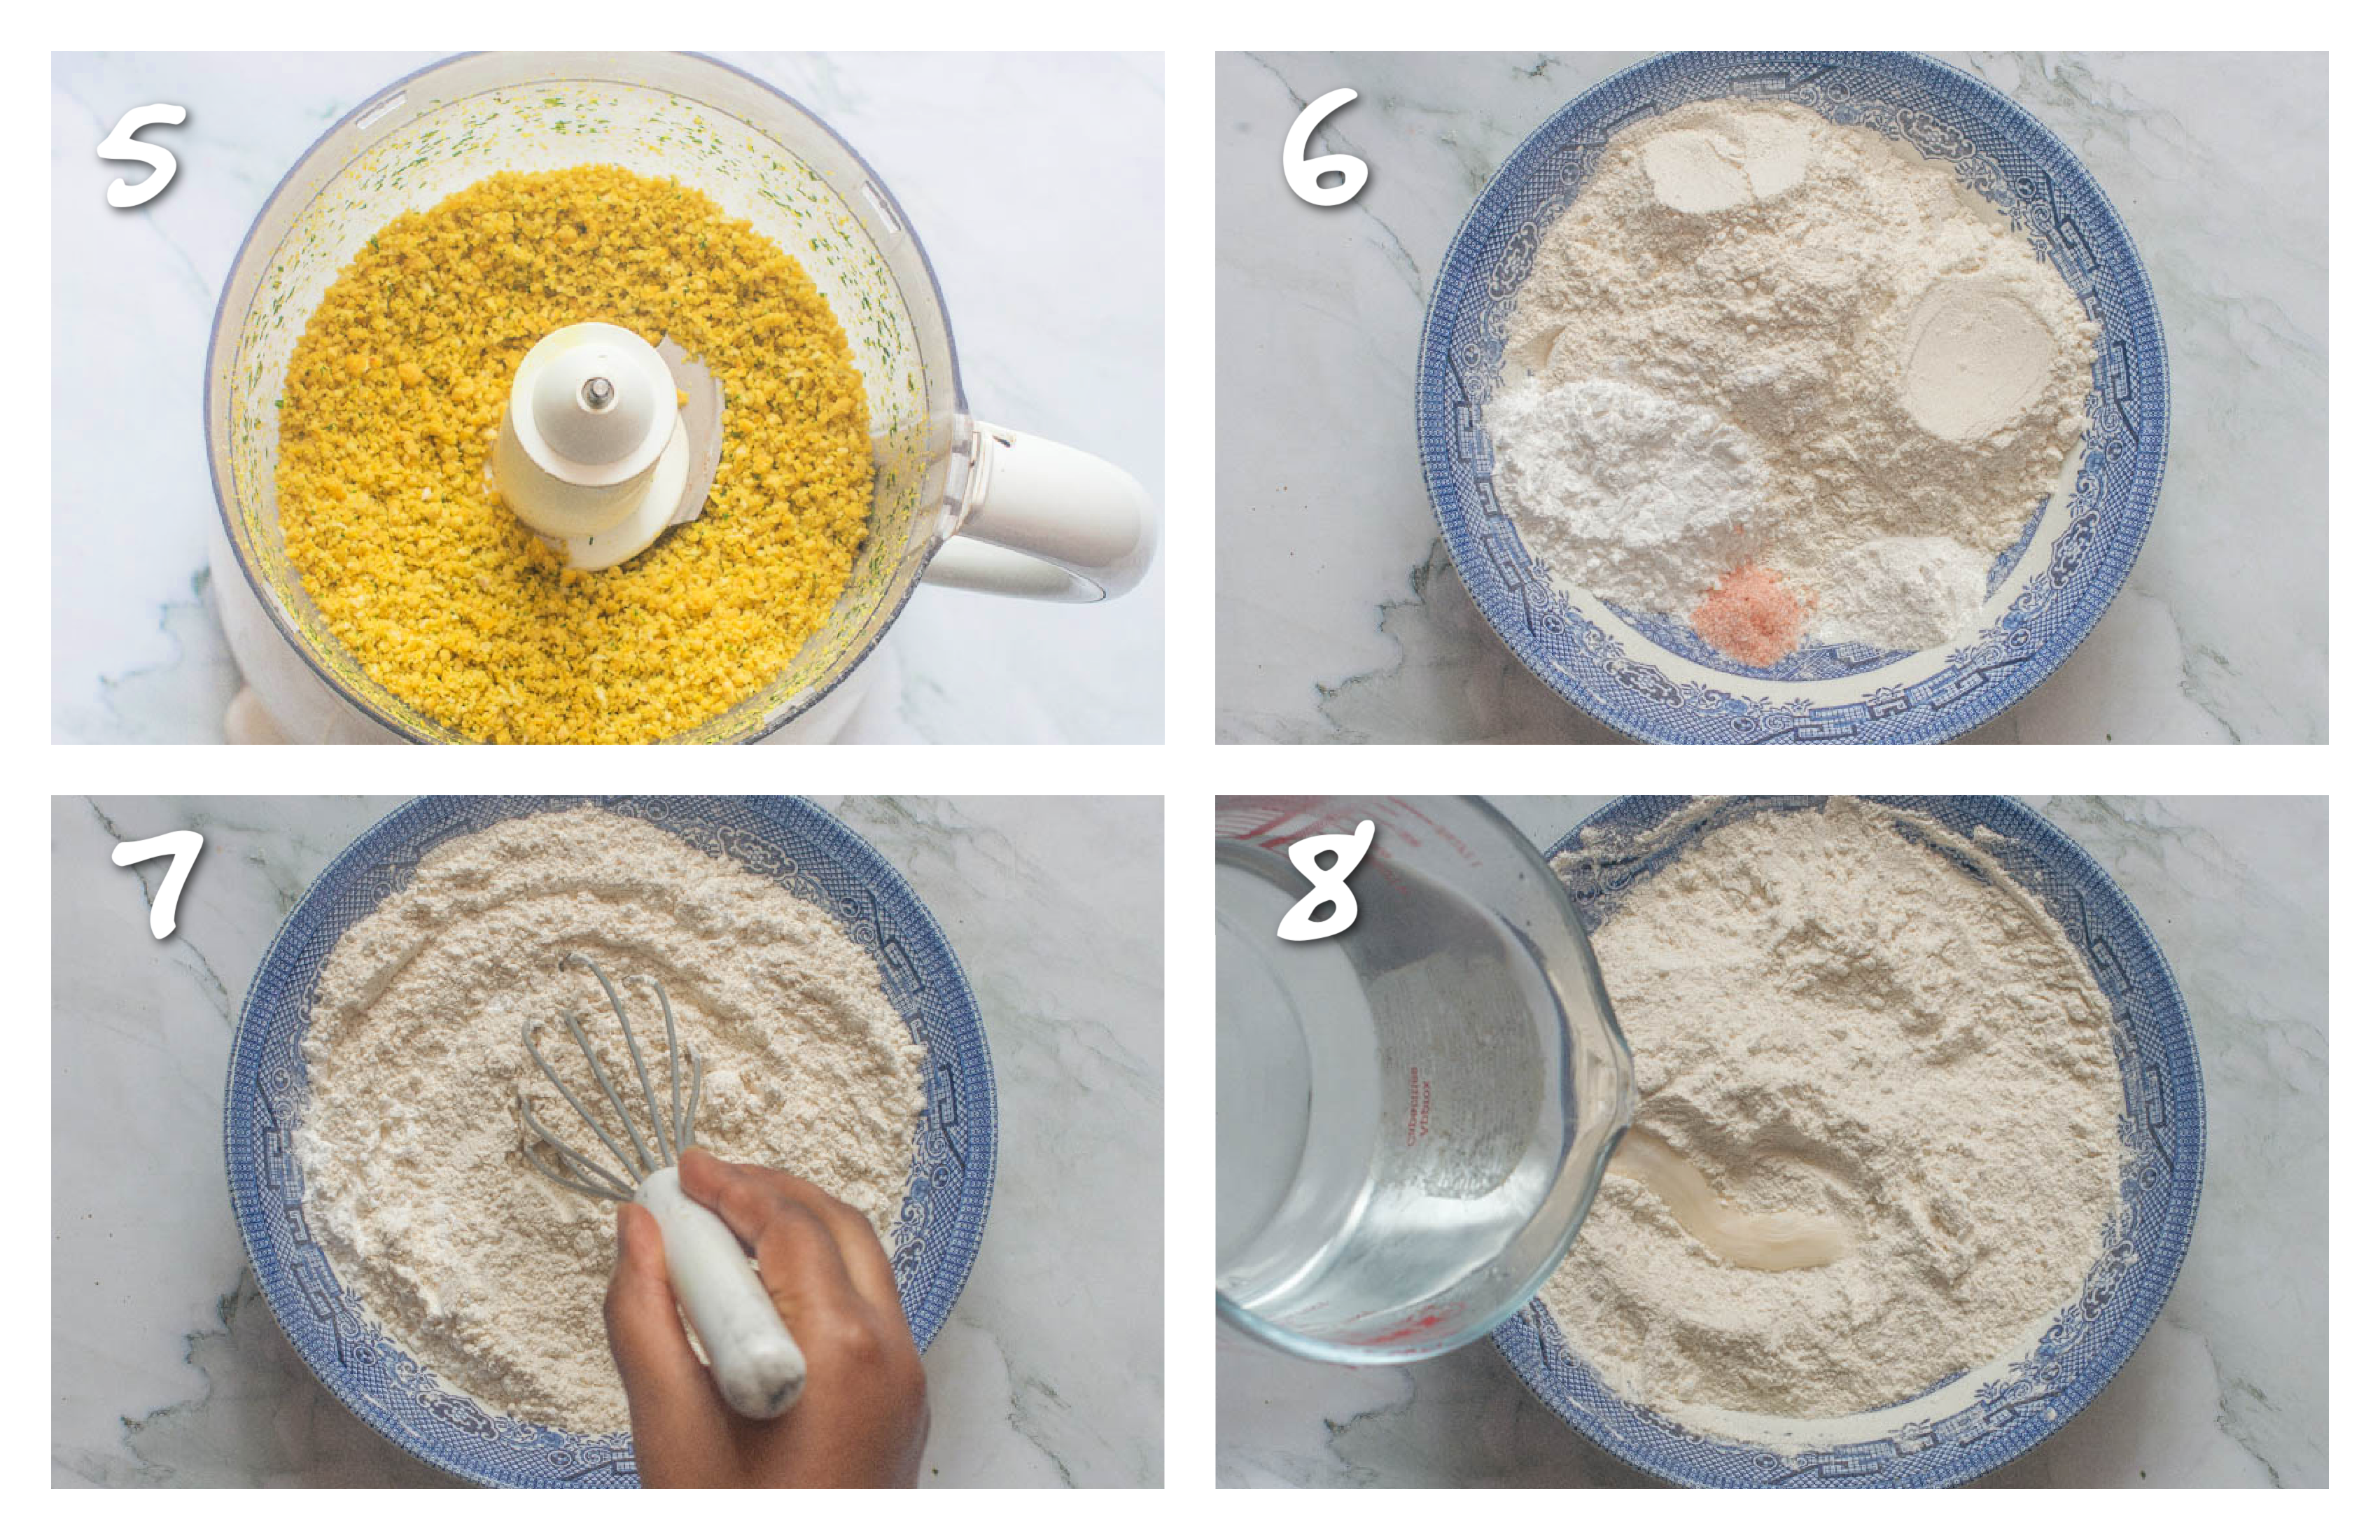
- Combine all of the ground split peas together in the same bowl and use your fingers to run through the peas, making sure the seasoning is evenly distributed then set aside.
To make the dough
- Place all of the dry ingredients in a medium sized bowl.
- Use a whisk or large spoon to evenly combine all of the dry ingredients.
- Drizzle in the olive oil then start to pour in the hot water, a little at a time, so in other words, do so in increments using a spatula/spoon to form a big pliable doughball (you won't need all of the hot water).
- The dough should be soft, firm but not too sticky.
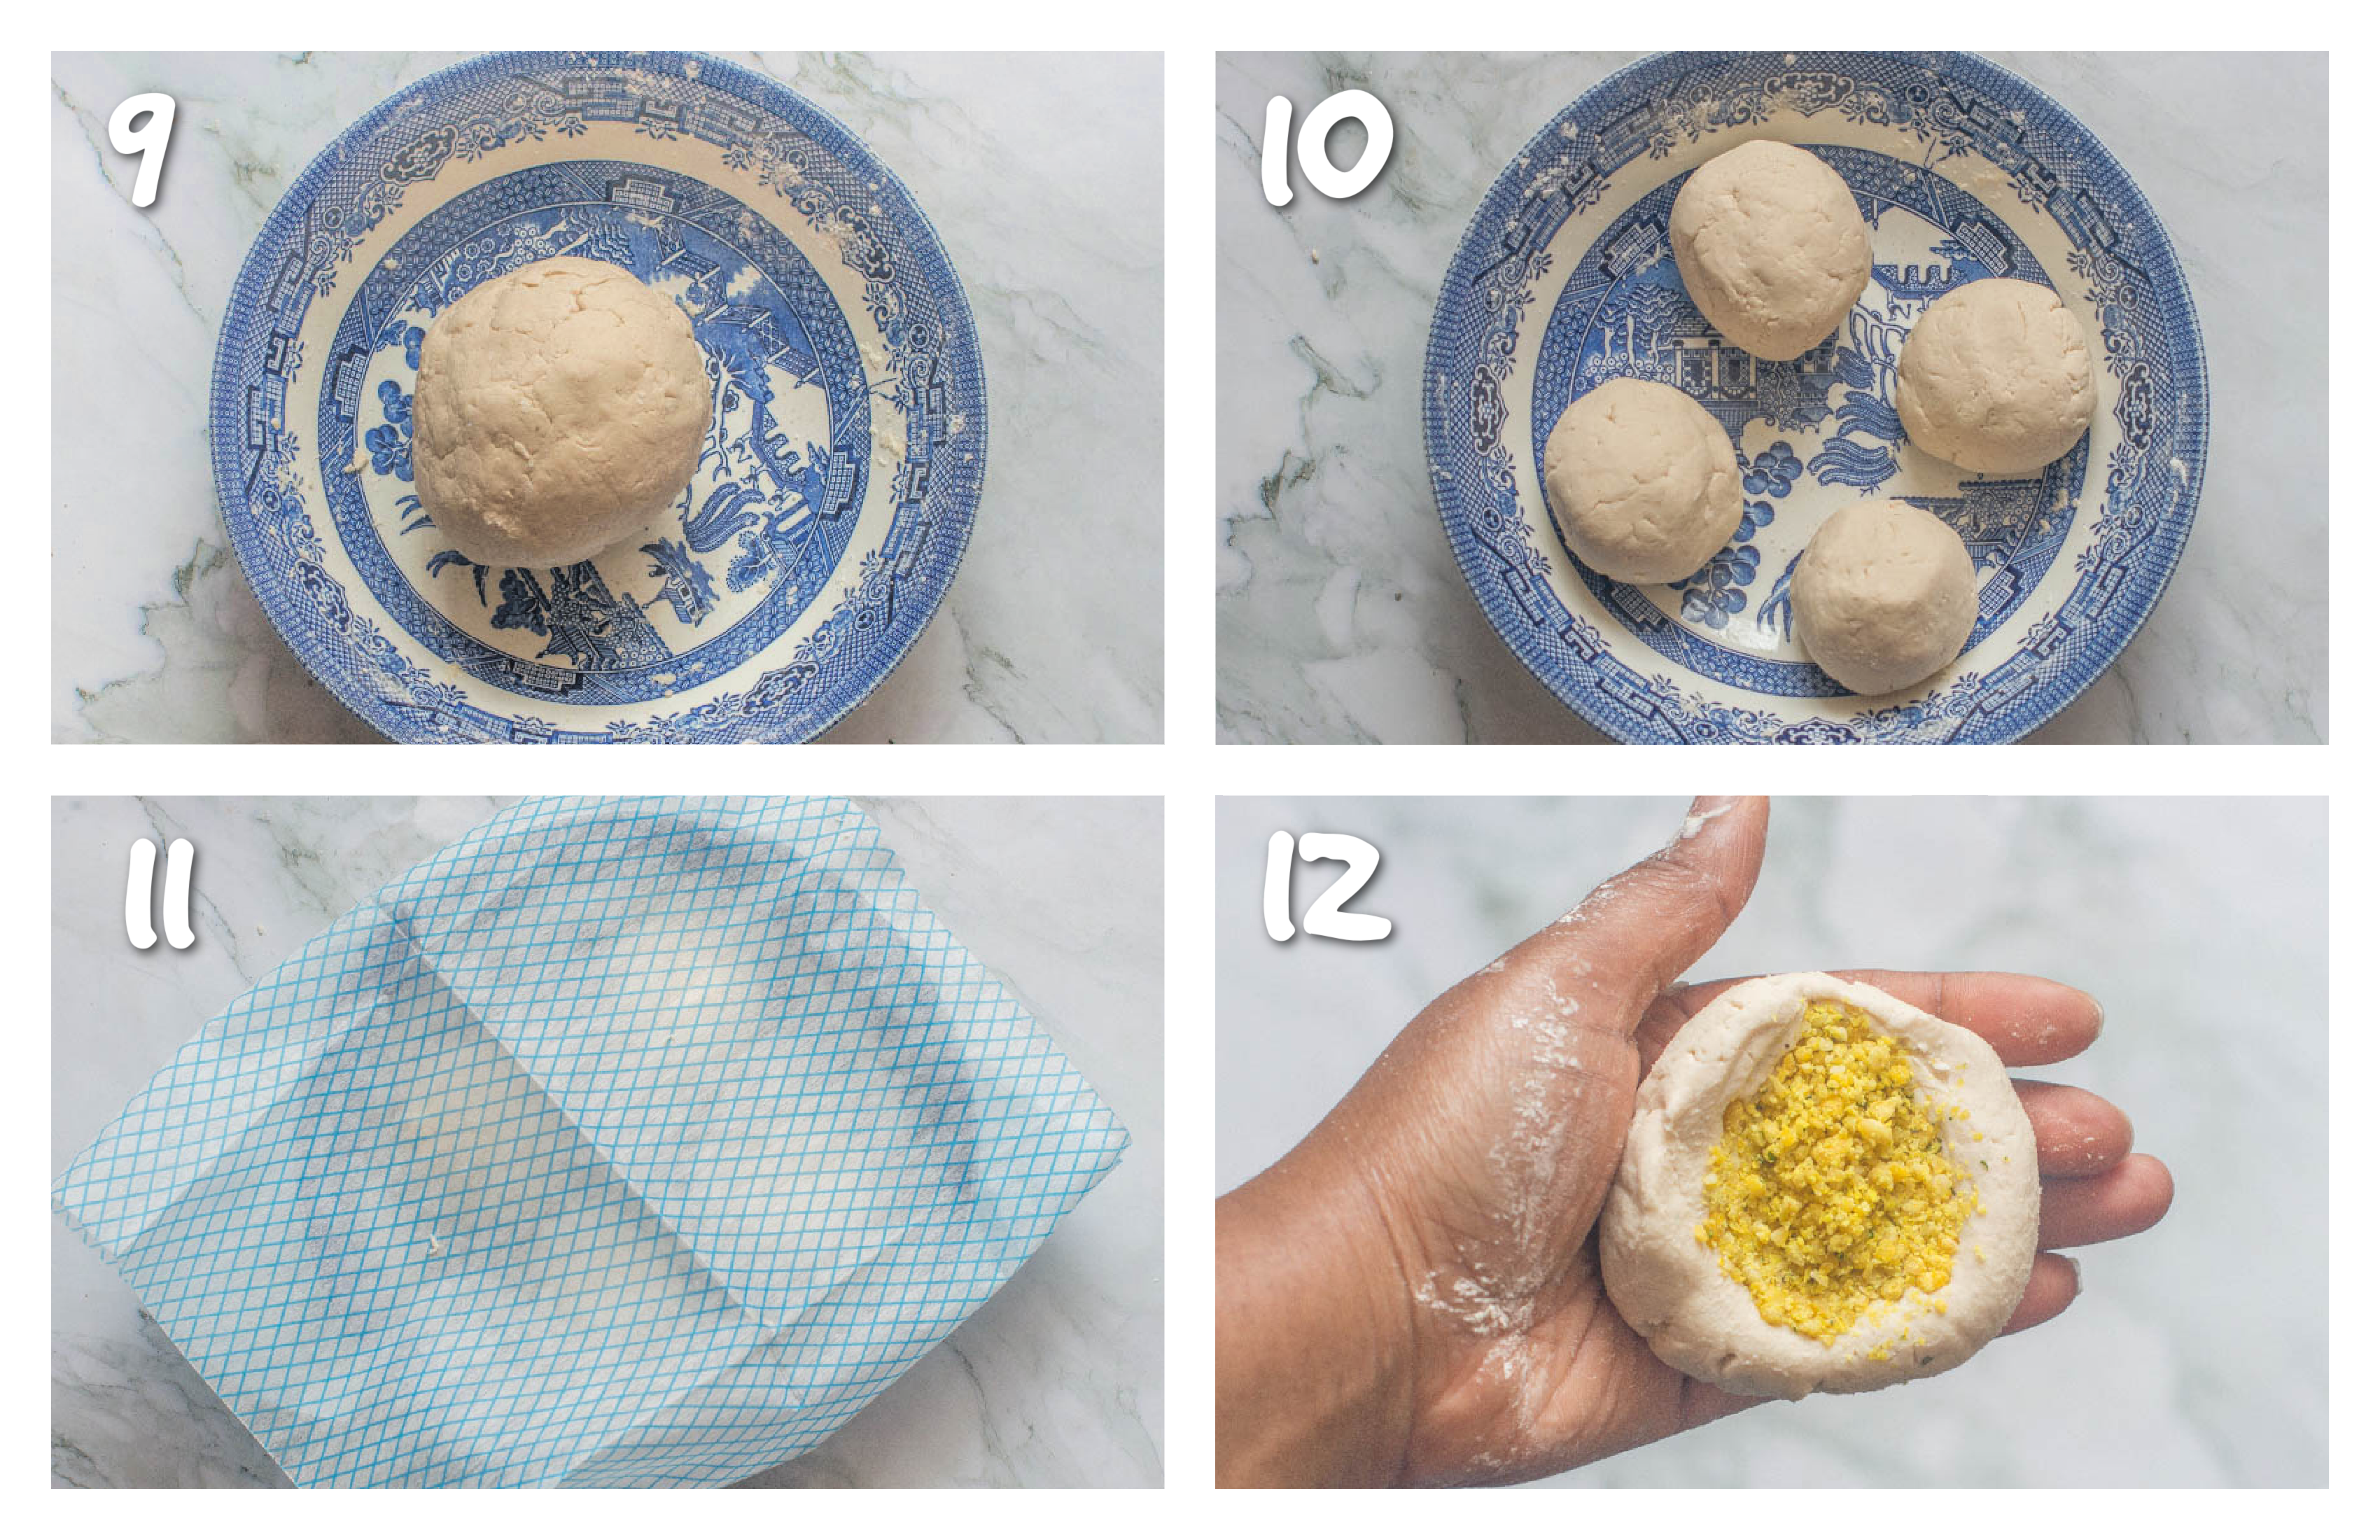
- Slice the dough into equal parts then roll each piece into a ball using wet hands then cover the bowl with a cloth.
Add the filling to the dough balls

- Grab one of the balls and proceed to open while flattening it into a curved disc (don't make it thin or the mixture will burst through).
- Add a few tablespoons of the ground mixture into the disc (do not overfill) and enclose to make a ball by pressing and pinching the edges to secure dough around the filling.
- Dip one hand in water and roll into a small ball (the dough ball should be easy to roll and NOT sticky).
- Set the filled dough ball aside and cover.
- Repeat the previous 4 steps with the rest of the dough.
- Lay some parchment paper on a clean surface, lightly dusted with cassava flour and place one of the doughballs on the paper while keeping the rest of the dough covered.
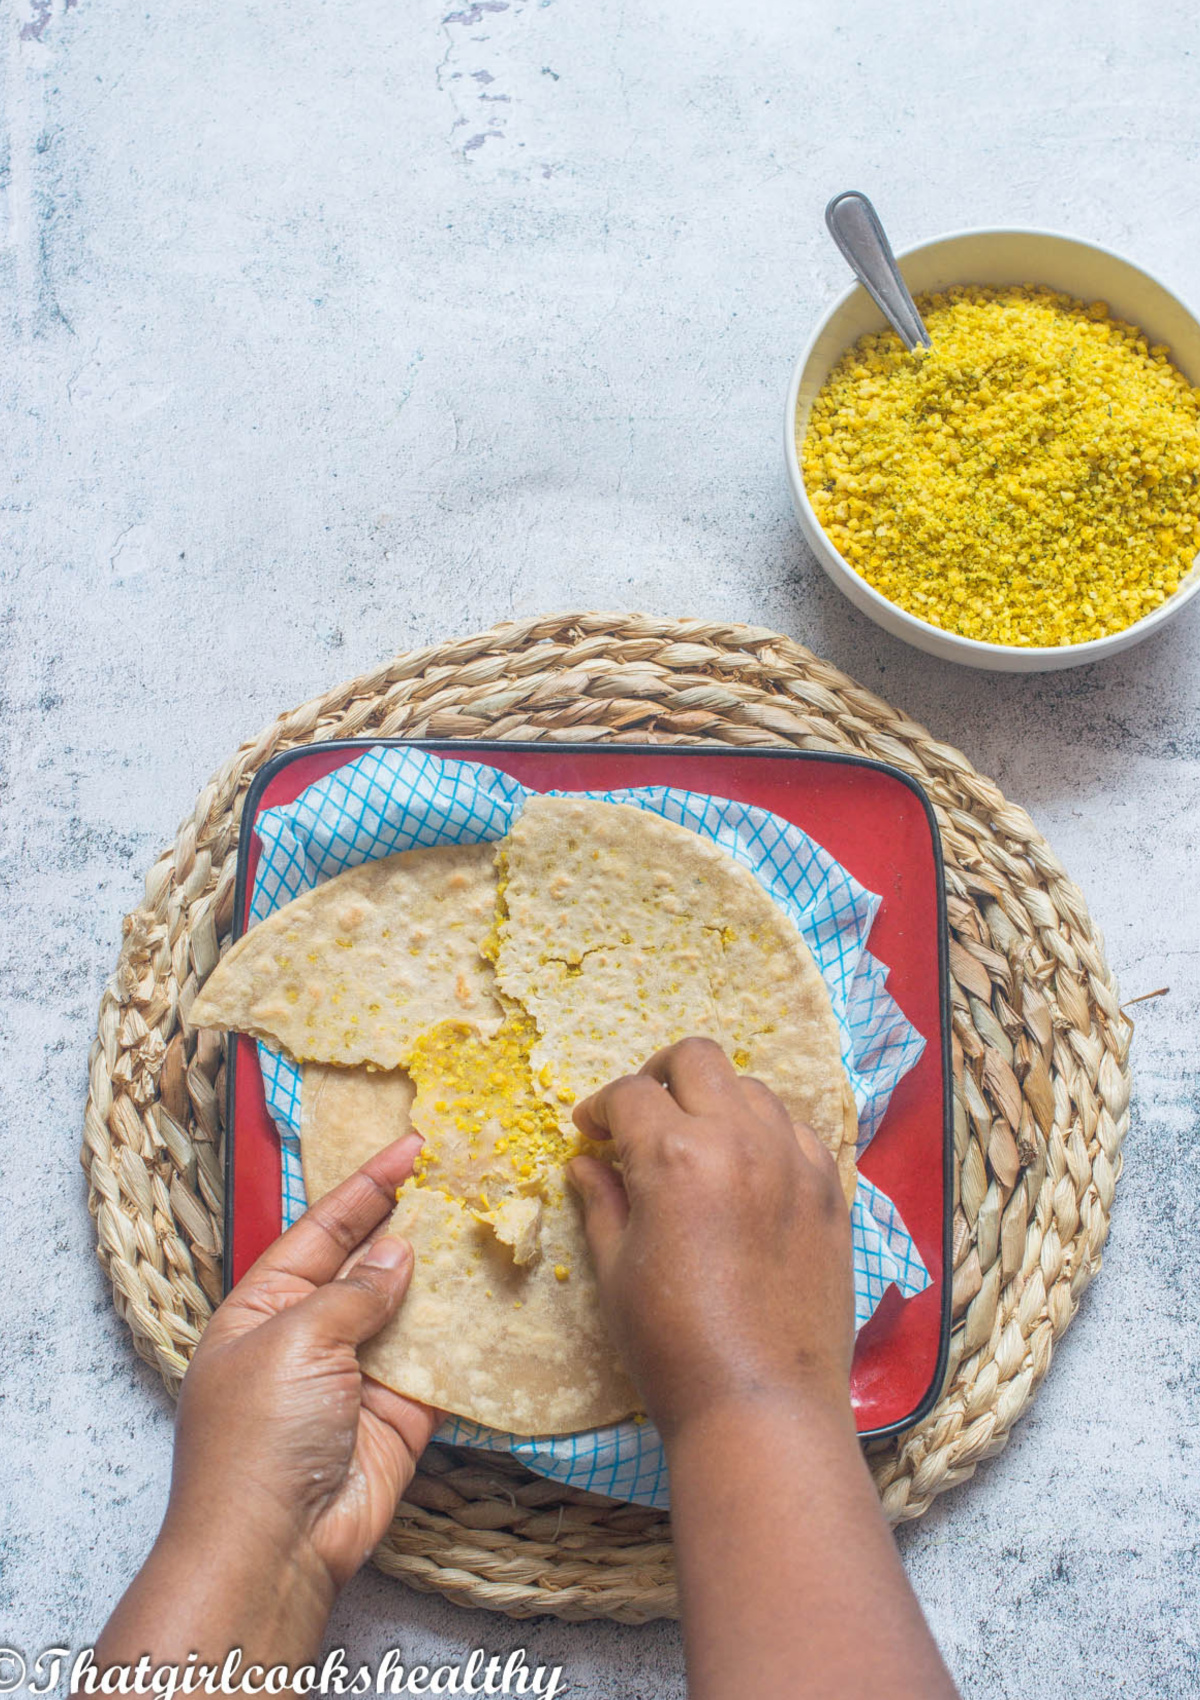
- Lightly dust a rolling pin with cassava flour then proceed to roll the dough as thin as possible without the filling bursting through to make a disc. Use a pizza cutter or knife to trim around the edges or to form a small-medium sized circle if you are finding this difficult.
- Repeat the above step placing each disc on some parchment paper until 4 discs (depending on size) are made. Shake off any excess flour if needed.
To cook the roti

- Heat up the tawa/crepe pan or skillet on high heat, you want the pan to be piping hot before starting. Hover your hand over the pan to determine its readiness.
- Lightly grease the pan with vegan butter.
- Place the dough on the hot pan then reduce the heat so it is slightly below high heat (not medium but not high so the roti burns, just in between).
- Use a pastry brush to lightly grease the topside with butter/water (this will keep the roti hydrated).
- Leave the dough to cook for about one minute, until small bubbles, start to form and the side directly exposed to the tawa starts to brown a little (use an egg spatula or tongs to check this)
- Flip the roti over and cook the other side until bubbles form (the roti WON'T puff up and this is normal for GF dhal puri roti) and use a damp cloth to rotate the roti as it cooks.
- Once cooked, placed the roti on a plate lined with a damp cloth and cover.
- Repeat the above steps with the rest of the doughballs.
Notes and tips
- Make sure you're using hot (boiling) water NOT warm, it must be hot in order to make this roti.
- Freeze any leftover ground split peas in a zip lock bag for up to 3 months.
- Unlike my sada roti recipe, this dhal puri roti WILL not puff up, you should get small bubbles but not a giant puff ball.
- Very important! - Make sure to grease the pan between making each roti skin when cooking them and use a damp cloth as this will prevent dry spots.
- When adding the filling use a teaspoon to press down on the filling as this will make it easier when forming a dough ball.
- Keep the dough hydrated at all times, use wet hands where stated to roll the dough into balls, this will prevent it from being dry when rolling it out.
- This recipe makes roughly 4 roti skins, depending on the size.
- Roll out the dough of your roti as thin as possible, if it tears, it's too thin, you want it to be very thin but you don't want the filling to burst through.
- Don't substitute any ingredients unless they are listed. If I haven't listed an alternative that means either I haven't tried it or I do not recommend it.
- Use good quality ingredients i.e Bob Red Mills Cassava flour and Tiana (for the UK based) Cassava flour.
- Cassava is NOT the same as TAPIOCA STARCH. They are NOT interchangeable, they have been listed separately because they play different roles (see my post, for details).
- For best results, serve the roti while it is still warm.
- If you need to re-heat the roti then wrap it in aluminium foil and warm in the oven for a few minutes.
- If you want to double the recipe then do so SEPARATELY, make 2 individual batches. I haven't tested this with any other way.
- Practice, Practice and more practice, dhal puri roti, especially the GF kind can be challenging and needs a bit more help than its sada roti counterpart.
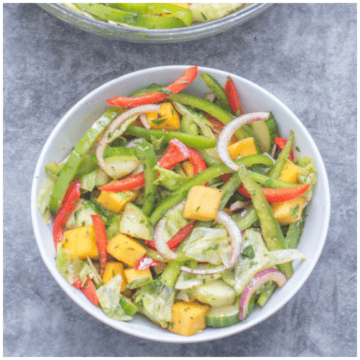
Sauces to serve this recipe with
Other recipes from Trinidad and Tobago
- Macaroni Pie
- Tomato Choka
- Ochro Rice
- Baigan Choka
- Trinidad Corn Soup
- Trinidad Stew Chicken
- Sago Porridge
- Trinidadian Dhal
- Cou Cou (Coo Coo)
**Don't forget to comment below and star rate if you have tried my recipes. Let's be friends and engage on YouTube, Facebook and Instagram I also like to pin on Pinterest, where you can find more amazing recipes.**

Dhal Puri Roti (Gluten Free)
Ingredients
- 5 cups water (1.18 litres)
- ¾ cup dried split peas (148g)
- ½ tsp turmeric
- 4 garlic cloves
- 1 teaspoon cumin
- 1 tablespoon chadon beni (15g) chopped or use cilantro/coriander instead
- ¼ teaspoon scotch bonnet pepper I used my dried version
- ¼ teaspoon pink salt (1.5g)
To make the roti
- 1¼ cup cassava flour
- ¼ cup tapioca starch (30g)
- ⅓ cup brown rice flour (52g)
- 1 teaspoon psyllium husk or use xanthan gum instead
- 2 teaspoon baking powder
- ½ teaspoon pink salt
- 1 tablespoon olive oil (15ml)
- 2½ cup hot water (590ml)
- melted vegan butter and extra cassava flour for dusting
Instructions
To boil the split peas
- Rinse the split peas several times to eliminate any debris and/or any old peas.
- Once rinsed, bring a large saucepan with 5 cups of water to boiling point.
- Carefully add the split peas to the saucepan of water along with the turmeric.
- Reduce the heat to medium and allow to simmer for roughly 15-20 minutes. You want the split peas to be tender to the point of being able to squash, so keep an eye on them and test them.
- Once the split peas have cooked, drain off the water and allow to cool then blot dry with paper towel (you don't want any excess water).
To make the filling
- Add ⅓ of the split peas to the food processor with the cumin, scotch bonnet, chadon beni, garlic cloves, cumin and pink salt.
- Pulse the mixture until it is ground (but not like a paste).
- Remove the ground split peas from the food processor and transfer into a medium sized bowl.
- Continue to pulse the remaining split peas into a ground texture.
- Combine all of the ground split peas together in the same bowl and use your fingers to run through the peas, making sure the seasoning is evenly distributed then set aside.
To make the dough
- Place all of the dry ingredients in a medium sized bowl.
- Use a whisk or large spoon to evenly combine all of the dry ingredients.
- Drizzle in the olive oil then start to pour in the hot water, a little at a time, so in other words, do so in increments using a spatula/spoon to form a big pliable doughball (you won't need all of the hot water).The dough should be soft, firm but not too sticky.
- Slice the dough into equal parts then roll each piece into a ball using wet hands then cover the bowl with a cloth.
Add the filling to the dough balls
- Grab one of the balls and proceed to open while flattening it into a curved disc(don't make it thin or the mixture will burst through).
- Add a few tablespoons of the ground mixture into the disc (do not overfill) and enclose to make a ball by pressing and pinching the edges to secure dough around the filling.
- Dip one hand in water and roll into a small ball (the dough ball should be easy to roll and NOT sticky). .
- Set the filled dough ball aside and cover with a cloth.
- Repeat the previous 4 steps with the rest of the dough.
- Lay some parchment paper on a clean surface, lightly dusted with cassava flour and place one of the doughballs on the paper while keeping the rest of the dough covered.
- Lightly dust a rolling pin with cassava flour then proceed to roll the dough as thin as possible without the filling bursting through to make a disc.
- Use a pizza cutter or knife to trim around the edges or to form a small-medium sized circle if you are finding this difficult.
- Repeat the above step placing each disc on some parchment paper until 4 discs (depending on size) are made. Shake off any excess flour if needed.
To cook the roti
- Heat up the tawa/crepe pan or skillet on high heat, you want the pan to be piping hot before starting. Hover your hand over the pan to determine its readiness.
- Lightly grease the pan with vegan butter.
- Place the dough on the hot pan then reduce the heat so it is slightly below high heat (not medium but not high so the roti burns, just in between).
- Use a pastry brush to lightly grease the topside with butter/water (this will keep the roti hydrated).
- Leave the dough to cook for about one minute, until small bubbles, start to form and the side directly exposed to the tawa starts to brown a little (use an egg spatula or tongs to check this)
- Flip the roti over and cook the other side until bubbles form (the roti WON'T puff up and this is normal for GF dhal puri roti) and use a damp cloth to rotate the roti as it cooks.
- Once cooked, placed the roti on a plate lined with a damp cloth and cover.
- Repeat the above steps with the rest of the doughballs.
Notes
-
- Make sure you're using hot (boiling) water NOT warm, it must be hot in order to make this roti.
-
- Freeze any leftover ground split peas in a zip lock bag for up to 3 months.
-
- Unlike my sada roti recipe, this dhal puri roti WILL not puff up, you should get small bubbles but not a giant puff ball.
-
- Very important! - Make sure to grease the pan between making each roti skin when cooking them and use a damp cloth as this will prevent dry spots.
-
- When adding the filling use a teaspoon to press down on the filling as this will make it easier when forming a dough ball.
-
- Keep the dough hydrated at all times, use wet hands where stated to roll the dough into balls, this will prevent it from being dry when rolling it out.
-
- This recipe makes roughly 4 roti skins, depending on the size.
-
- Roll out the dough of your roti as thin as possible, if it tears, it's too thin, you want it to be very thin but you don't want the filling to burst through.
-
- Don't substitute any ingredients unless they are listed. If I haven't listed an alternative that means either I haven't tried it or I do not recommend it.
-
- Use good quality ingredients i.e Bob Red Mills Cassava flour and Tiana (for the UK based) Cassava flour.
-
- Cassava is NOT the same as TAPIOCA STARCH. They are NOT interchangeable, they have been listed separately because they play different roles (see my post, for details).
-
- For best results, serve the roti while it is still warm.
-
- If you need to re-heat the roti then wrap it in aluminium foil and warm in the oven for a few minutes.
-
- If you want to double the recipe then do so SEPARATELY, make 2 individual batches. I haven't tested this with any other way.
-
- Practice, Practice and more practice, dhal puri roti, especially the GF kind can be challenging and needs a bit more help than its sada roti counterpart.

Savi says
Thank you so much for sharing this delicious gluten-free dhalpurie recipe. I made some today and it's really good, followed your recipe with no changes. They even puffed up better than when I make wheat ones 😊
Charla says
Yay! That's what I like to hear. Glad you enjoyed it Savi.
Vidya Narayan says
This is amazing - gluten free version of dhal puri. Can't wait to try this!
Charla says
I'm so excited for you!
imsen says
This looks so easy to make! thnx for the recipe!
Charla says
You are welcome.
Kushigalu says
What an interesting roti recipe to try. Thanks a lot for sharing.
Charla says
You are very welcome.
Farah Abumaizar says
Wow this looks amazing!! I love exotic spices and ingredients in food, and you make this seems so easy to make. Can't wait to try it out!
Charla says
Thanks Farah.
Ieva says
Brilliant roti, definitely just as good, if not better than the usual version made with wheat flour! Thanks for the recipe.
Charla says
Thank you so much Leva