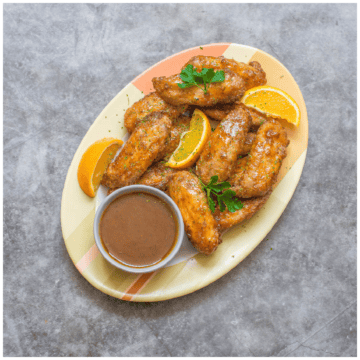
Learn how to make gluten free fried chicken thighs in the comfort of your own home using an air fryer. They are crispy, succulent, juicy and finger licking good without having to depend on deep fat frying. Perfect to snack on or to pair with a main meal - your choice!

Be prepared to be blown away by this fried chicken recipe. I promise you WON'T regret making it.
If you are a chicken lover, more specifically a fried chicken lover then this recipe has your name written all over it.
For those of you who aren't meat eaters, don't worry I have you covered with this Vegan Fried Chicken recipe using oyster mushrooms instead.
The air fryer pretty much dominates our household, I'm serious! It is by far the best investment in a kitchen gadget and well worth the money.
I have no regrets in purchasing an air fryer and I will never look back. In my house we like to air fry chicken because it is a healthier alternative to its deep fried counterpart.
We love any type of chicken but chicken thighs are an absolute favourite of ours. Although with that being said you can use ANY chicken to make this recipe.

The crispy coating always goes down a treat with us, along with the juiceness of the actual chicken.
The thing about this cooking method is that it doesn't require any deep fat frying but at the same time you get virtually the same results.
In terms of seasoning, I like to keep it simple with my all purpose seasoning, along with some onion/garlic granules, paprika, parsley, chilli powder, black pepper and pink salt.
Ingredients you need

- Chicken thighs - This is my preferred choice of chicken with the skin on.
- Sorghum and millet flour - I like to use a combination of two GF flours and both sorghum and millet flour are mild in taste, not too dense in texture with a hint of sweetness.
- Tapioca starch - Gives that elasticity and helps with the structure that is needed for gluten free goods.
- Baking powder - This is the secret ingredient for CRISPINESS, don't forget the baking powder, it's very important!
- All purpose seasoning, paprika, parsley, onion/garlic granules, black pepper, chilli and pink salt - This is all of the seasoning that is used.
- Almond milk - For saturating the chicken/helping the breading to adhere.
- Olive oil - Not pictured, used for hydrating any dry spots.

Recipe preparation
This recipe is relatively straight forward, you will be separating the recipe into 2 parts - wet and dry ingredients.
The wet ingredients consist of the almond milk, all purpose seasoning, black pepper and pink salt all placed in a large bowl and mixed together.
From there the chicken thighs are submerged into the milk and left to rest for several hours although overnight is best (if possible).
Whatever you do, don't move onto the next step(s) without leaving the chicken to rest in the milk for atleast 2 hours, if you are pushed for time.
The longer you leave the chicken to rest, the juicer and more flavoursome the chicken will be.
While the chicken is resting, I like to get the dry ingredients ready as not to waste any time.
The next thing that you need to do is combine the sorghum flour, millet flour, tapioca starch, baking powder, all purpose seasoning, paprika, onion/garlic granules, chilli powder, parsley and pink salt in another large bowl.
The chicken will need to be removed from the milk, I remove them one at a time and place them on a large plate.
Dredge the chicken thighs (one by one) shaking off any excess flour then the dredged chicken is dipped back into the milk again (this is why the chicken needed to be removed from the milk) and then coated one more time with the flour.
Double dipping ensure that the breading adheres to the chicken.
Once the chicken has been breaded the only thing that you need to do is to air fry both sides of the chicken (don't forget to spritz the dry spots with some oil, if needed).
The steps

- Place the almond milk in a large bowl along with the all purpose seasoning, black pepper and pink salt.
- Carefully lower the chicken into the milk.
- Wrap the bowl with saran wrap/cling film and refrigerate for several hours or overnight.

- In another separate bowl, add the sorghum flour, millet flour, tapioca starch, baking powder, all purpose seasoning, paprika, onion, garlic granules, chilli powder, parsley and pink salt.
- Mix the flour(s) together so all of the ingredients are evenly combined.

- Do a quick taste test to determine if you need to adjust for more seasoning.
- Carefully remove the chicken from the milk (do this one at a time) allow them to drain in a separate bowl or plate.
- Dredge the chicken in the flour mixture (shaking off any excess).
- Dip the chicken in the milk (allow to drain over the bowl) and then dip it one more time into the flour blend.

- Repeat the above steps with the remaining chicken.
- Once all of the chicken thighs have been coated, allow to rest on a plate for 10-15 minutes.
- Transfer them to the air fryer basket (you may need to do this in batches).

- Air fry 200C/400F for 20-25 minutes turning over half way through.
- Check the chicken about 5-8 minutes before it has finished air frying and spritz any dry spots with oil.
- Once cooked transfer on a plate with baking paper (leave for about a minute) before transferring to a cooling rack.
Notes and tips
- The coating and milk mixture is enough for up to 8 medium sized chicken thighs.
- If you want your chicken to be leaner and still on the bone then simply trim off the skin and bread the actual flesh instead.
- Do forgot to check out my vegan version of Fried Chicken.
- Do a taste test of the breading mixture just in case you may want to adjust the seasoning i.e. adding more pink salt, parsley etc.. before using it for dredging.
- Before air frying the chicken it is best to let the chicken rest for about 10-15 minutes first to ensure a nice crust and even cooking.
- You can bread the chicken ahead of time 1-2 days before, just leave the chicken in an airtight container or a zip lock bag and keep in the refrigerator.
- For best results, I do recommend eating the chicken straight away when it is hot and crispy.
- This is the link that you will need for my homemade All Purpose Seasoning.
- Once the chicken has been air fried place it on some kitchen towel first then quickly transfer it to a cooling rack to prevent any sticking/steaming.
- You can use any chicken for this recipe (on skin is best) - drumsticks, wings, legs etc...
- Depending on the capacity of your air fryer, you may need to air fry the chicken in batches.

Chicken recipes you need to try
- Jamaican Fried Chicken
- Chicken Roti
- Garlic Butter Chicken
- Pineapple Chicken Wings
- Pulled BBQ Chicken
- Caribbean Chicken and Cabbage
- Ninja Air Fryer Whole Chicken
- Peanut Butter Chicken
**Please comment below and star rate if you have tried my recipes. Support my website by leaving a donation through Buying Me a Coffee. A site to show your appreciation of my hardwork over the years. Let's be friends and engage on YouTube, Facebook and Instagram I also like to pin on Pinterest, where you can find more amazing recipes.**

Gluten Free Fried Chicken (Air Fryer Chicken Thighs Recipe)
Ingredients
- 6-8 chicken thighs (1½-2lbs)
- 4 teaspoon all purpose seasoning (8g)
- 1 teaspoon black pepper (2g)
- 1 teaspoon pink salt (6g)
- 3 cups almond milk (710ml)
For the coating
- 1½ cups sorghum flour (180g)
- 1½ cups millet flour (180g)
- ¾ cup tapioca starch (90g)
- 1½ teaspoon baking powder (6g)
- 4 tablespoon all purpose seasoning (30)
- 1½ tablespoon paprika (10.5g)
- 1½ tablespoon onion granules (10.5g)
- 1½ tablespoon garlic granules (12g)
- ½ teaspoon chilli powder (1g)
- 2 tablespoon parsley (8g)fresh or dried
- 2 teaspoon pink salt (2g)
Instructions
- Place the almond milk in a large bowl along with the all purpose seasoning, black pepper and pink salt.
- Carefully lower the chicken into the milk.
- Wrap the bowl with saran wrap/cling film and refrigerate for several hours or overnight.
- In another separate bowl, add the sorghum flour, millet flour, tapioca starch, baking powder, all purpose seasoning, paprika, onion, garlic granules, chilli powder, parsley and pink salt.
- Mix the flour(s) together so all of the ingredients are evenly combined.
- Do a quick taste test to determine if you need to adjust for more seasoning.
- Carefully remove the chicken from the milk (do this one at a time) allow them to drain in a separate bowl or plate.
- Dredge the chicken in the flour mixture (shaking off any excess).
- Dip the chicken in the milk (allow to drain over the bowl) and then dip it one more time into the flour blend.
- Repeat the above steps with the remaining chicken.
- Once all of the chicken thighs have been coated, allow to rest on a plate for 10-15 minutes.
- Transfer them to the air fryer basket (you may need to do this in batches).
- Air fry 200C/400F for 20-25 minutes turning over half way through.
- Check the chicken about 5-8 minutes before it has finished air frying and spritz any dry spots with oil.
- Once cooked transfer on a plate with baking paper (leave for about a minute) before transferring to a cooling rack.
Notes
- The coating and milk mixture is enough for up to 8 medium sized chicken thighs.
- If you want your chicken to be leaner and still on the bone then simply trim off the skin and bread the actual flesh instead.
- Do forgot to check out my vegan version of Fried Chicken.
- Do a taste test of the breading mixture just in case you may want to adjust the seasoning i.e. adding more pink salt, parsley etc.. before using it for dredging.
- Before air frying the chicken it is best to let the chicken rest for about 10-15 minutes first to ensure a nice crust and even cooking.
- You can bread the chicken ahead of time 1-2 days before, just leave the chicken in an airtight container or a zip lock bag and keep in the refrigerator.
- For best results, I do recommend eating the chicken straight away when it is hot and crispy.
- This is the link that you will need for my homemade All Purpose Seasoning.
- Once the chicken has been air fried place it on some kitchen towel first then quickly transfer it to a cooling rack to prevent any sticking/steaming.
- You can use any chicken for this recipe (on skin is best) - drumsticks, wings, legs etc...
- Depending on the capacity of your air fryer, you may need to air fry the chicken in batches.


Tara says
I love that you made these in the air fryer! That coating sounds absolutely incredible, especially with all the spices. Yum!
Charla says
Thank you so much Tara
Vicky says
Just made this gluten-free fried chicken in my air fryer, and it was a hit—crispy on the outside, juicy on the inside! Who knew healthy could taste this good?
Charla says
Yay! I'm so glad you enjoyed it!
paula says
So excited to have found a truly good gluten-free fried chicken recipe! This was fantastic.
Charla says
Thanks Paula
Farah Abumaizar says
Wow this looks delicious! A great way to enjoy fried chicken that's accessible for a gluten free diet. Thanks so much for this recipe!
Charla says
You are very welcome
caroline says
Wow, this recipe looks absolutely delicious! I can't wait to try it out this weekend. Thanks for sharing🤗!
Charla says
You are very welcome Caroline