
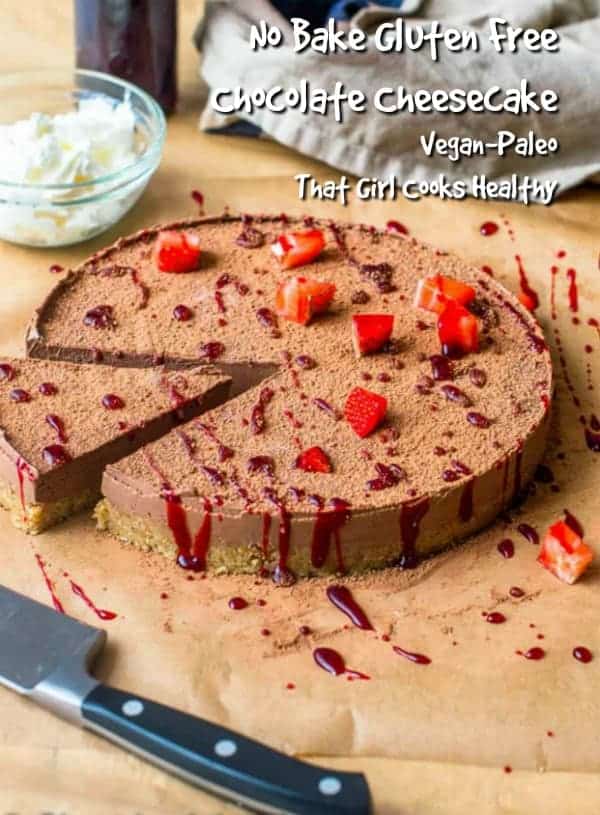
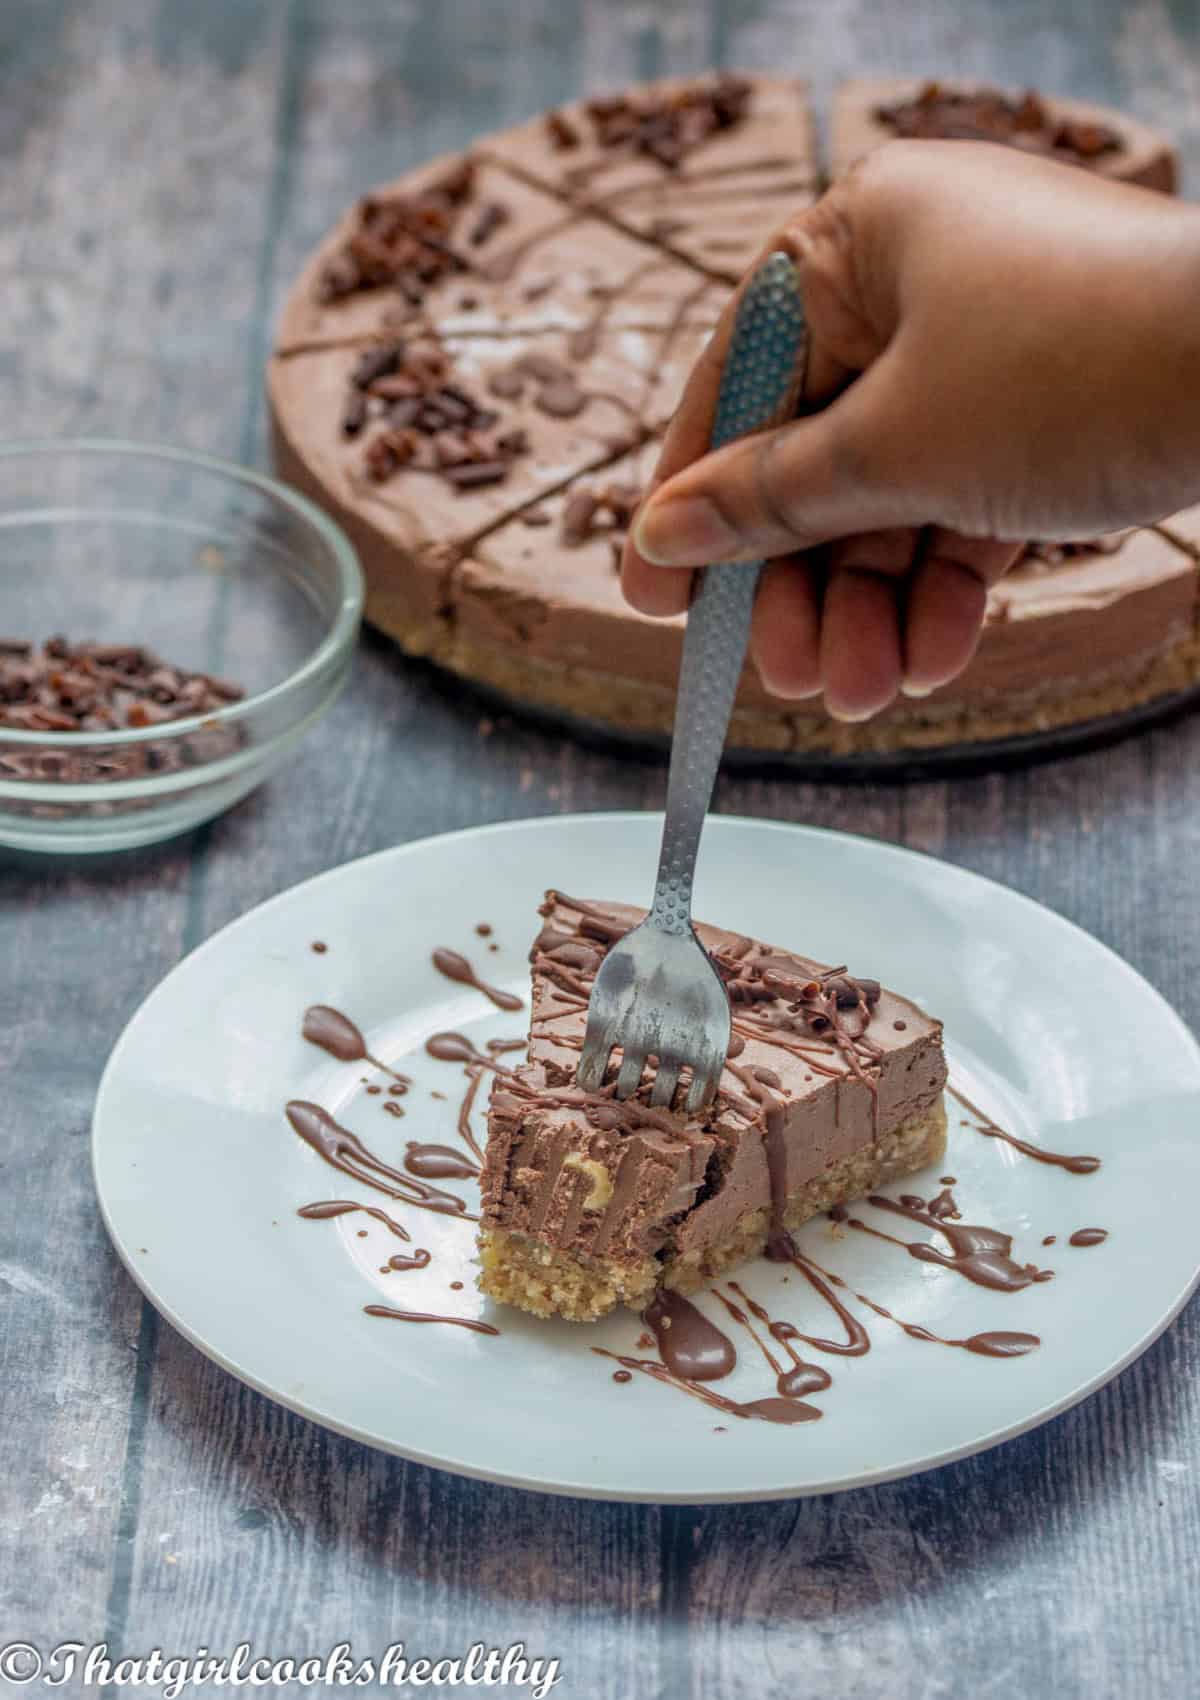
This chocolate cheesecake recipe is no bake, vegan friendly and a raw version of it's baked counterpart with a creamy filling made from whipped cashews and cacao spread over a gluten free walnut base. This dessert is perfect for the family to feast on or to bring to a potluck.
Jump to:
Do you love cheesecake but hate the aspect of baking it? Yes, I know the feeling too well.
I adore cheesecake with chocolate being my favourite, so I am delighted to share my ultimate go to cheesecake the is hassle free and most importantly doesn't require baking.
Yes, that's fantastic news, as it gives the oven a break and saves on the use of electricity so there's a win win.
I've made this cheesecake for friends, family and even co-workers. When I first started blogging this was the very same cheesecake that I made from my collegue who was transitioning to a dairy free lifestyle.
I promise if you stick around for the long haul, hopefully I can convince you to make this cheesecake and you won't regret it, and that's a promise!
Reasons to make this cheesecake
- Hidden vegetables - as it contains zucchini/courgette this is a great way to incorporate more vegetables into your diet without even trying!
- Great for anyone who is a choc-a-holic.
- Suitable for most dietary requirements - paleo, vegan, gluten free, dairy free and vegan friendly.
- Quick and easy, you only need to whip the crust up in a food processor and use a blender to puree the filling.
- No Soy(a)/tofu - say no more!
- It's a great alternative to conventional baking.
- Perfect for a dinner/date or hosting an event.
Ingredients you will need
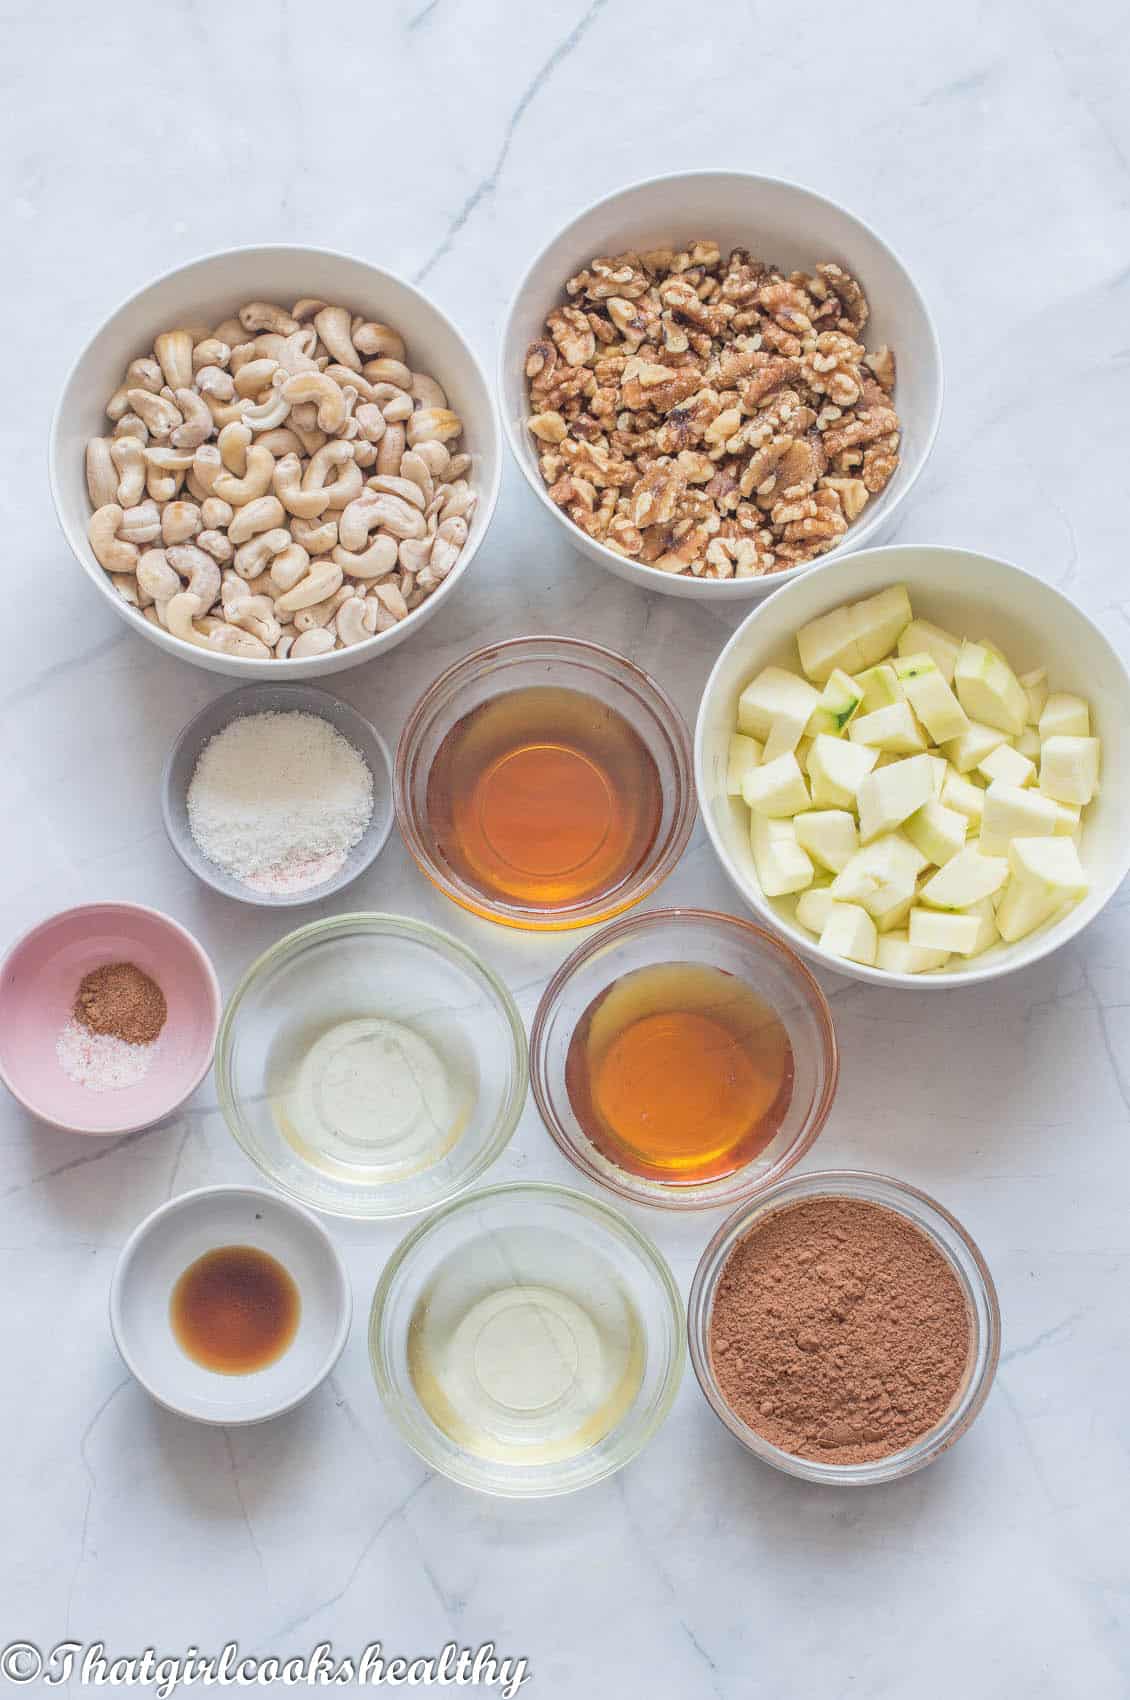
- Walnuts - Walnuts are quite coarse in texture compared to other nuts like almonds/cashew and that coarseness really works to form the crust.
- Shredded coconut - Unsweetned shredded coconut gives the crust a subtle hint of coconut flavour and sweetness.
- Maple syrup - Used both of the sweetening the crust and to form part of the filling.
- Coconut oil - This is very important, for both the crust/filling because coconut oil solidifies this helps with the structure of the cheesecake.
- Zucchini - Also known as courgette, a hidden vegetable that helps to create that silky smooth chocolate texture for the filling.
- Pink salt/vanilla/nutmeg - All used as flavour enhancers.
- Cashew nuts - When pureed they a silky smooth, very neutral in taste which means they won't overpower the flavour of the cheesecake and outshine the chocolate flavour.
- Cacao powder - Dairy free/vegan friendly alternative to cocoa powder.
The steps

- Line and grease and a 9 inch spring form pan with parchment paper and then set aside.
- Fit a food processor with an S blade.
- Add the walnuts and proceed to pulse at a low speed until it starts to break down, half way through pulsing stop the machine and remove the lid to check the consistency, if it too chunky, pulse for alittle longer.
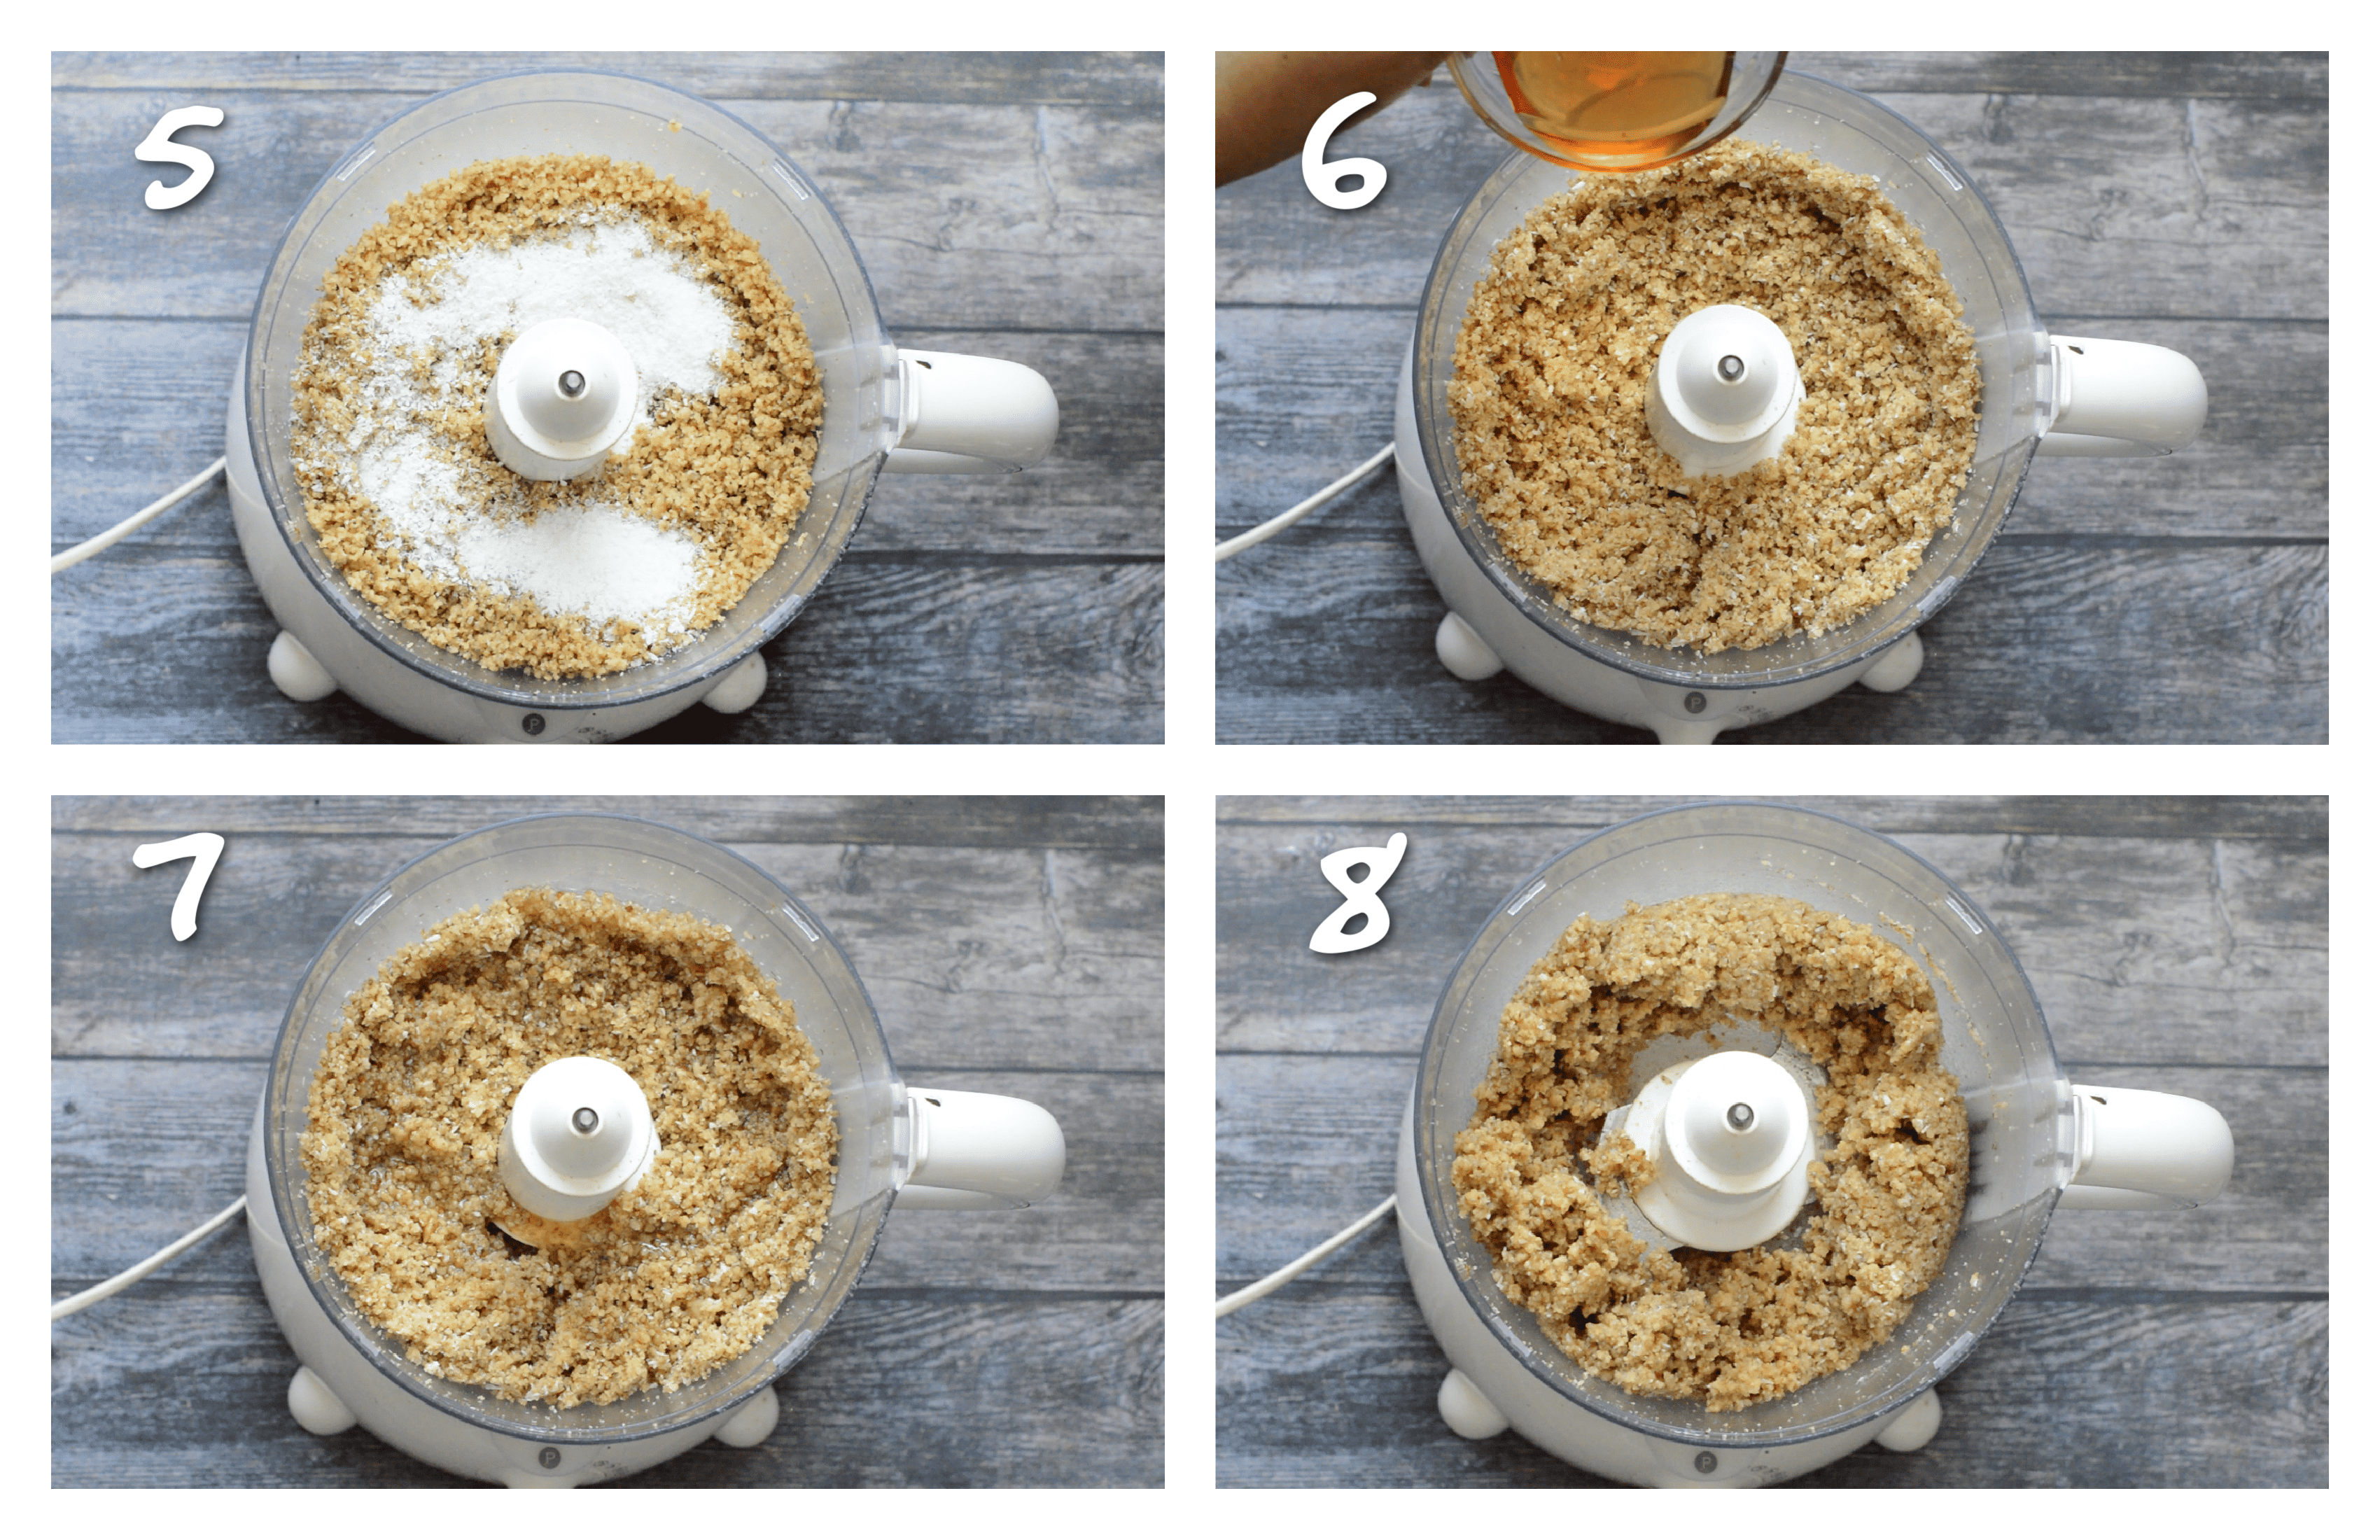
- Add the shredded coconut and pulse again.
- Drizzle in the maple syrup and coconut oil.
- Pulse on slow speed in intervals, don't leave the machine continuously running or the mixture may turn into a doughball, just run enough so all of the ingredients combine and almost clump together.
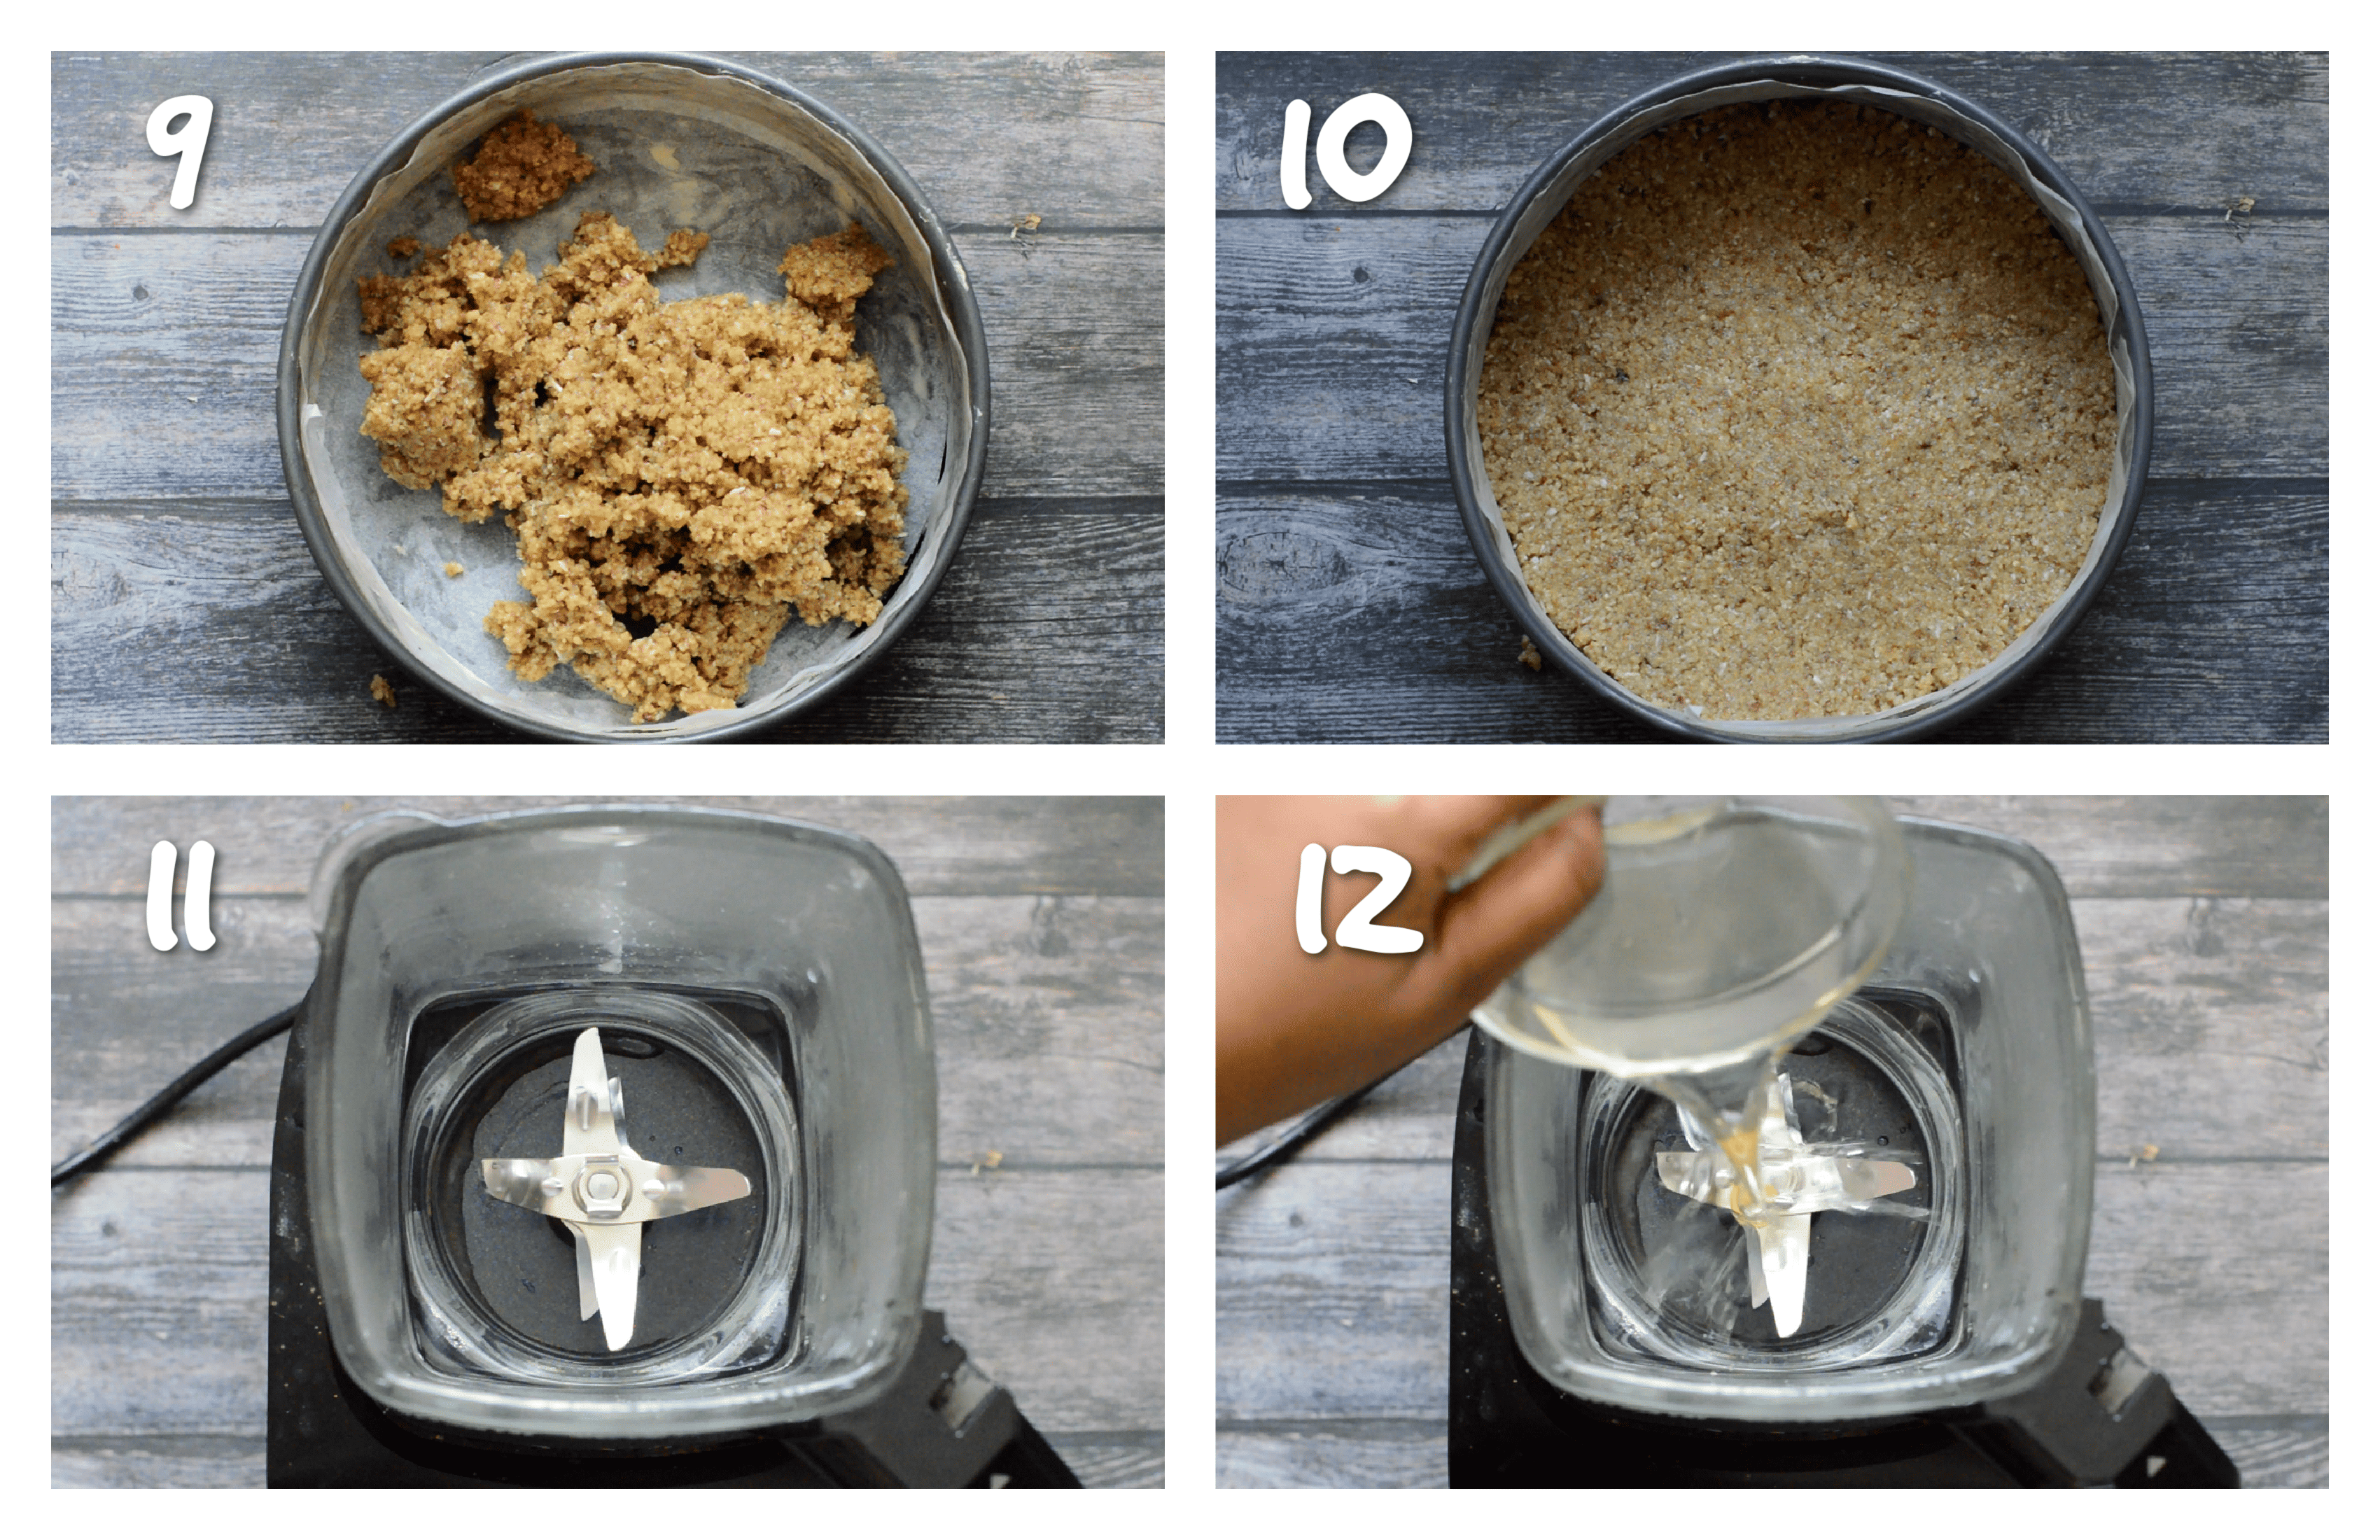
- Scoop the contents out of the food processor and place in the springform pan.
- Use the back of a large spoon to press down to form a crust, rotating the pan so the mixture is evenly distributed then set aside.

- In a high speed blender, add the liquid ingredients first - coconut oil, maple syrup, nutmeg, pink salt, cacao powder, zucchini and cashew nuts.
- Blitz at high speed until a smooth consistency is formed (check the consistency with a spoon, it should be silky smooth) you may need to add more melted coconut oil, if the texture is gritty and repeat.
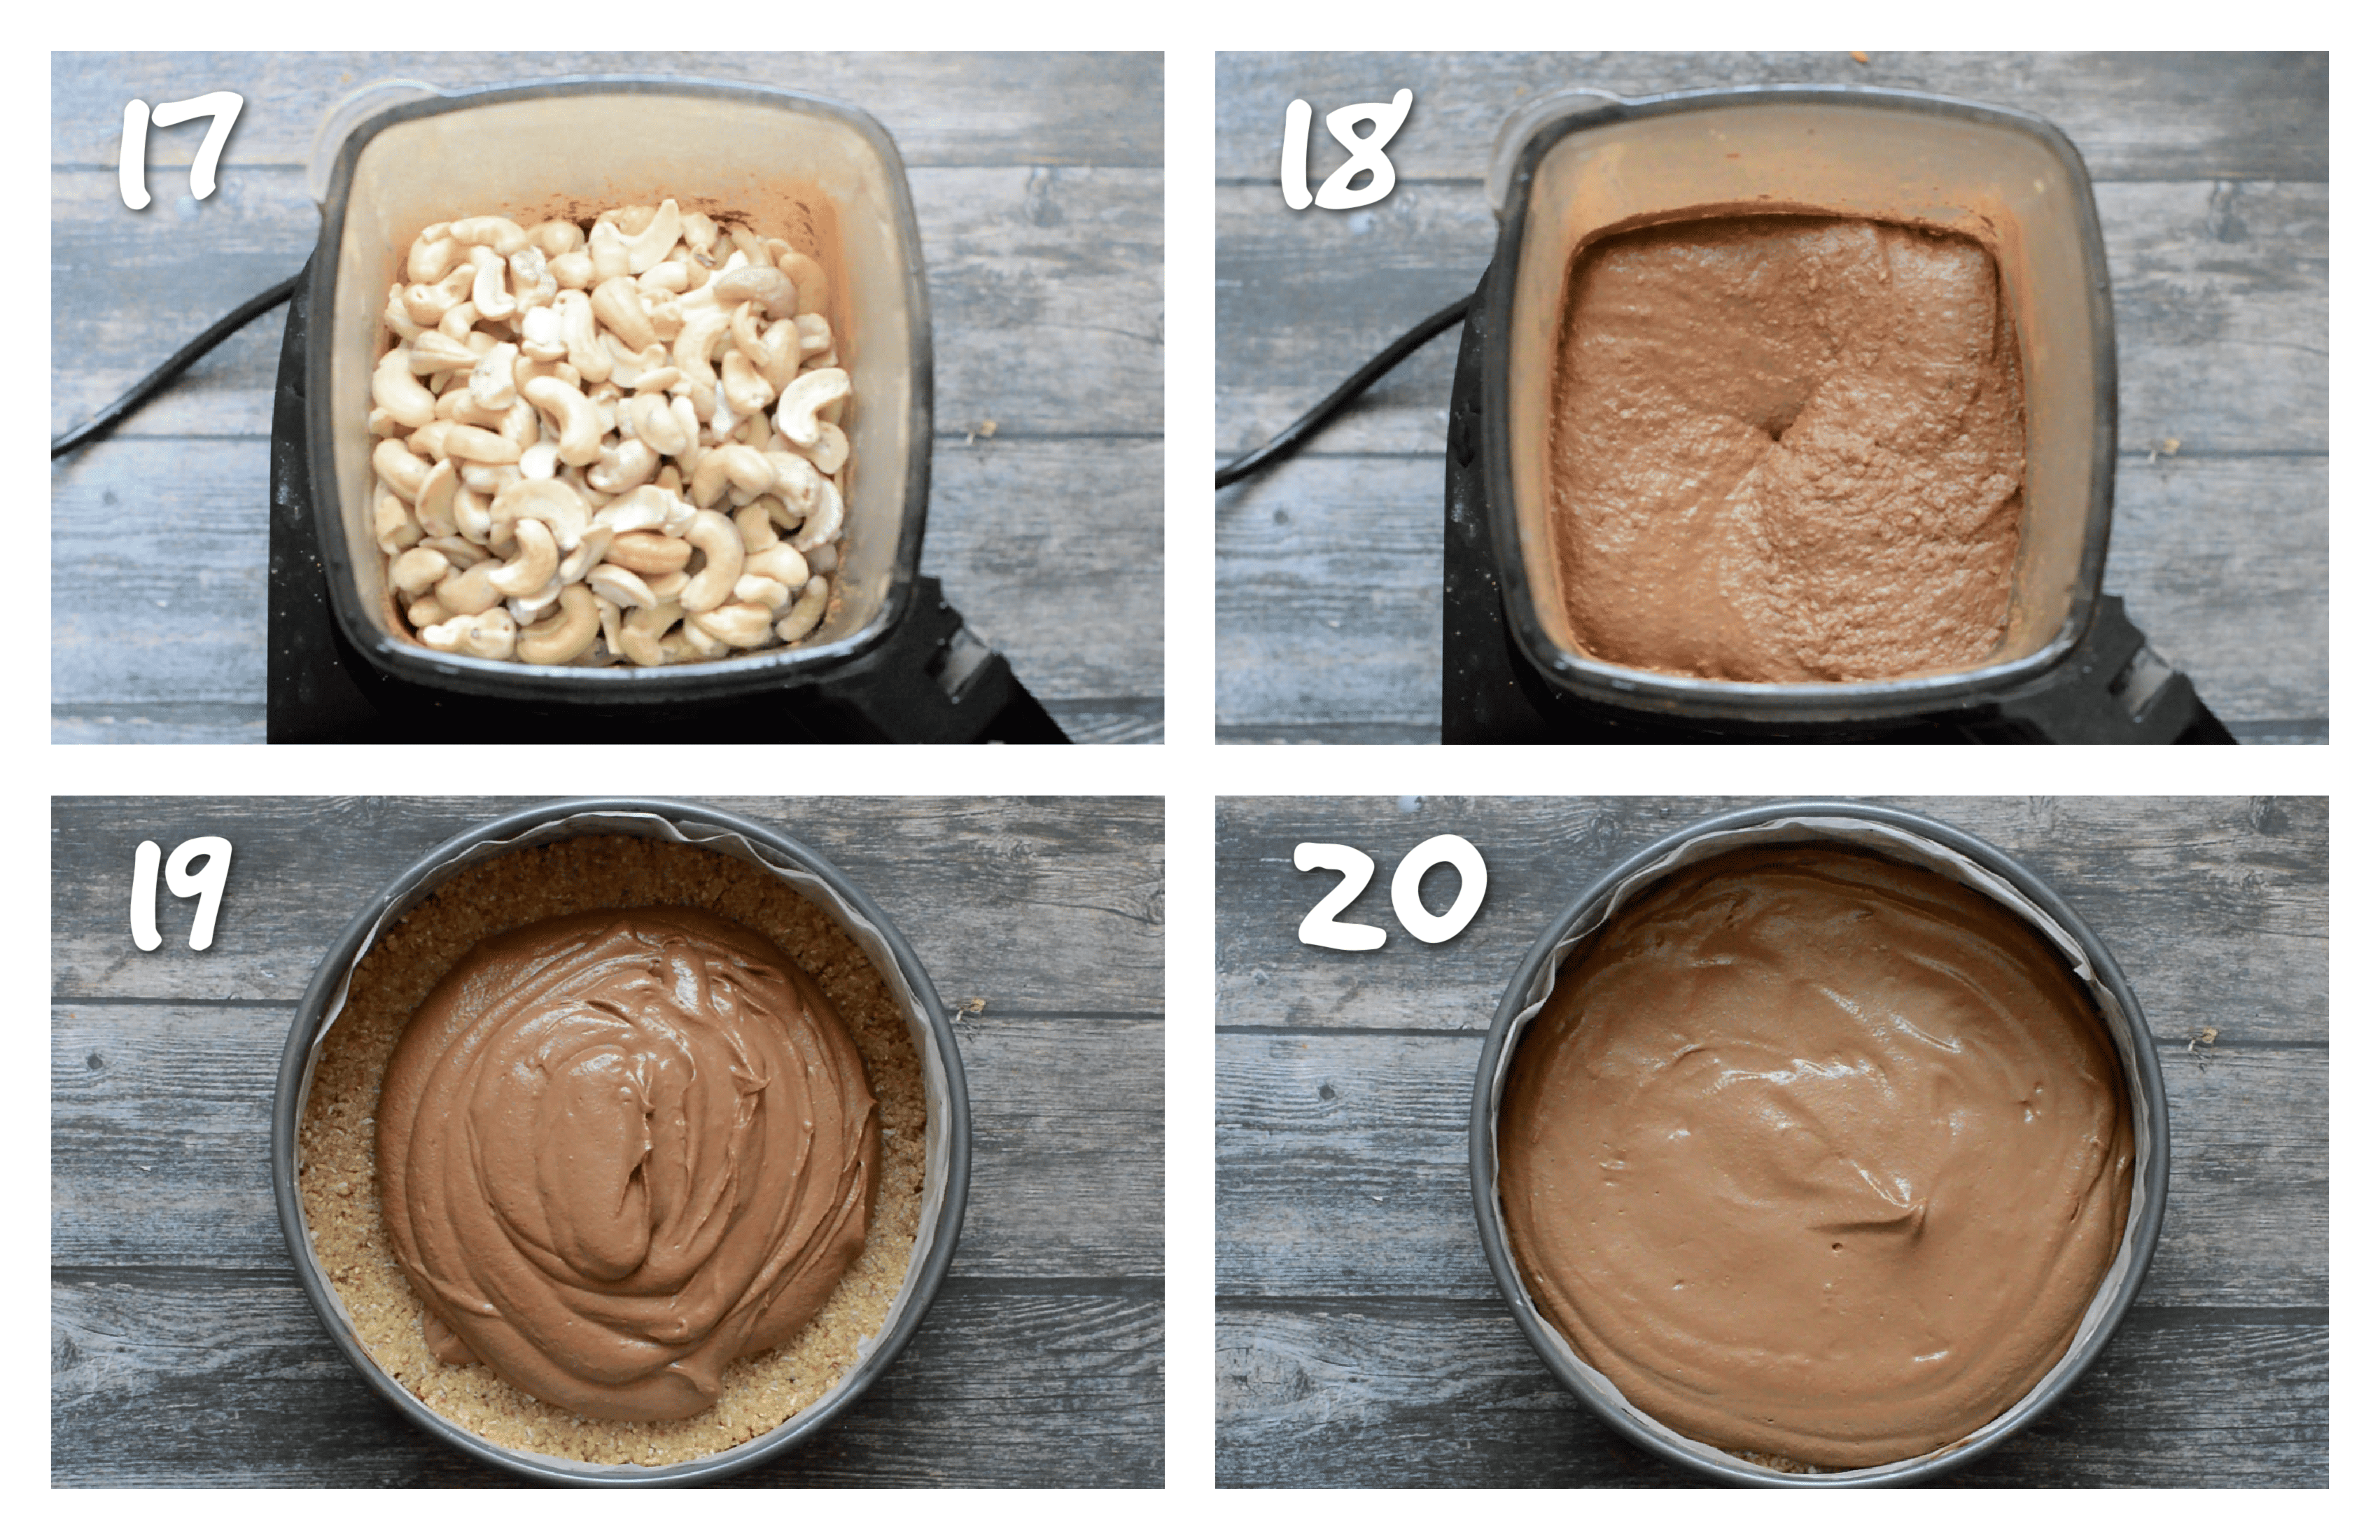
- Scoop out the mixture onto the base of the cheesecake.
- Use the back of a spoon to spread out the filling, rotating the pan so it is evenly distributed.
- Cover with saran wrap/cling film.
- Freeze overnight or until it is completely firm.
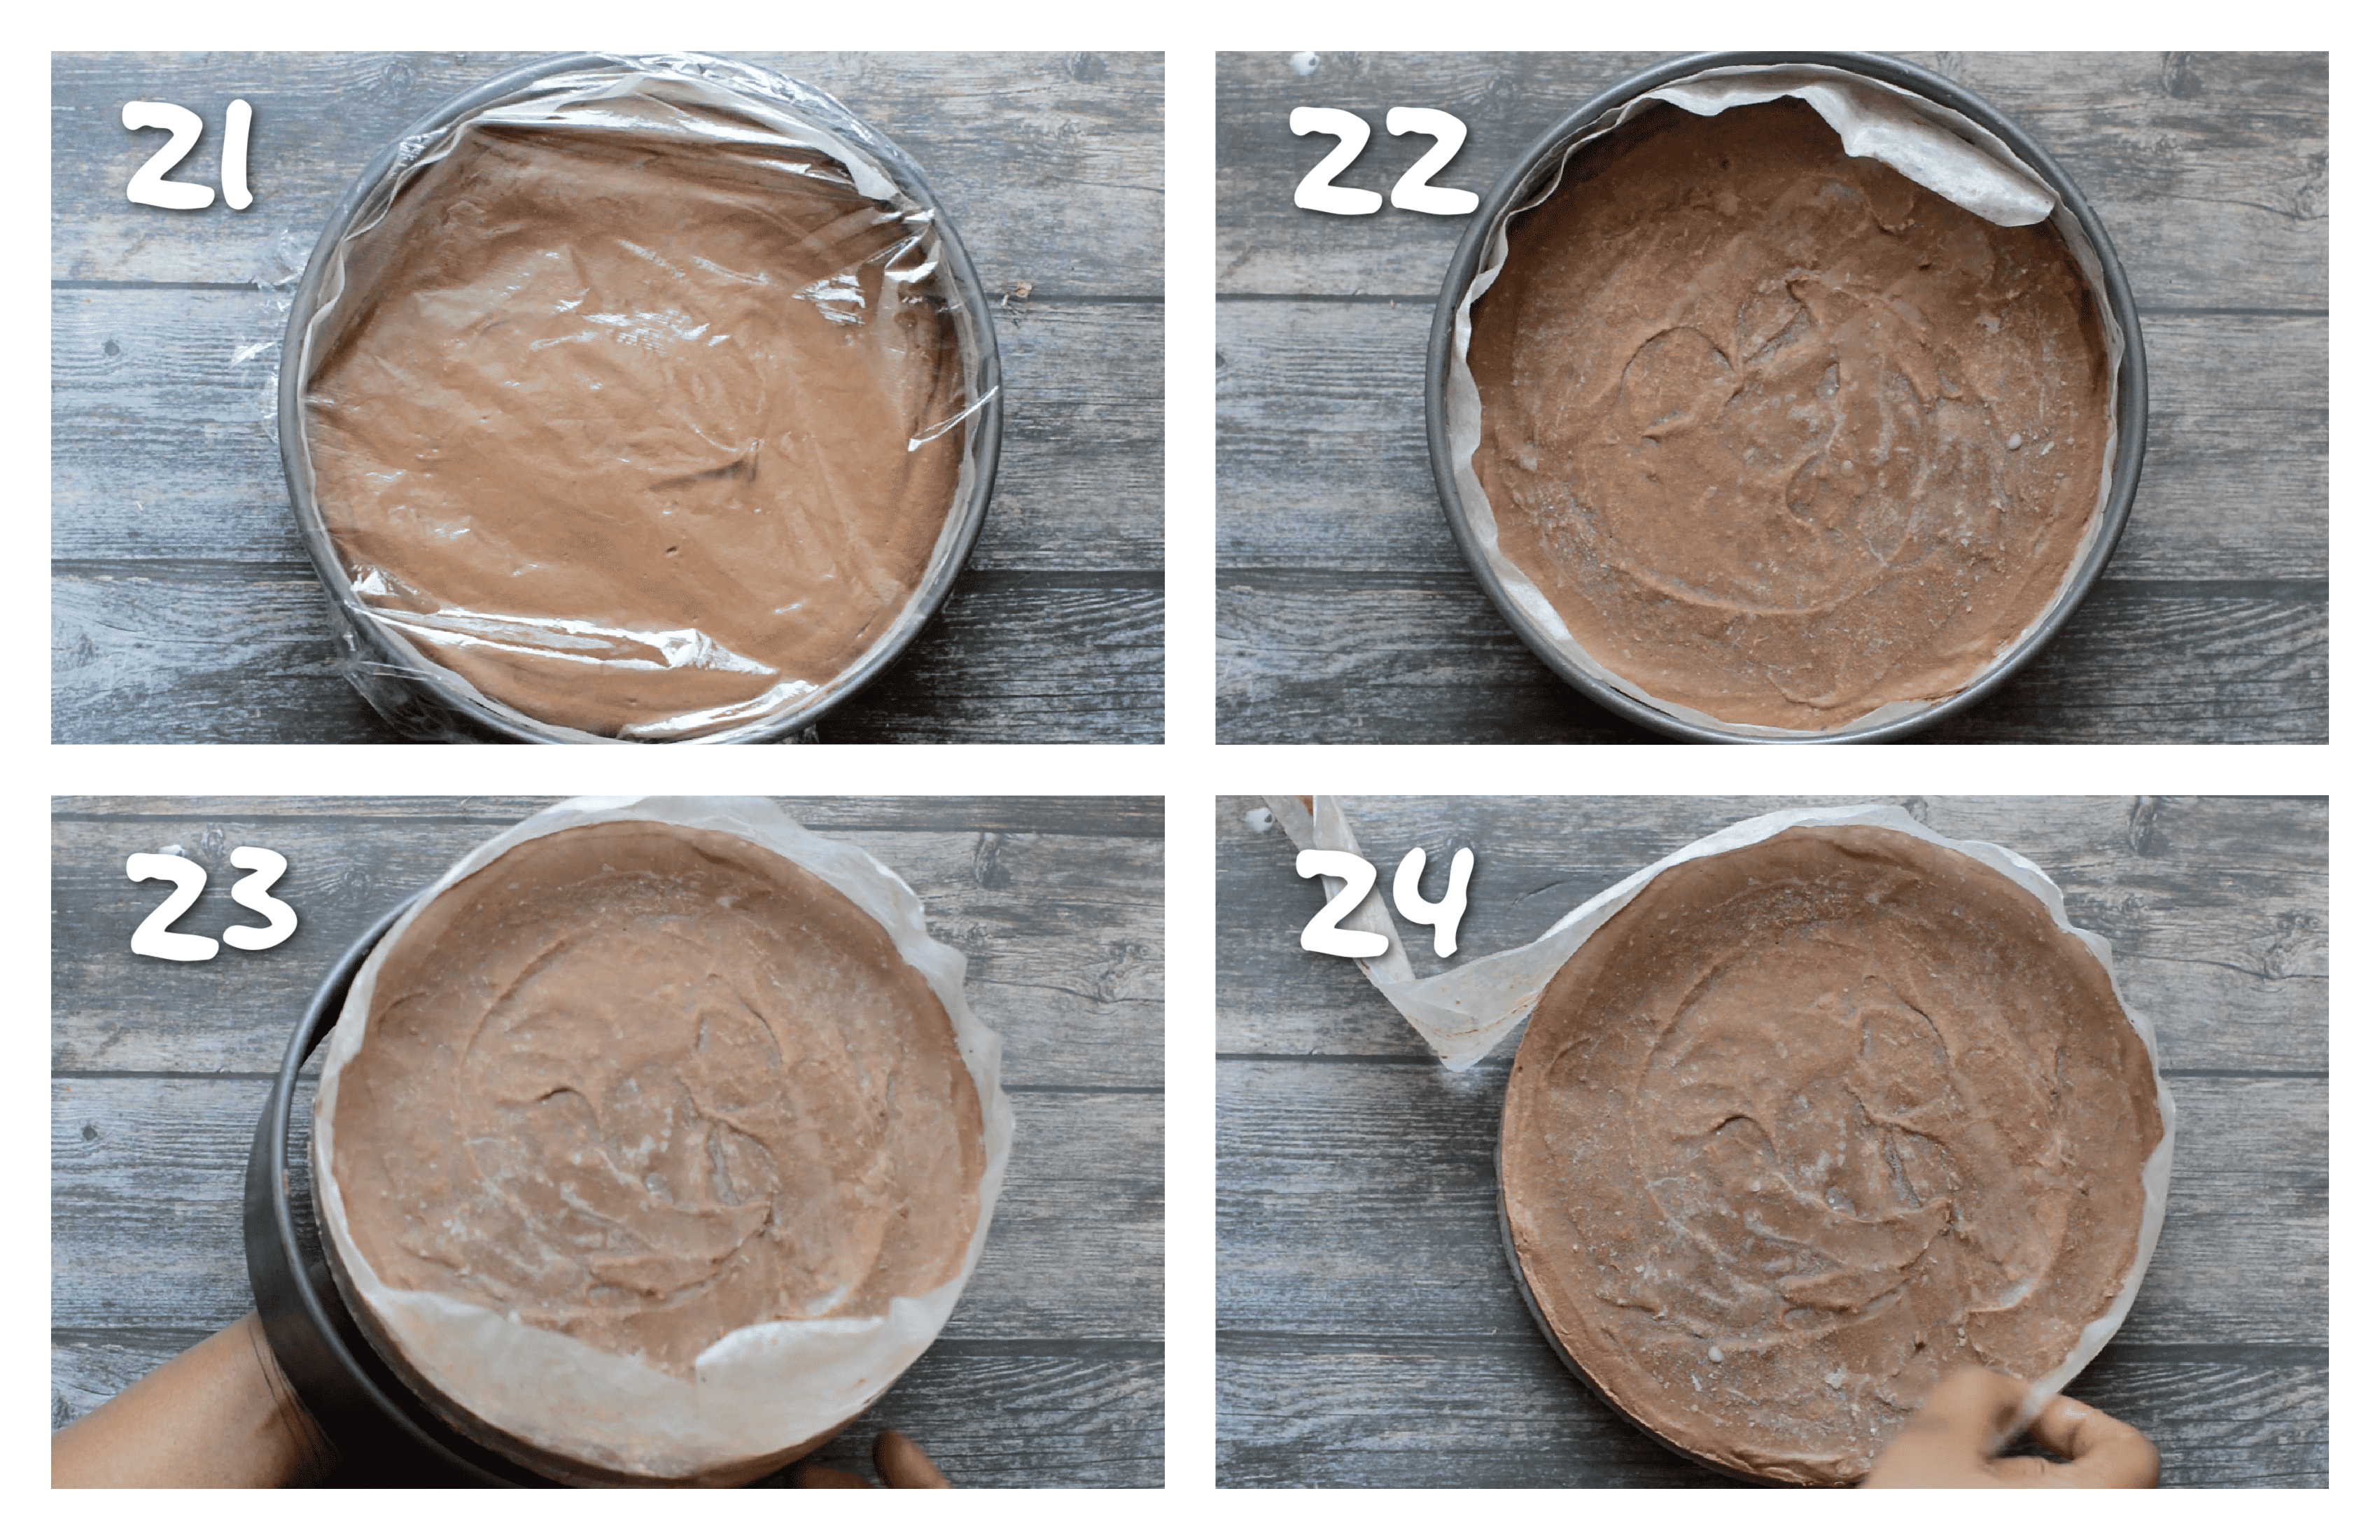
- Remove the cheesecake from the freezer and leave to thaw out.
- Once thawed, push the base of the pan upwards to release the cheesecake.
- Remove the parchment paper that is wrapped around the circumference of the cheesecake and discard.
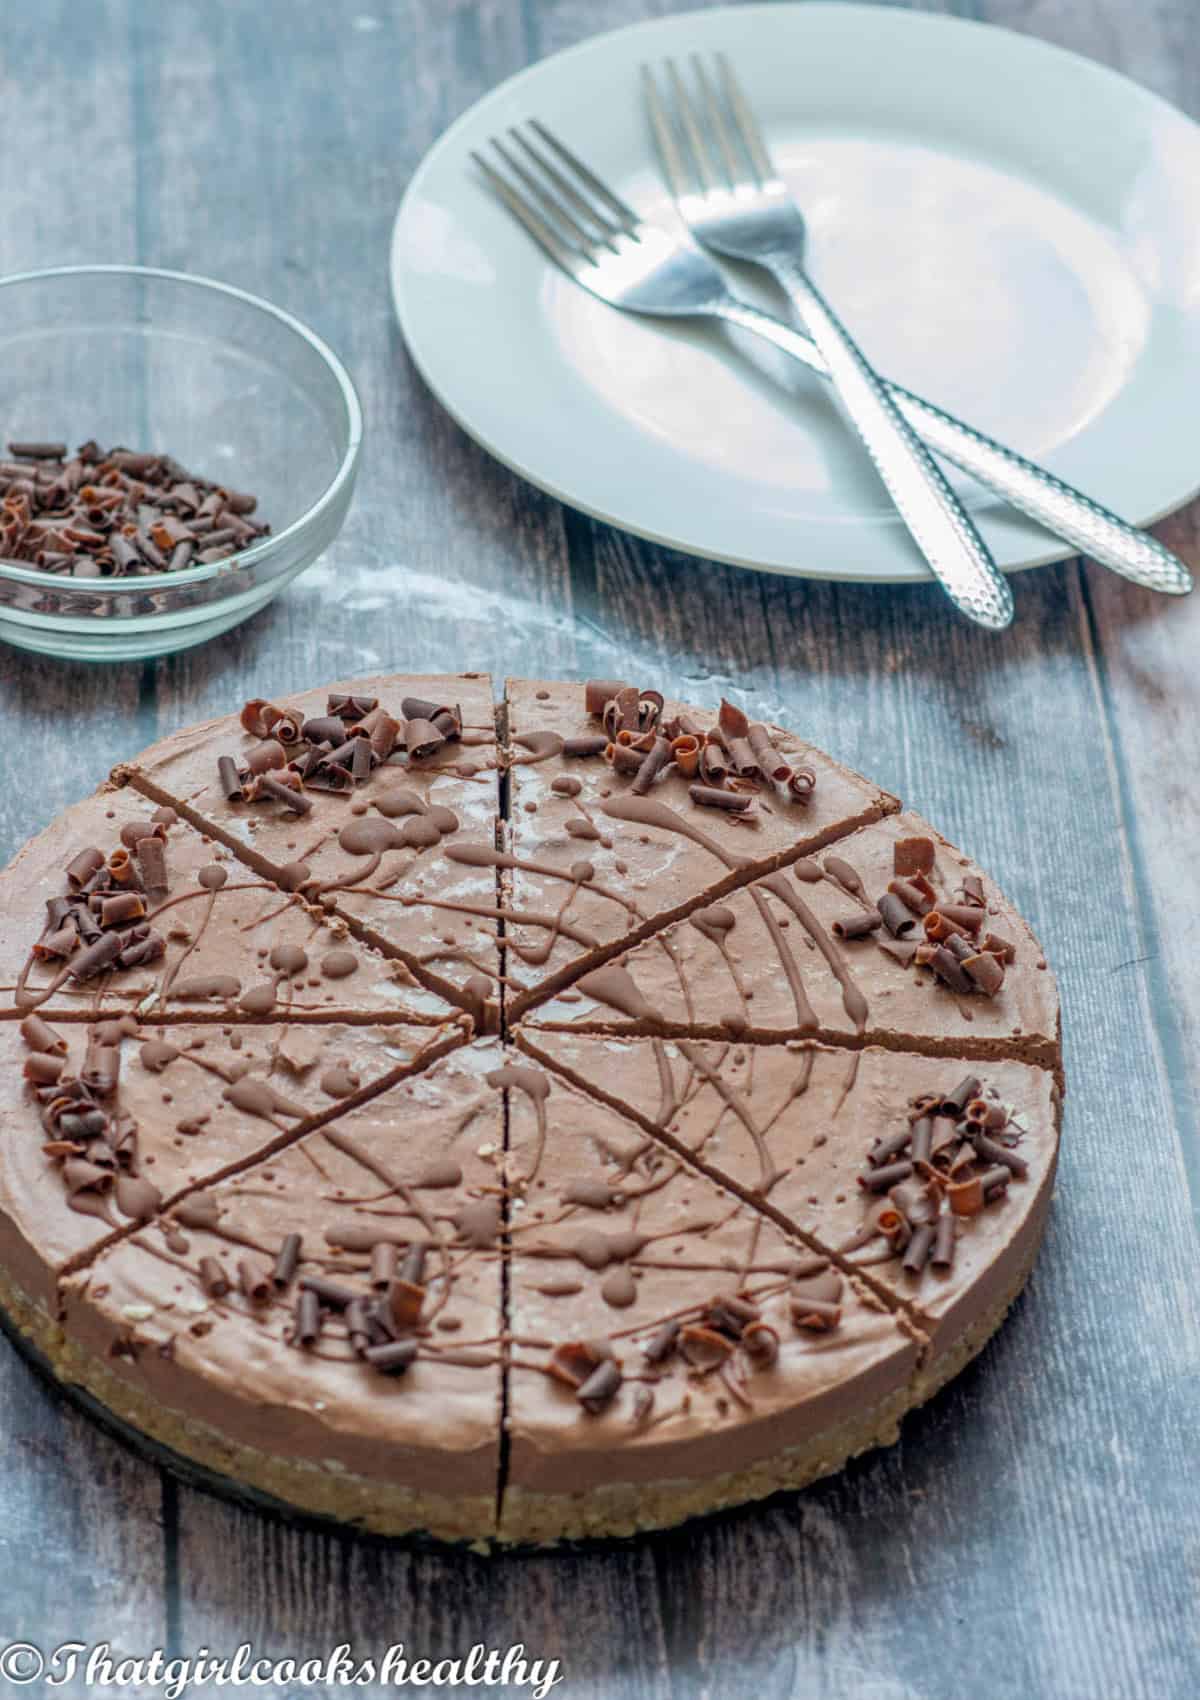
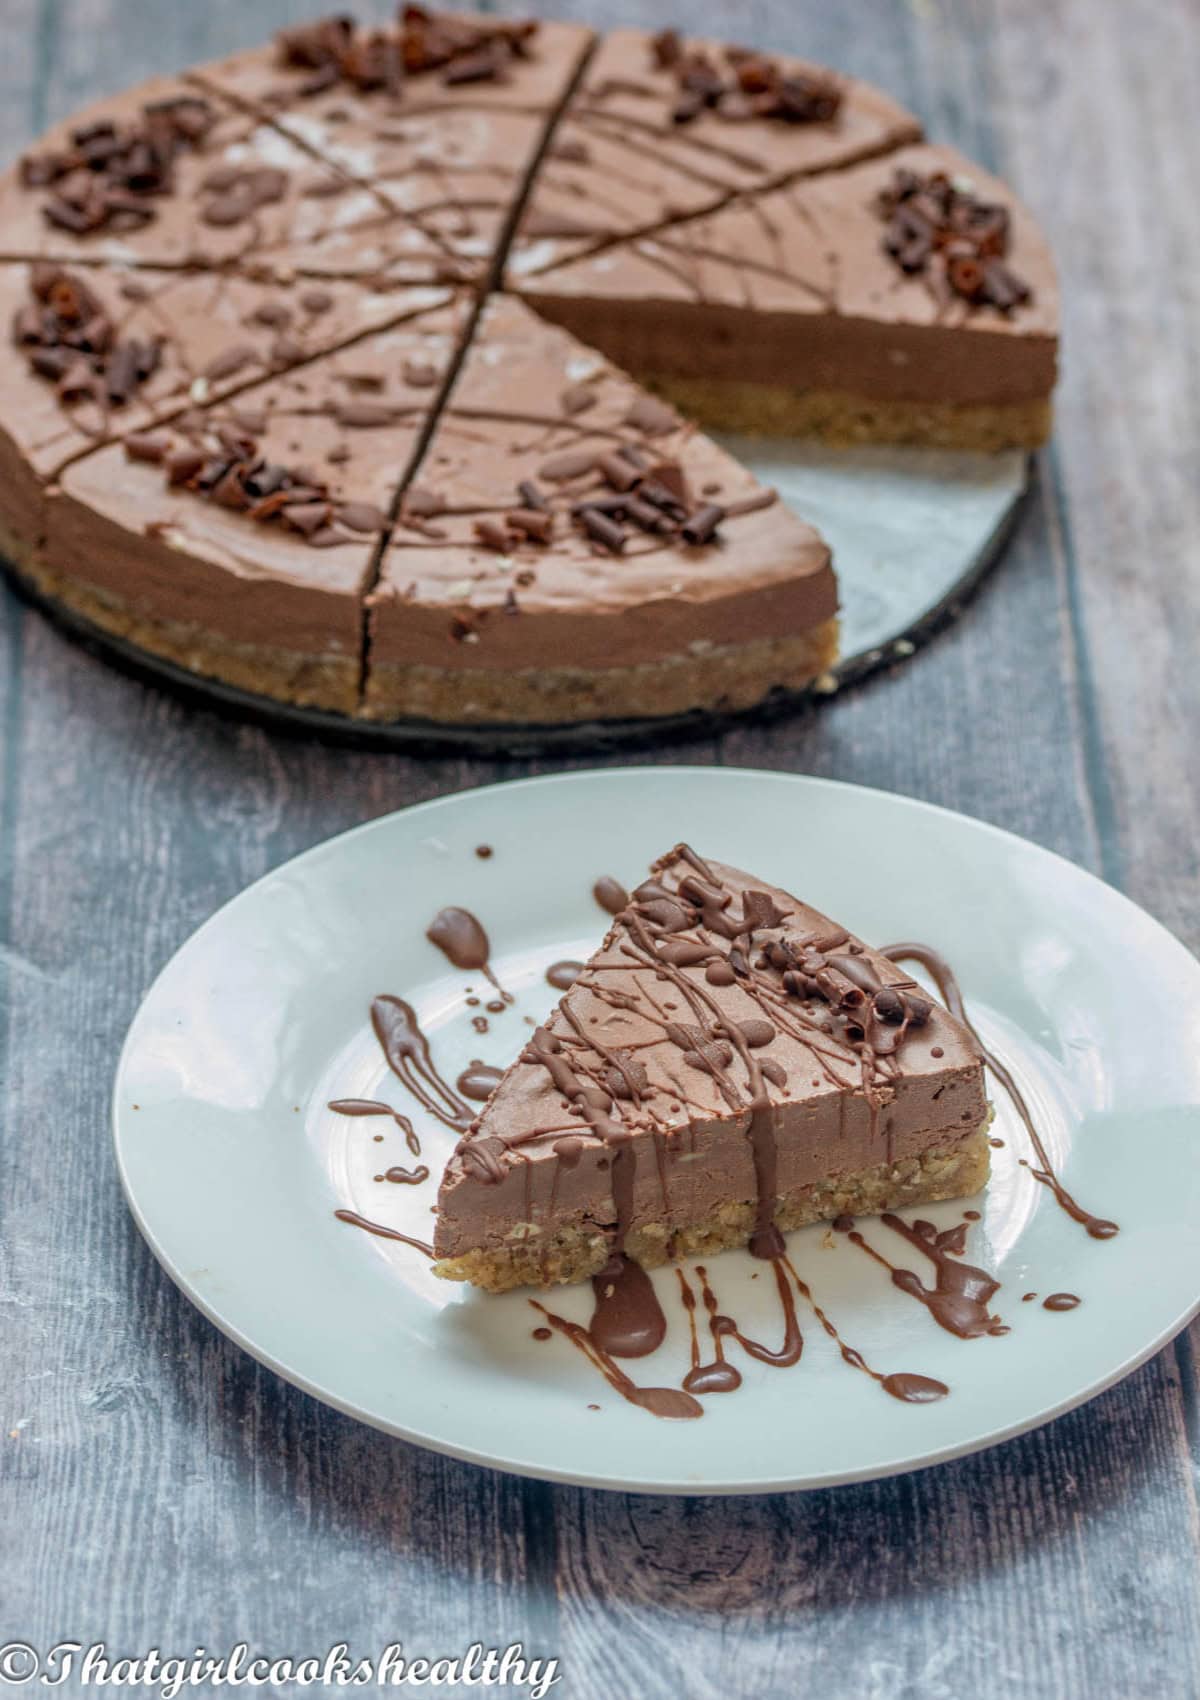
- Slice into portions and serve accordingly.
Notes and tips
- Make sure you are using a spring form with a loose base, this will make it easier when removing the cheesecake when serving it.
- Leave the cheesecake to rest at room temperature for roughly 30 minutes prior to serving this should leave enough time for it to thaw out.
- I highly recommend storing the cheesecake in the freezer and not in the refrigerator. The filling will soften although still hold its shape if refrigerated.
- It will be more convenient if you slice the cheesecake into equal portions, store if necessary and then serve when you are ready.
- You should get approximately 6-8 slices from this recipe.
- You will need a food processor and a high speed/sturdy blender for the filling.
- Make sure to soak the cashew nuts for several hours/overnight ahead of time, alternatively you can fast track the softening process by using boiling water for up to an hour.
More cheesecakes and desserts to try
**Please comment below and star rate if you have tried my recipes. Support my website by leaving a donation through Buying Me a Coffee. A site to show your appreciation of my hardwork over the years. Let's be friends and engage on YouTube, Facebook and Instagram I also like to pin on Pinterest, where you can find more amazing recipes.**

No Bake Chocolate Cheesecake Recipe (Gluten Free, Vegan)
Ingredients
For the crust
- 2 cups of walnuts (234g)
- 3 tablespoon coconut oil melted
- 3 tablespoon shredded coconut
- ¼ cup maple syrup (60ml)
- ⅛ teaspoon pink salt
For the filling
- 2 cups cashew nuts (258g)(they must be soaked)
- 1 zucchini peeled and chopped
- ½ cup raw cacao powder (48g)
- ¼ cup coconut oil (60ml)melted
- ½ cup maple syrup (118ml)
- ½ teaspoon nutmeg
- ½ teaspoon vanilla extract or powder
- ⅛ teaspoon pink salt
Instructions
- Line and grease and a 9 inch spring form pan with parchment paper and then set aside.
- .Fit a food processor with an S blade.
- Add the walnuts and proceed to pulse at a low speed until it starts to break down, half way through pulsing stop the machine and remove the lid to check the consistency, if it too chunky, pulse for alittle longer.
- Add the shredded coconut and pulse again.
- Drizzle in the maple syrup and coconut oil.
- Pulse on slow speed in intervals, don't leave the machine continuously running or the mixture may turn into a doughball, just run enough so all of the ingredients combine and almost clump together.
- Scoop the contents out of the food processor and place in the springform pan.
- Use the back of a large spoon to press down to form a crust, rotating the pan so the mixture is evenly distributed then set aside.
- In a high speed blender, add the liquid ingredients first - coconut oil, maple syrup, nutmeg, pink salt, cacao powder, zucchini and cashew nuts.
- Blitz at high speed until a smooth consistency is formed (check the consistency with a spoon, it should be silky smooth) you may need to add more melted coconut oil, if the texture is gritty and repeat.
- Scoop out the mixture onto the base of the cheesecake.
- Use the back of a spoon to spread out the filling, rotating the pan so it is evenly distributed.
- Cover with saran wrap/cling film.
- Freeze overnight or until it is completely firm.
- Remove the cheesecake from the freezer and leave to thaw out.
- Once thawed, push the base of the pan upwards to release the cheesecake.
- Remove the parchment paper that is wrapped around the circumference of the cheesecake and discard.
- Slice into portions and serve accordingly.
Video
Notes
- Make sure you are using a spring form with a loose base, this will make it easier when removing the cheesecake when serving it.
- Leave the cheesecake to rest at room temperature for roughly 30 minutes prior to serving this should leave enough time for it to thaw out.
- I highly recommend storing the cheesecake in the freezer and not in the refrigerator. The filling will soften although still hold its shape if refrigerated.
- It will be more convenient if you slice the cheesecake into equal portions, store if necessary and then serve when you are ready.
- You should get approximately 6-8 slices from this recipe.
- You will need a food processor and a high speed/sturdy blender for the filling.
- Make sure to soak the cashew nuts for several hours/overnight ahead of time, alternatively you can fast track the softening process by using boiling water for up to an hour.


Oksana says
I’ve made this cake and it’s fantastic!
Thank you very much for sharing the recipe.
Charla says
Thank you so much
Rose says
how big is the 1 zucchini ?
Charla says
Hi Rose, you will need a large zucchini for this recipe.
Laura says
I just made this last night for our supper club. It turned out amazing and no one could tell me the "secret" ingredient.
Charla says
Thanks for the wonderful feedback Laura
veenaazmanov says
Love this unique recipe. Made with all the healthier ingredients. This is delicious, creamy and easy as it is a no bake one too. yum
Charla says
Thanks Veena
Beth Sachs says
Absolutely delicious and great that I can serve up to my vegan friends. One slice is never enough!
Charla says
No, you gotta have a few slices Beth
Adrianne says
Yum!! This cheesecake looks amazing. I also love that it is a no bake version. The strawberry pieces look sweet and enjoyable. I look forward to trying this out. Thanks
Charla says
Thank you so much Adrianne
Jacqueline Meldrum says
I do love cheesecake and this one is calling out to me.
Charla says
I'm so glad to hear that Jacqueline
Linda Cormack says
This recipe sounds really good and I'd like to try it since I need grain-free and dairy-free.
Charla says
Apologies. I shall amend, it should be cups for both ingredients. Thanks for pointing that out.
Rich Far says
Hi Charla,
Well...my favorite desert in the world is Cheesecake. So, you certainly hit the spot with this one!
I haven't tried this recipe yet, however, it shall not be long before I do and I will let you know what I think. Going by the picture and the recipe, I just know i'm not in for disappointment.
Blessings Be,
Rich Far
Charla says
Yes Rich, please do try it. You won't be disappointed - I cannot deny that
Amy says
Wow that looks absolutely delicious!!
I'm gonna try it out, thanks for sharing Charla 🙂
Charla says
Thanks Amy, please do and let me know how it turns out.