
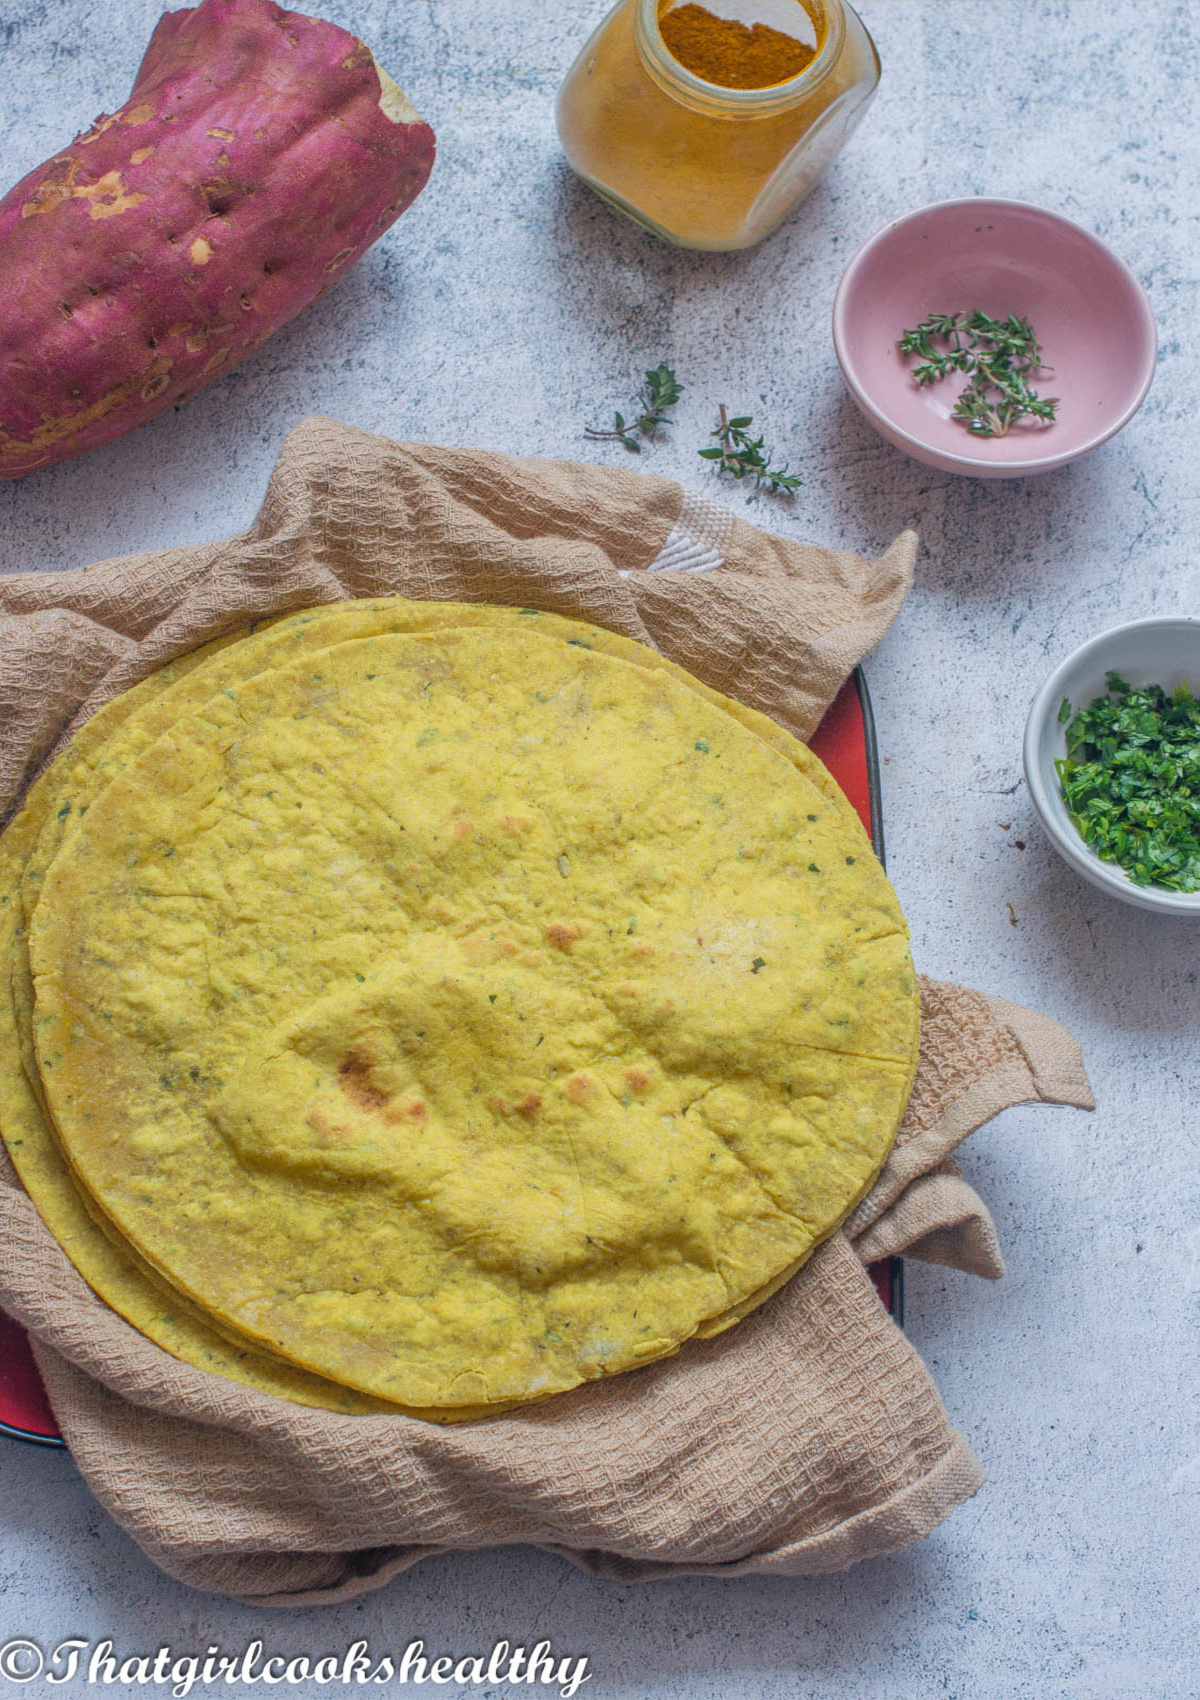
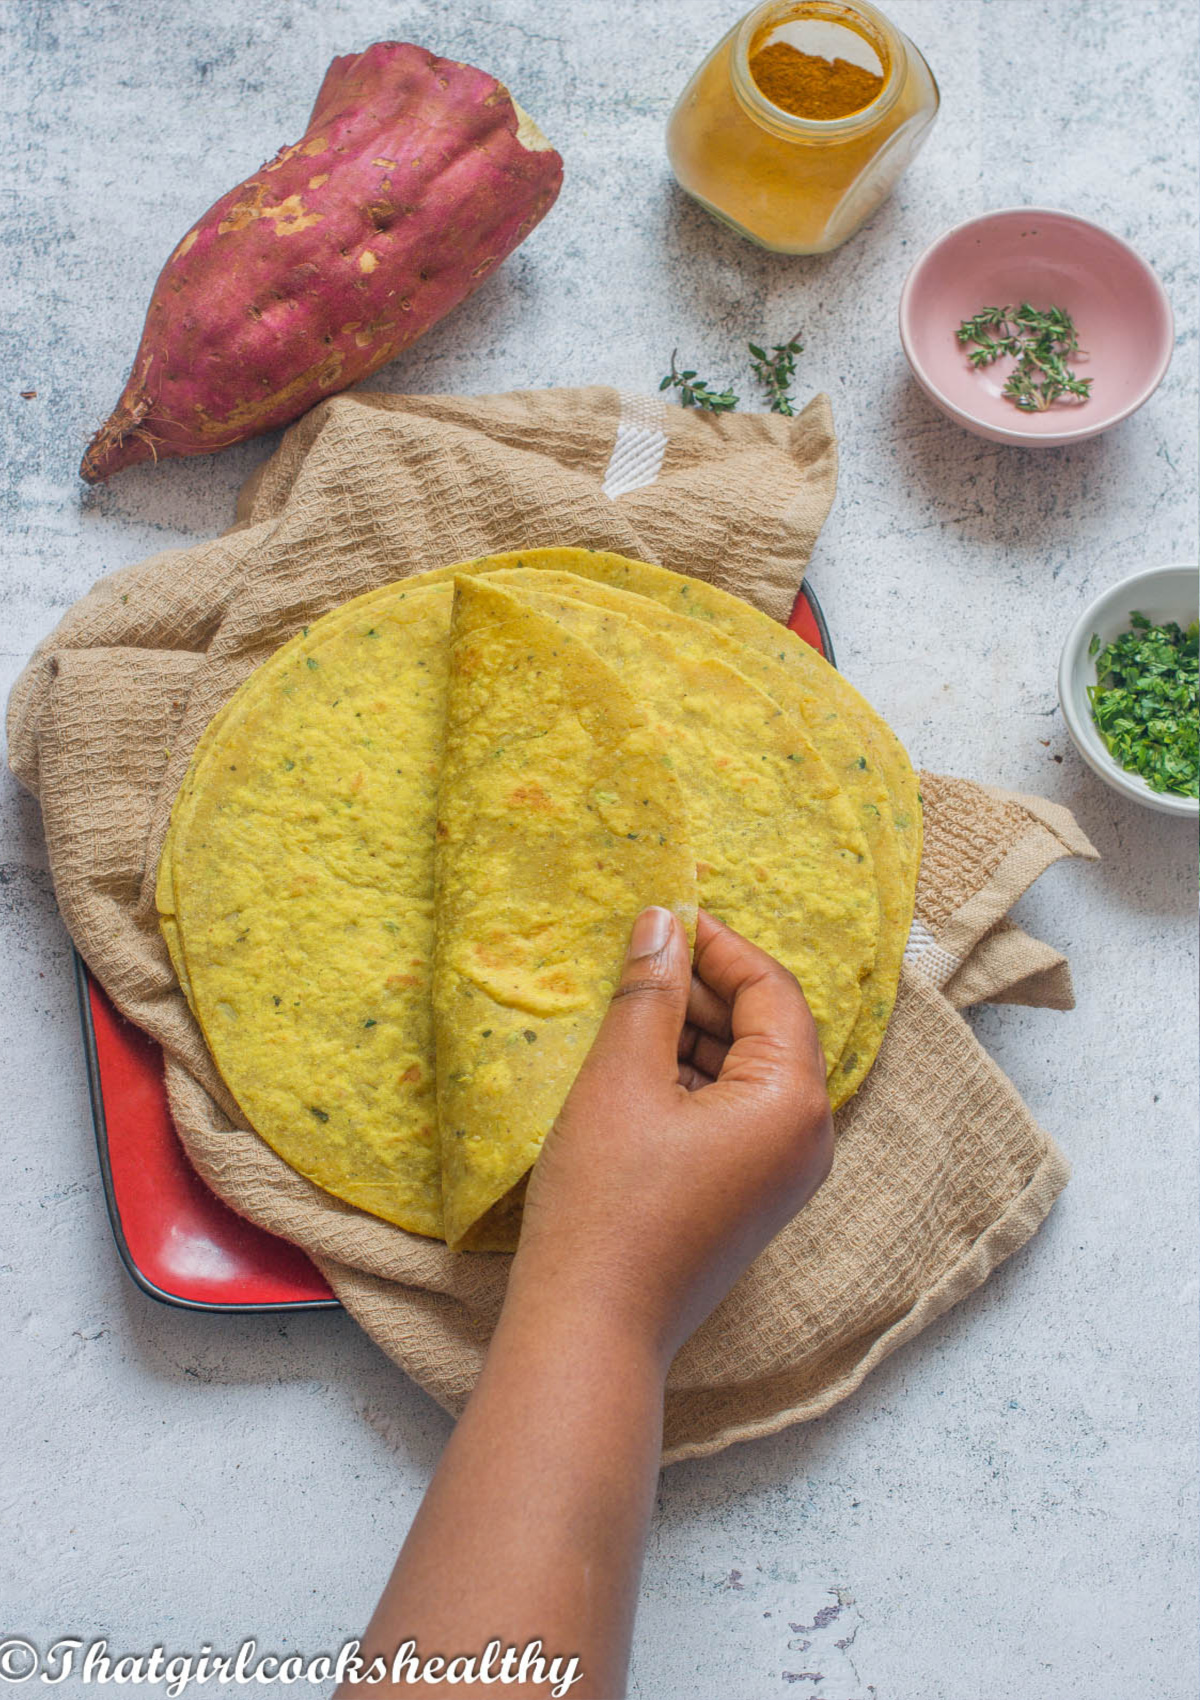
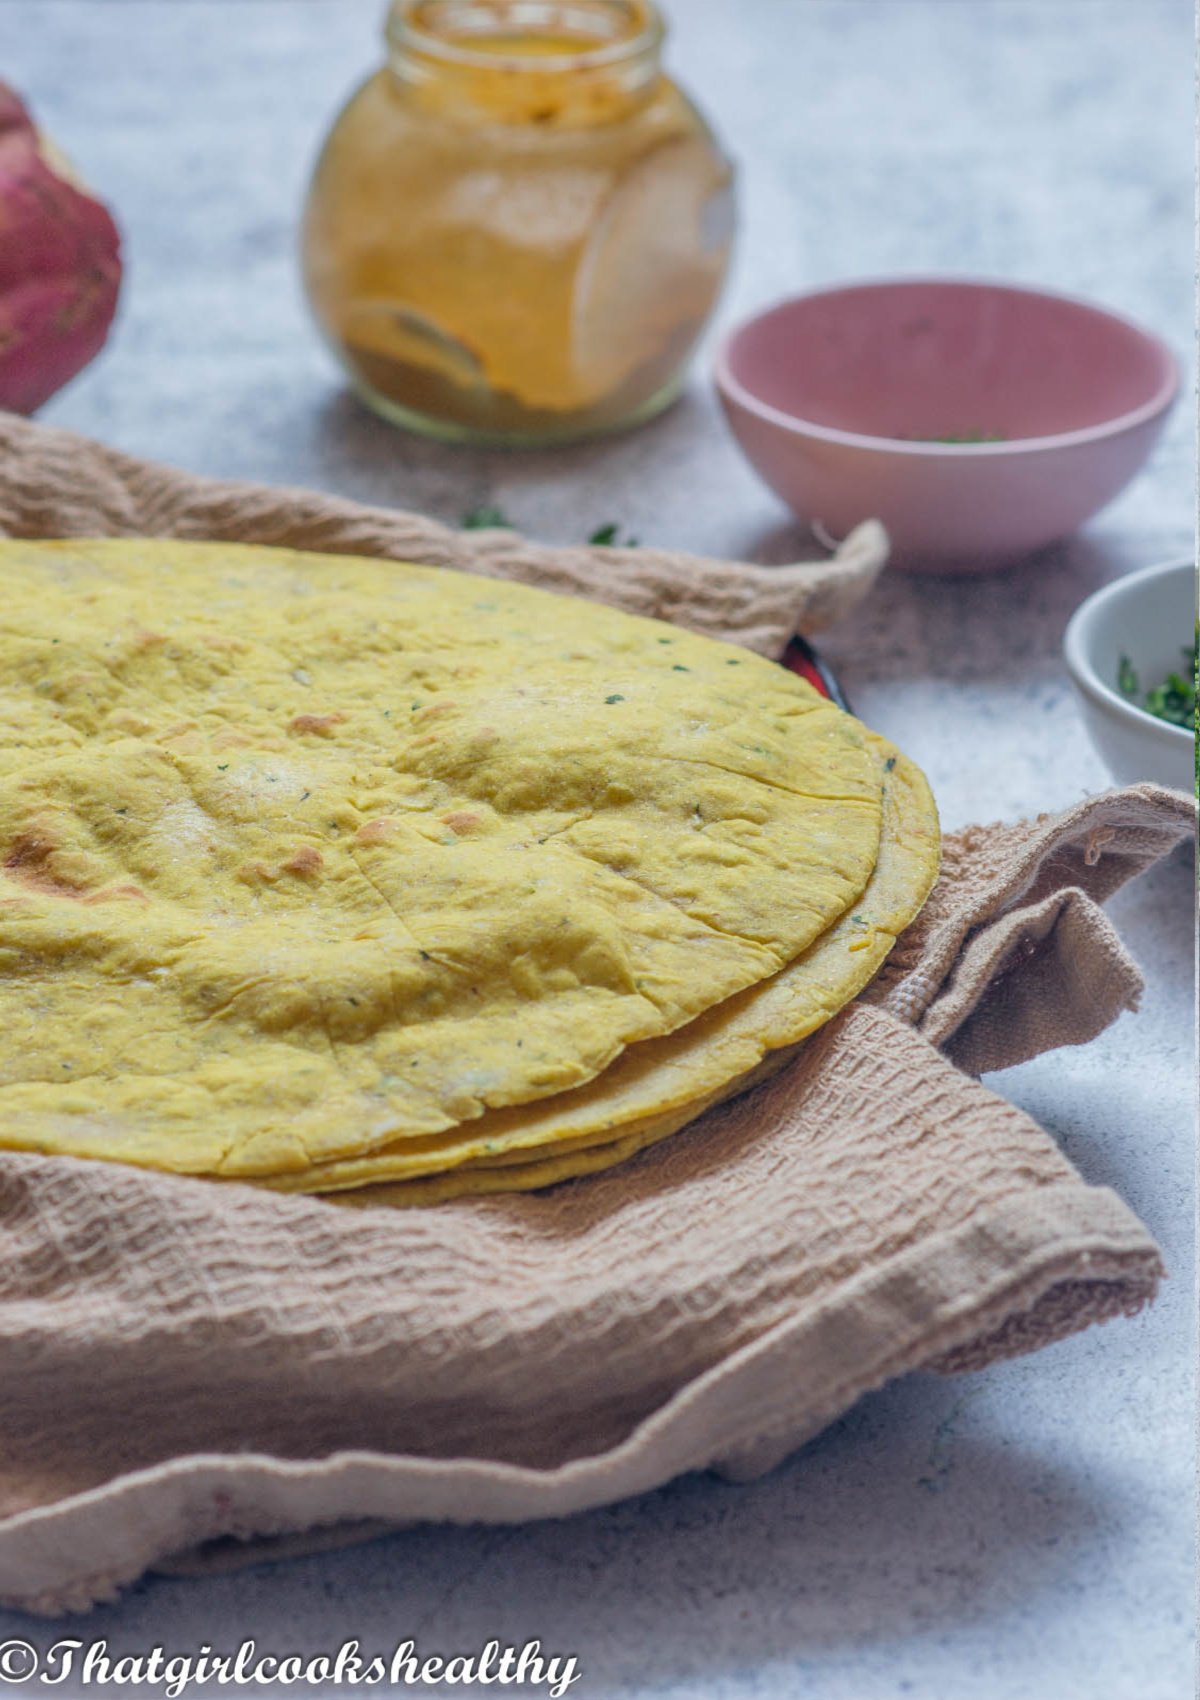
Learn how to make some sweet potato roti that is free from gluten and vegan friendly. This roti skin is super simple, it's soft, folds and bends, you would never know it's not made from wheat flour and tasty too.
Oh how I love roti, roti is a BIG part of my life and I'm slowly making different variations of gluten free roti.
I already have a gf Sada Roti, Sugar Roti as well as a Dhal Puri Roti recipe on the website for you to test out.
As you all know gluten free baking especially bread recipes can be challenging.
Achieving that pillow soft texture is so difficult which is why my bread recipes are advised to be eaten immediately or while still hot, because I still haven't mastered how to keep that pillow soft texture after it gets cold.
Anyway, enough about that and let's discuss the recipe to hand. Have you ever tried adding some sweet potato directly to your roti?
This isn't the aloo (potato) roti recipe where the potato is used to stuff the cavity of the dough.
I'm saving that recipe for another time, instead we are adding the potato to the actual ingredients so it forms part of the dough.
Just like my other roti recipes, the dough comes together so effortlessly with the sweet potato.
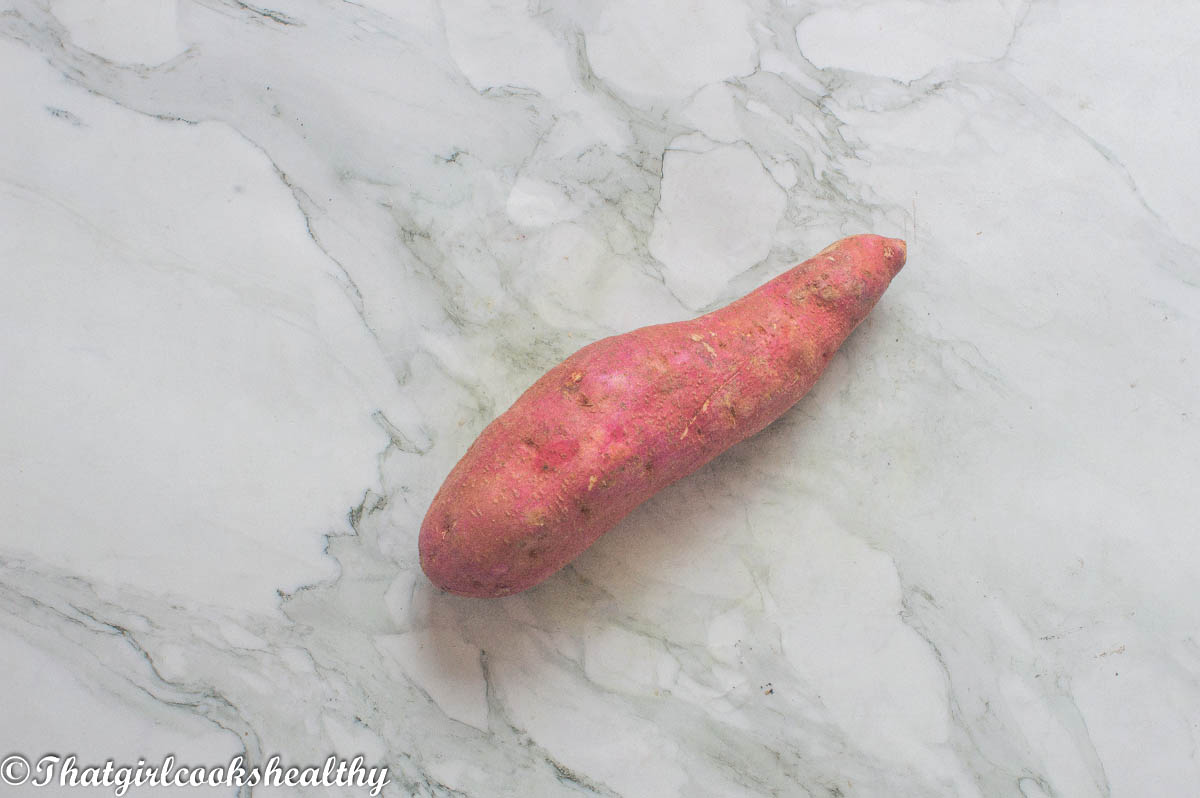
You can use the orange or the white flesh sweet potato. To keep things within the Caribbean theme, I like to use white flesh sweet potatoes.

Along with some curry powder for flavour and turmeric to give the roti skin a yellow hue.
I think the colour yields vibrancy and gives the roti a nice pop of colour. I also like to add some mild herbs and spices - garlic, onion granules, shado beni and thyme.
These herbs and spices really compliment the taste of the sweet potato roti without being too overpowering.
As with my other roti recipes, please follow the recipe to the TEE. I have only tested this recipe using the listed ingredients.
If you do decide to deviate from the recipe, as I always say, you are doing this at your own risk.
The use of psyllium husk
Unlike the other roti recipes where cassava flour and tapioca starch are both used to create that elasticity, this time I used my very own flour blend along with psyllium husk.
The psyllium husk is an important element for allowing the roti to puff up and bend/fold just like roti would when it is made with wheat flour.
Do not skip this step at all because there are NO substitutes. You will also notice that I use my stand mixer to mix everthing together.
You can knead by hand instead BUT, I find it does require a bit more effort for the paste to come together in a smooth manner which is why I would recommend using a stand mixer.
Traditionally, roti is made on a tawa, but my new stovetop is electric and needs induction pans.
Unfortunately, finding an induction friendly tawa is nearly impossible which is why you see in the picture that I use my frying pan and trivet to puff the roti.
If you have a gas stove and a tawa then you can follow the instructions by hovering the roti over the flame by hanging it slightly over the tawa.
You can pair this roti with
- Curries
- Stews
- Main meals
- To accompany some sauce
The steps
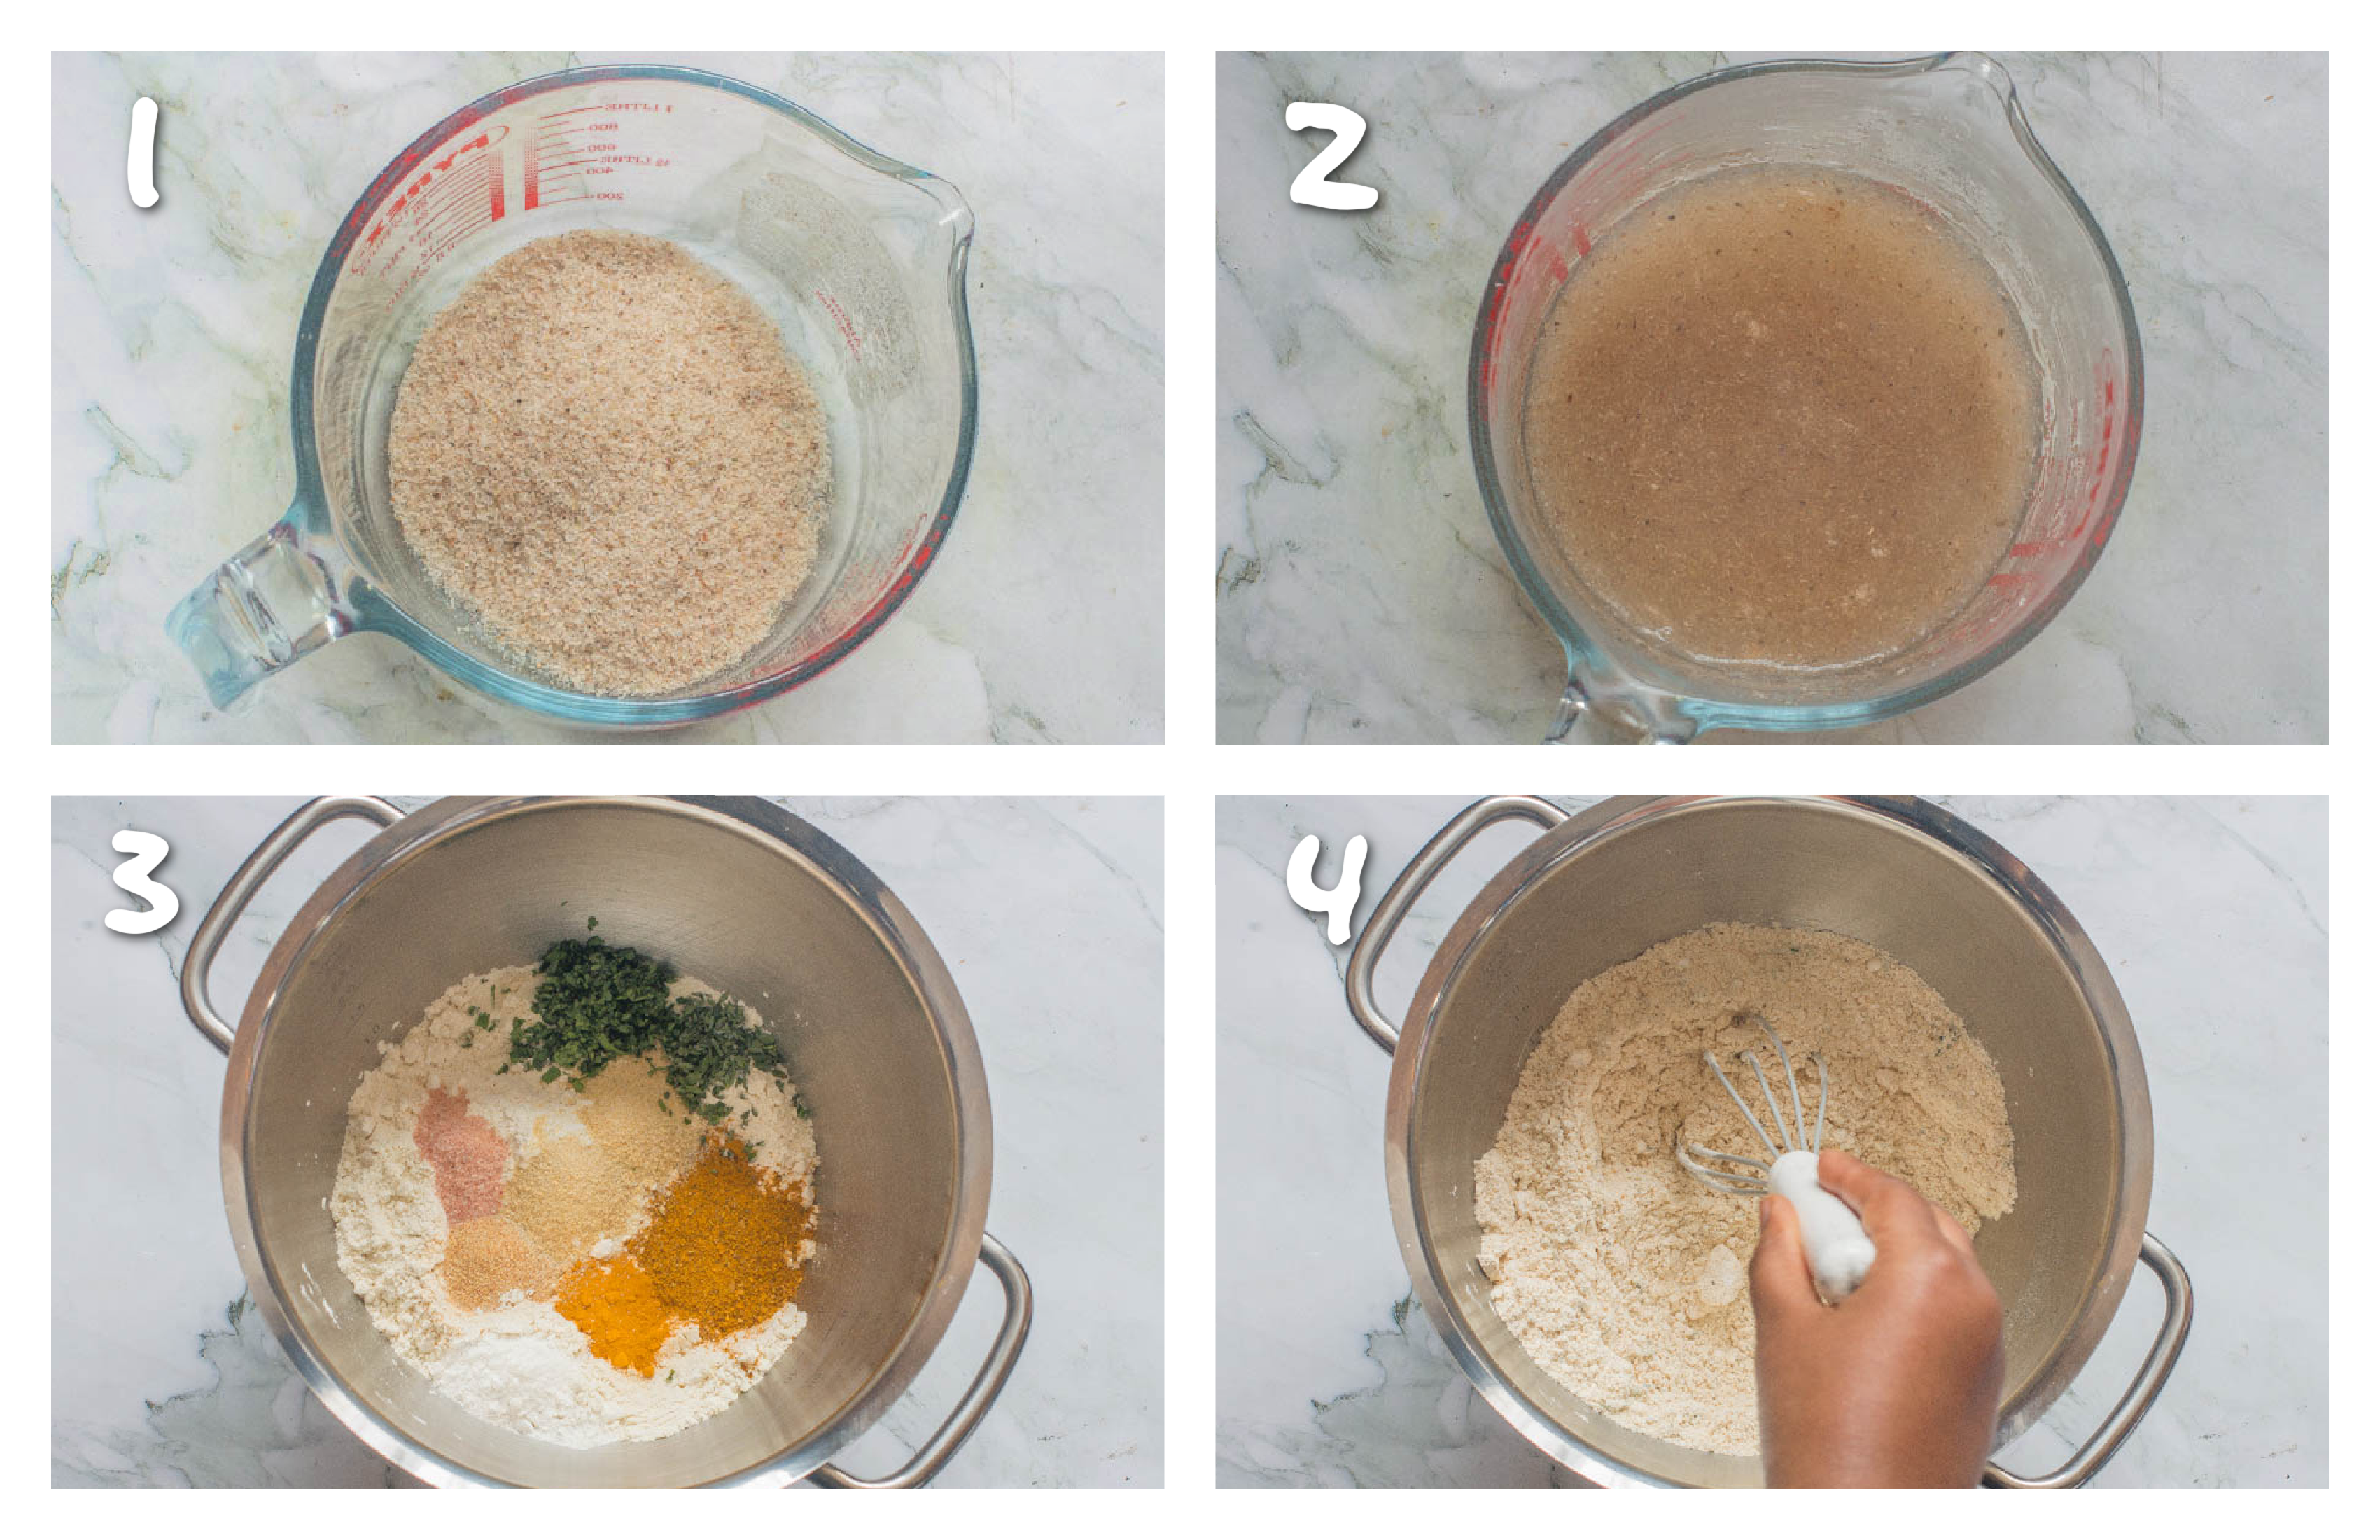
- Place the psyllium husk in a bowl/jug and combine with the hot water.
- Mix together until it looks like a paste and set aside.
- Place the gluten free flour, curry powder, turmeric powder, onion granules, garlic granules, baking powder, thyme , chadon beni and pink salt in a mixing bowl.
- Use a whisk to mix the dry ingredients together before fitting the mixer with a dough hook.
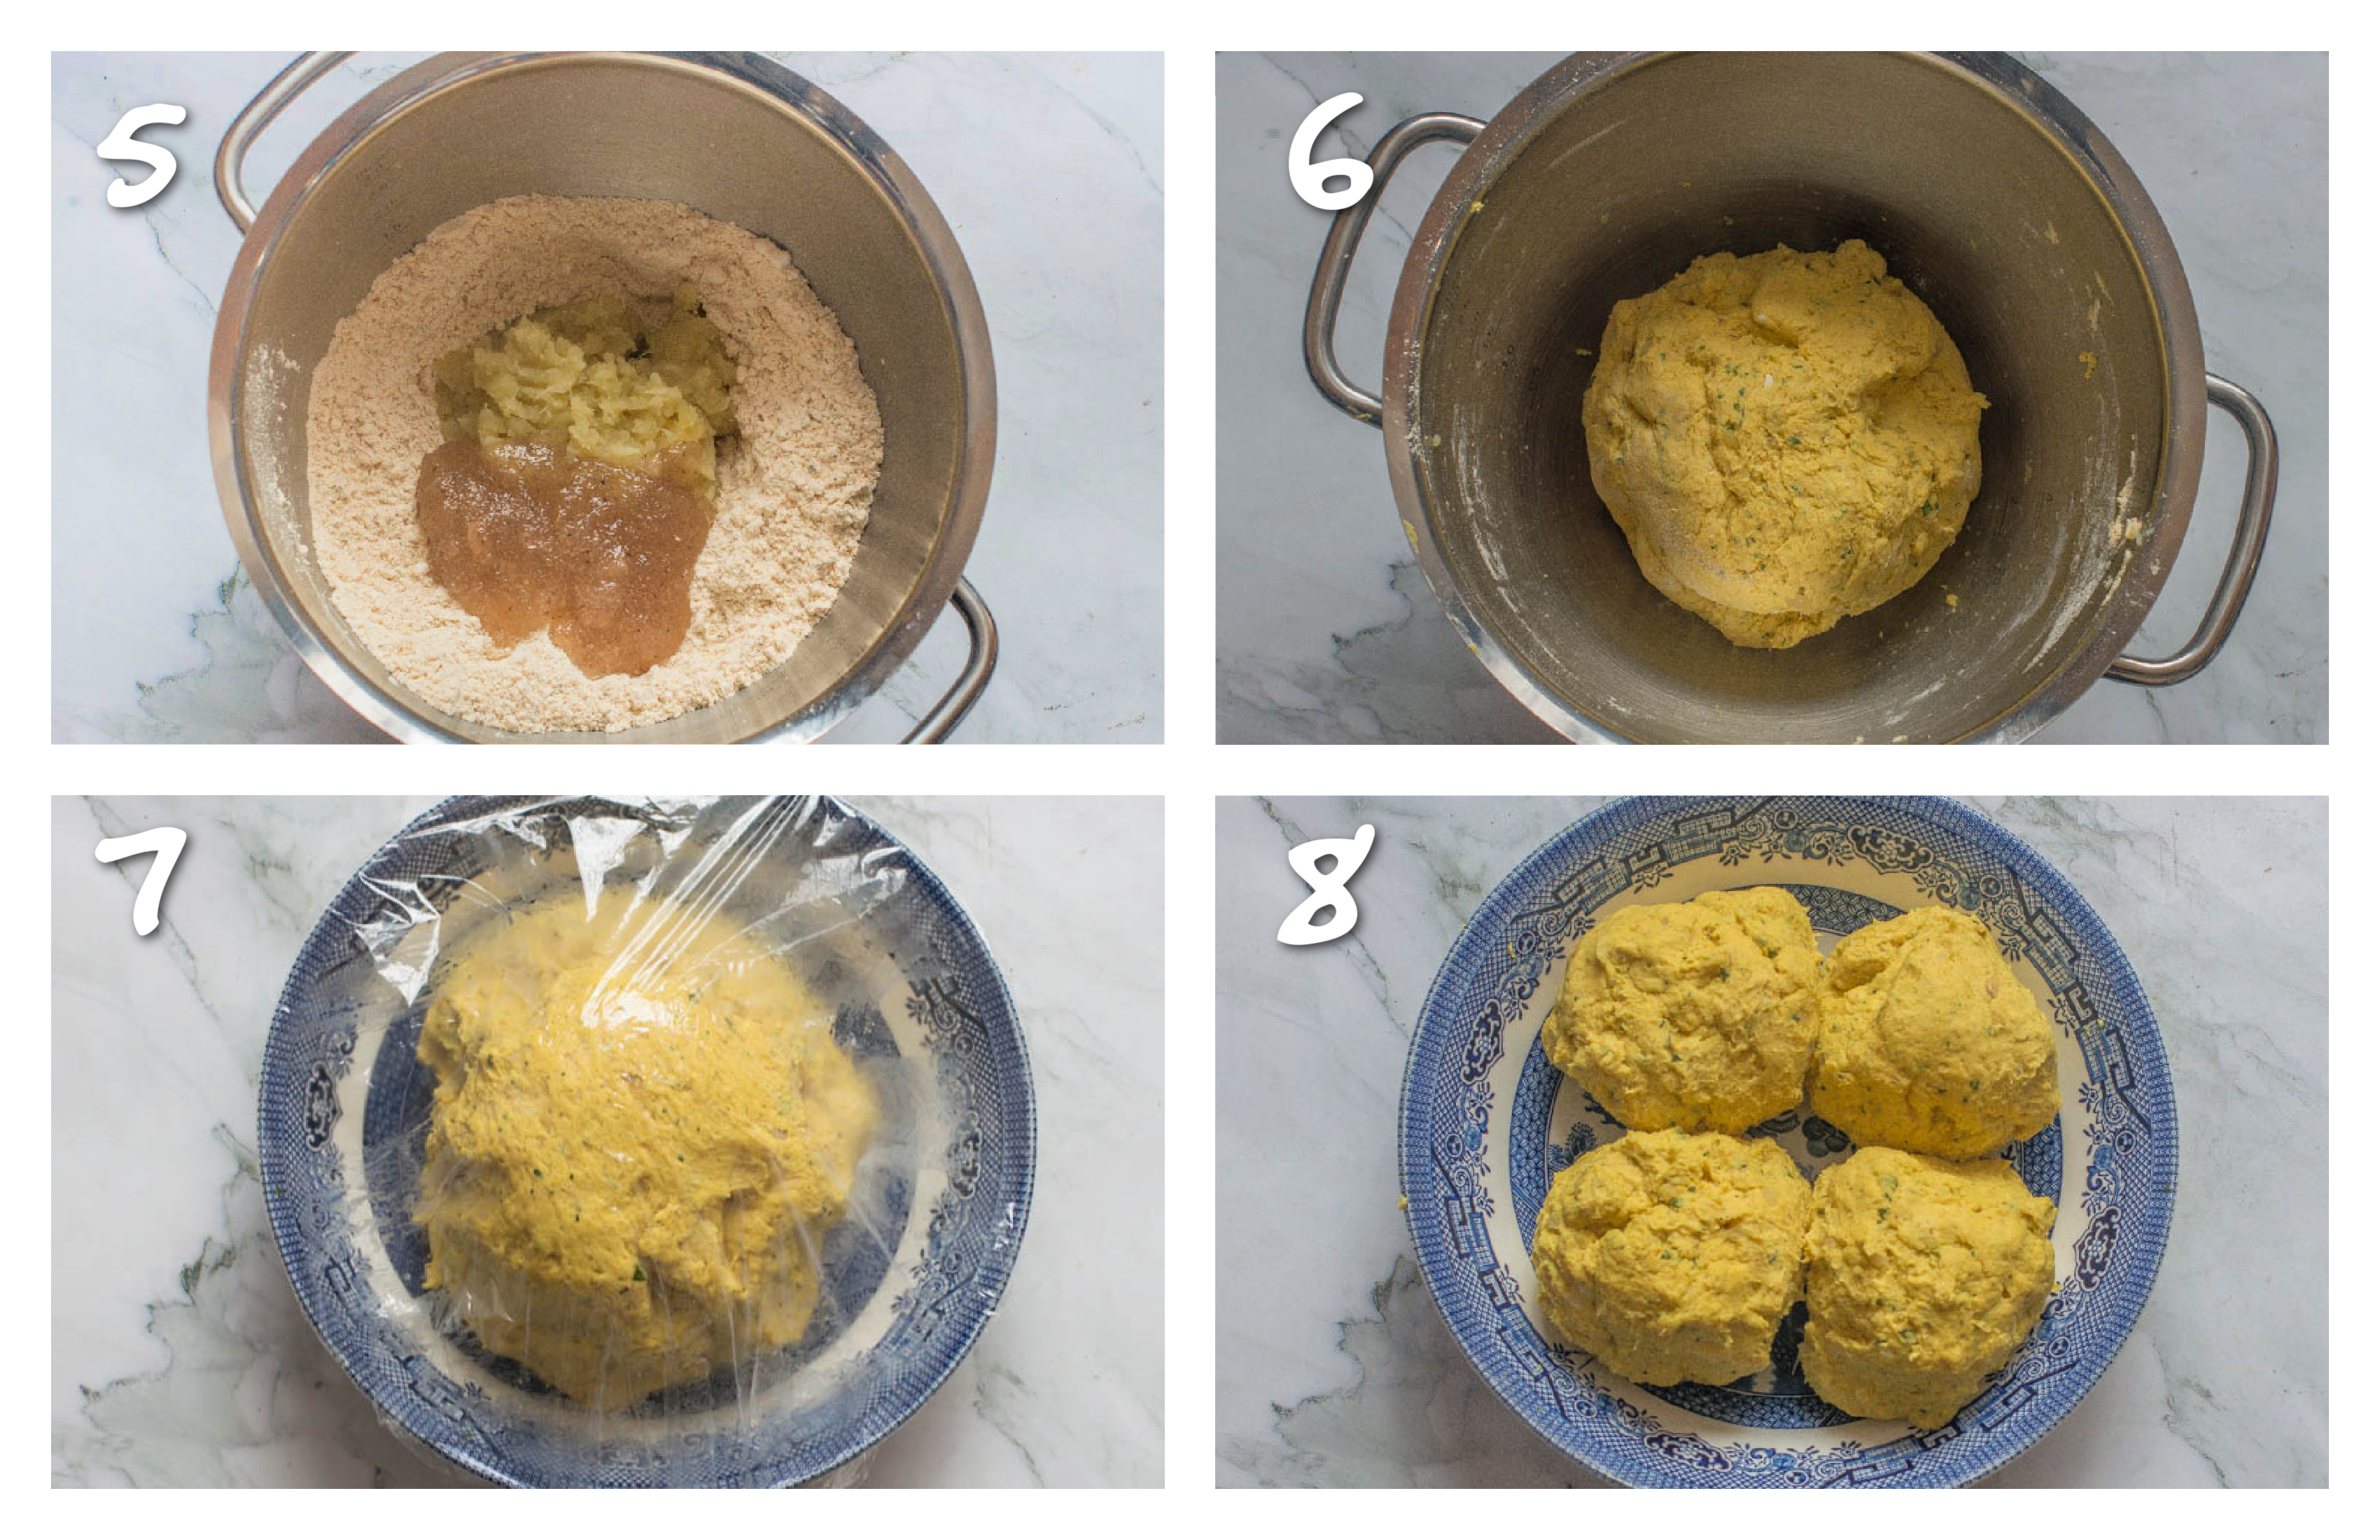
- Add the potato puree to the mixing bowl and start the mixer on the lowest speed and gradually increase the speed to high.
- While the mixer is running, add the psyllium husk paste in increments (you won't use it all) to form a pliable dough ball (the dough should be soft, firm and NOT sticky, if it is add more flour).
- Remove the dough from the mixer and place in a bowl and cover with either some plastic wrap or a damp cloth (this will keep it hydrated at all times).
- Split the dough into 4-6 equal parts (depending on how big you want your roti skin to be) and cover with the wrap/cloth.
- Lay some parchment paper on a clean surface and place one of the doughballs on the paper.
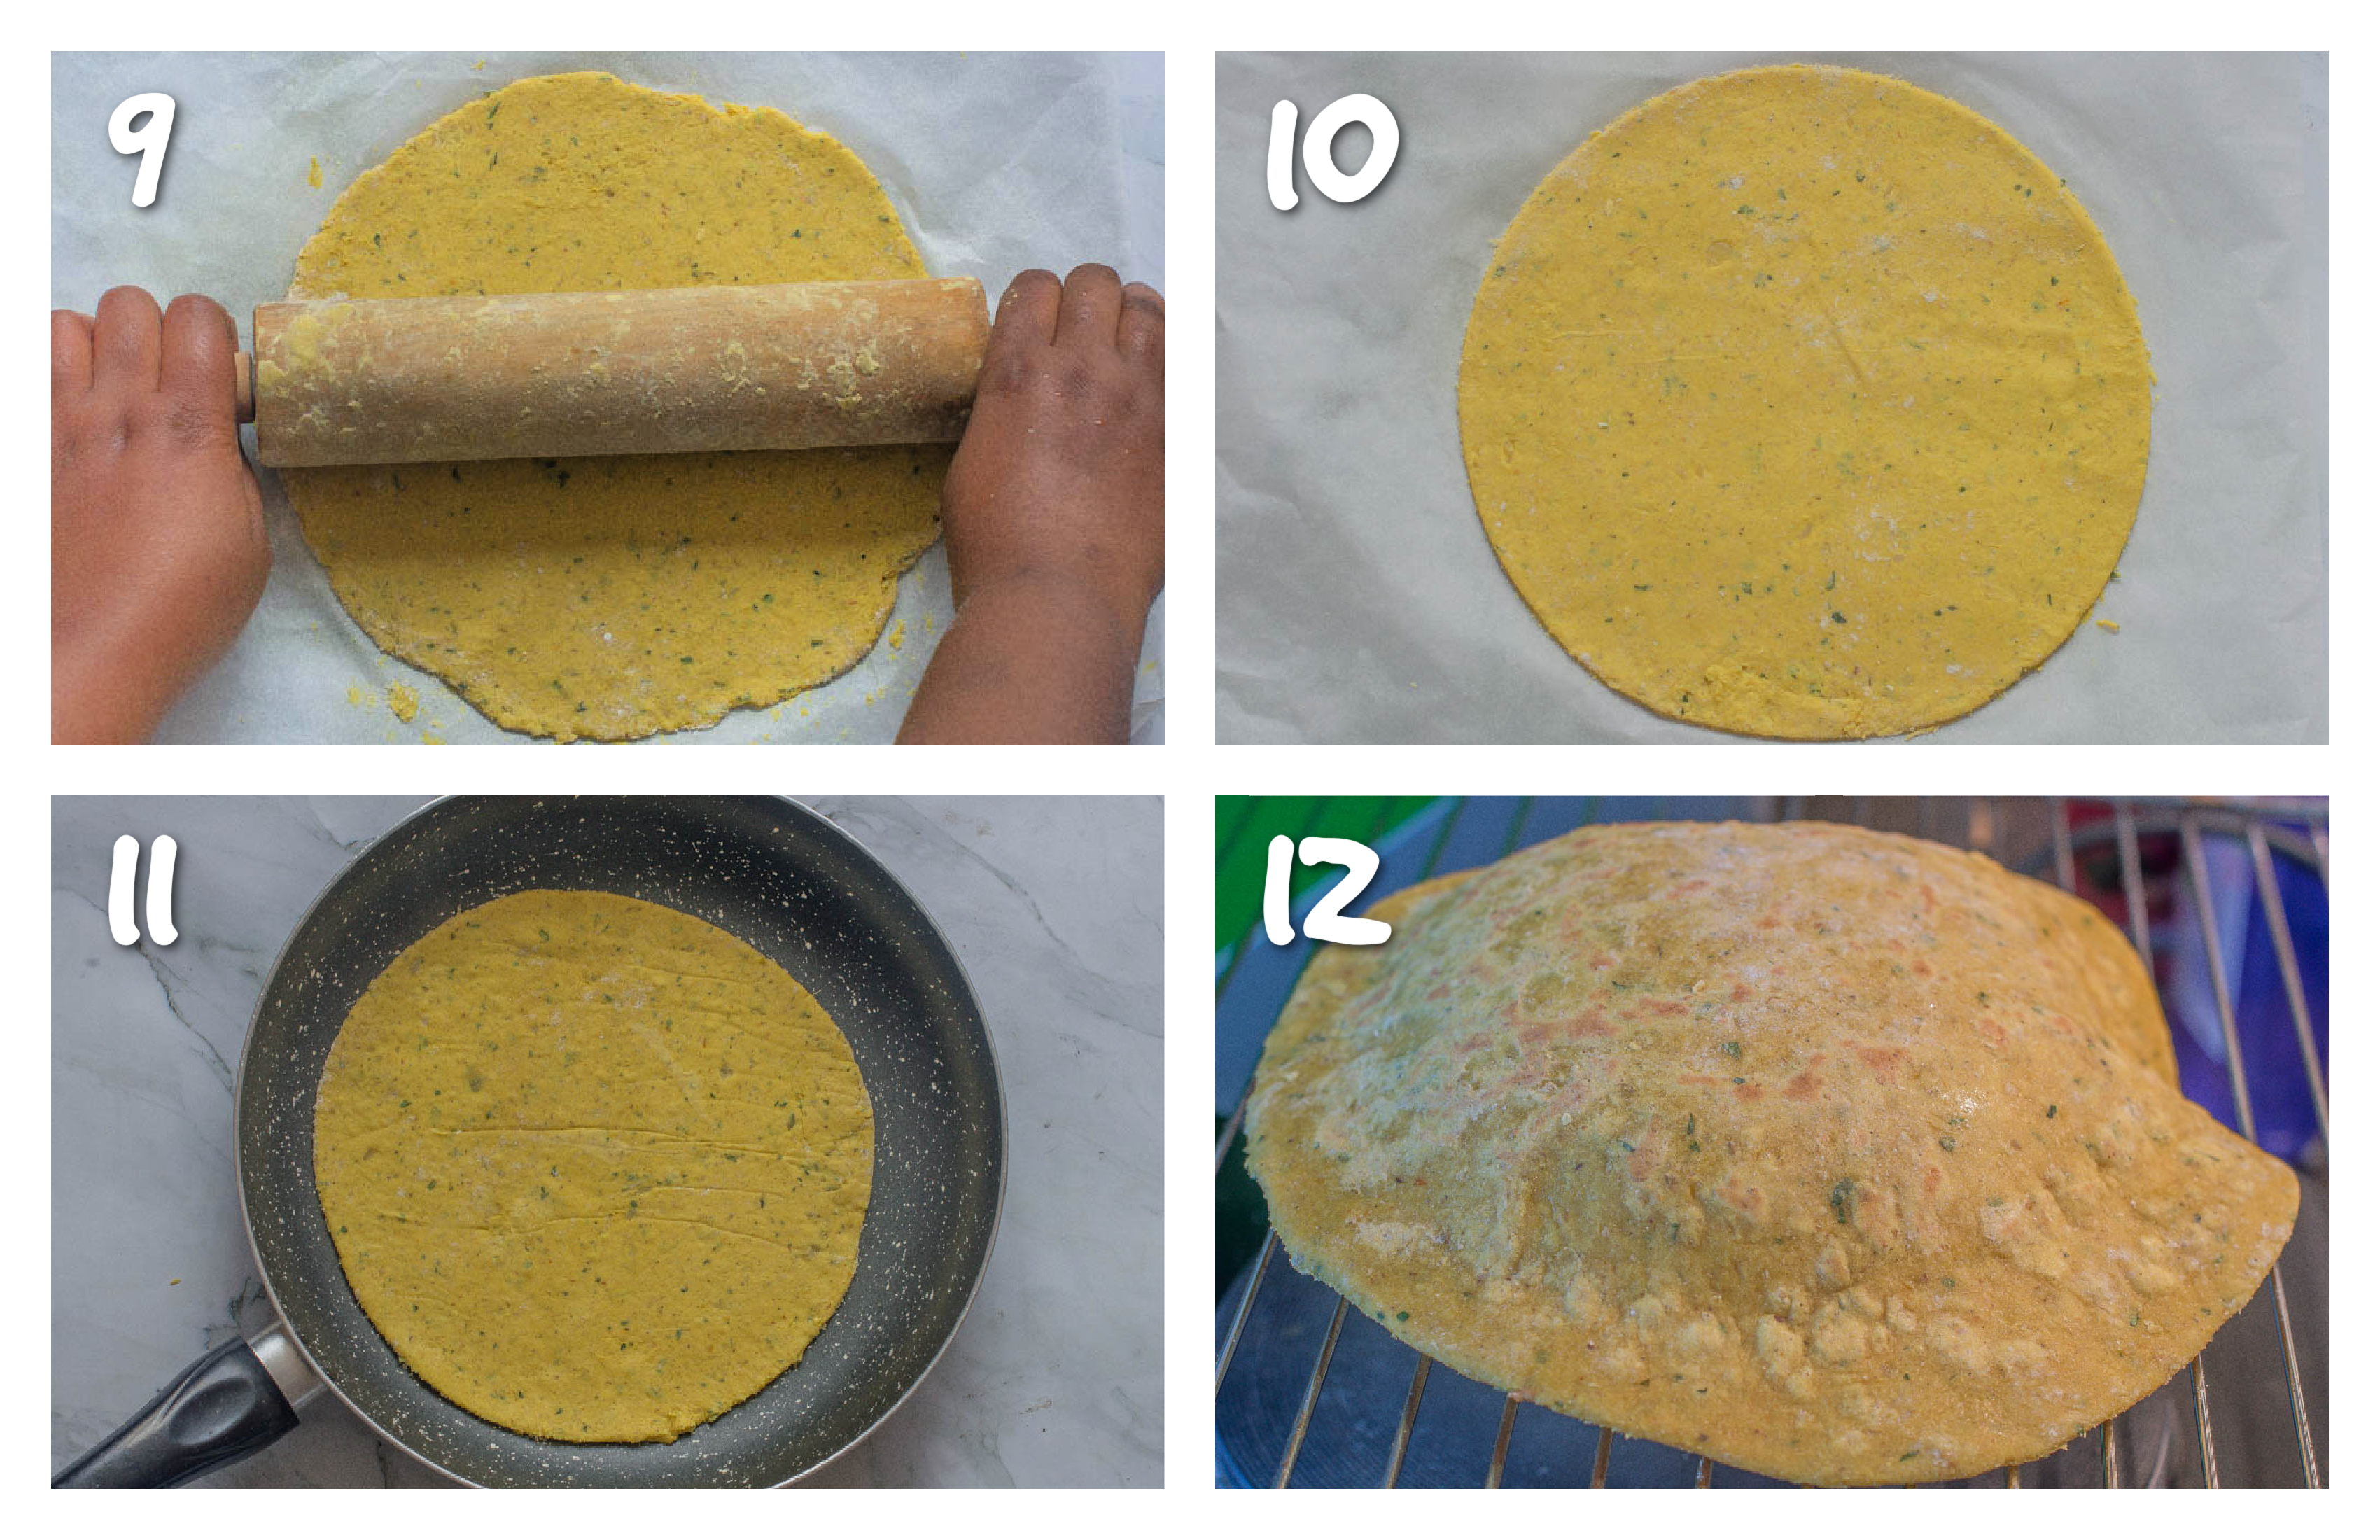
- Lightly dust a rolling pin with some gluten free flour then proceed to roll the dough as thin as possible to make a disc. Use a pizza cutter or knife to trim around the edges or to form the size that you desire (small discs are easier to work with, if you are a novice).
- Repeat the above step placing each disc on some parchment paper until 6-8 discs (depending on the size) are made. Shake off any excess dust if needed.
- Heat up the tawa/crepe pan or skillet on high heat, you want the pan to be piping hot before starting. Hover your hand over the pan to determine it's readiness.
- Place the dough on the hot pan then reduce the heat so it is slightly below high heat (not medium but not high so the roti burns, just in between).
- Leave the dough to cook for about one minute, until small bubbles, start to form and the side directly exposed to the tawa starts to brown a little (use an egg spatula or tongs to check this)
- Once the first side is ready, flip it over until the other side is slightly brown.
- At this point, you can place the roti directly on a roasting trivet (as pictured) and allow it to puff up. If not, skip this step and continue with step 18.
- Flip the roti again, reduce the heat to low and then push your tawa/pan slightly to one side so only half of it is on the burner/stovetop and push the roti so it is hanging slightly off the edge of the tawa.
- Use a damp cloth to apply gentle pressure while moving the roti in a counter clockwise motion while it starts to puff up (the amount of swelling will vary, some will completely while others only a few bubbles, this is normal especially being gluten free).
- As soon as it puffs put the tawa/pan directly back on the heat.
- Leave the roti for about 30 seconds before removing.
- Coat both sides of the roti, lightly with some melted vegan butter then place each roti skin on a plate lined with a damp cloth and cover.
Notes and tips
- For best results, I would recommend using a stand mixer with a dough hook to ensure the psyllium husk combines with the flour blend.
- I have only tried using my own flour blend for this recipe.
- You will need my Jamaican Curry Powder for this recipe.
- The amount of roti skin that this recipe makes will vary depending on the size.
- The dough should be FIRM and SOFT and NOT STICKY, if it is too sticky, you will need to counterbalance this by adding more flour.
- When making the paste with the psyllium husk, the water must be HOT.
- Be sure to add the paste in increments, do not add it all at once because you most likely won't need it all
- Roll out the dough of your roti as thin as possible, if it tears, it's too thin, you want it to be very thin and the texture very soft as this increases the likelihood of swelling.
- For best results, serve the roti while it is still warm.
- If you need to re-heat the roti then wrap it in aluminium foil and warm in the oven for a few minutes.
Recipes to pair the roti with
- Ital Stew
- Cuban Mojo Chicken
- Jamaican Curry Chicken
- Jackfruit Stew
- Dhal and Rice
- Saltfish and Callaloo
- Shrimp and Cabbage
Sauces to pair this with
**Don't forget to comment below and star rate if you have tried my recipes. Let's be friends and engage on YouTube, Facebook and Instagram I also like to pin on Pinterest, where you can find more amazing recipes.**

Sweet Potato Roti (Gluten Free)
Ingredients
- 4 tablespoon psyllium husk (40g)
- 1½ cup hot water (355ml)
- 3 cups Charla's gluten free flour (410g)
- 1 tablespoon curry powder
- 1 teaspoon turmeric powder
- 2 teaspoon onion granules
- 2 teaspoon garlic granules
- 1 teaspoon baking powder
- ½ tablespoon dried thyme
- 2 tablespoon chadon beni can use cilantro/fresh coriander instead
- 1 teaspoon pink salt
- ¾ cup sweet potato puree (210g)
Instructions
- Place the psyllium husk in a bowl/jug and combine with the hot water.
- Mix together until it looks like a paste and set aside.
- Place the gluten free flour, curry powder, turmeric powder, onion granules, garlic granules, baking powder, thyme , chadon beni and pink salt in a mixing bowl.
- Use a whisk to mix the dry ingredients together before fitting the mixer with a dough hook.
- Add the potato puree to the mixing bowl and start the mixer on the lowest speed and gradually increase the speed to high.
- While the mixer is running, add the psyllium husk paste in increments (you won't use it all) to form a pliable dough ball (the dough should be soft, firm and NOT sticky, if it is add more flour).
- Remove the dough from the mixer and place in a bowl and cover with either some plastic wrap or a damp cloth (this will keep it hydrated at all times).
- Split the dough into 4-6 equal parts (depending on how big you want your roti skin to be) and cover with the wrap/cloth.
- Lay some parchment paper on a clean surface and place one of the doughballs on the paper.
- Lightly dust a rolling pin with some gluten free flour then proceed to roll the dough as thin as possible to make a disc.
- Use a pizza cutter or knife to trim around the edges or to form the size that you desire (small discs are easier to work with, if you are a novice).
- Repeat the above step placing each disc on some parchment paper until 6-8 discs (depending on the size) are made. Shake off any excess dust if needed.
- Heat up the tawa/crepe pan or skillet on high heat, you want the pan to be piping hot before starting. Hover your hand over the pan to determine it's readiness.
- Place the dough on the hot pan then reduce the heat so it is slightly below high heat (not medium but not high so the roti burns, just in between).
- Leave the dough to cook for about one minute, until small bubbles, start to form and the side directly exposed to the tawa starts to brown a little (use an egg spatula or tongs to check this)
- Once the first side is ready, flip it over until the other side is slightly brown.
- At this point, you can place the roti directly on a roasting trivet (as pictured) and allow it to puff up. If not, skip this step and continue with step 18.
- Flip the roti again, reduce the heat to low and then push your tawa/pan slightly to one side so only half of it is on the burner/stovetop and push the roti so it is hanging slightly off the edge of the tawa.
- Use a damp cloth to apply gentle pressure while moving the roti in a counter clockwise motion while it starts to puff up (the amount of swelling will vary, some will completely while others only a few bubbles, this is normal especially being gluten free).
- As soon as it puffs put the tawa/pan directly back on the heat.Leave the roti for about 30 seconds before removing.
- Coat both sides of the roti, lightly with some melted vegan butter then place each roti skin on a plate lined with a damp cloth and cover.
Notes
- For best results, I would recommend using a stand mixer with a dough hook to ensure the psyllium husk combines with the flour blend.
- I have only tried using my own flour blend for this recipe.
- You will need my Jamaican Curry Powder for this recipe.
- The amount of roti skin that this recipe makes will vary depending on the size.
- The dough should be FIRM and SOFT and NOT STICKY, if it is too sticky, you will need to counterbalance this by adding more flour.
- When making the paste with the psyllium husk, the water must be HOT.
- Be sure to add the paste in increments, do not add it all at once because you most likely won't need it all
- Roll out the dough of your roti as thin as possible, if it tears, it's too thin, you want it to be very thin and the texture very soft as this increases the likelihood of swelling.
- For best results, serve the roti while it is still warm.
- If you need to re-heat the roti then wrap it in aluminium foil and warm in the oven for a few minutes.


Nancy says
Can you use Sweet Potatoo Flour instead?
What adjustments need to be made?
Charla says
Hi Nancy, I haven't tested it with sweet potato flour and I'm not sure if it would hold up so it's best to adhere to the recipe as it has been written.
Ram P Mony says
I live in South India. I've been told that shado beni is way stronger/ more pungent than cilantro or coriander? Should I therefore replace 2 tbsp shado beni (30gm), which I have unfortunately never seen sold here, with 4 tbsp of cilantro/ coriander (60 gm)?
Charla says
Hello, yes chadon beni is more intense than coriander so yes you can certainly increase the amount to 3tbsp instead, that should suffice. I hope that helps!
Wanda says
I've always wanted to try making roti. Your recipe looks easy! Bookmarking to make this weekend!
Charla says
Thank you Wanda.
Amy says
I love how these are gluten-free! Thank you for a new recipe to enjoy!
Charla says
You are welcome Amy.
rebecca says
I love roti, this is such a simple recipe and it's great to find a GF version that doesn't just crumble
Charla says
Yes, it is very much foolproof.
dana says
These were awesome! This was my first time making roti from scratch and it was a much smoother process than I imagined. Your post was so helpful, and I was so proud of myself lol.
Charla says
Yay! I'm so glad to hear that Dana.
Gloria says
Wow, these look cooked to perfection. I would have never thought of making them with sweet potatoes.
Charla says
It's such a great Concept!