
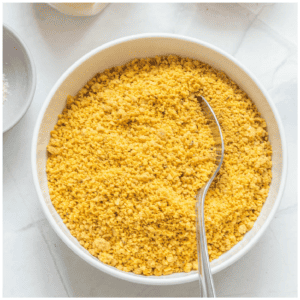
Learn how to make homemade golden gluten free breadcrumbs from scratch without depending on bread. These breadcrumbs are grain free, vegan friendly and made from almond flour. They make a light and crispy coating or topping for vegetables, meat or baked goods that need a boost of crunchiness.
Breadcrumbs are a very popular ingredient in the culinary world. At some people we have either eaten them or used them in some homemade baking.
The quickest way to make any breadcrumbs is from leftover/stale bread.
You pretty much breakdown them down in a food processor and mill into a fine consistency and hey presto, you have breadcrumbs.
Gluten free bread is very expensive and I know most people don't like to waste any or it have excess bread lying around.
I wanted to deliberately show you my method for making breadcrumbs without relying on bread.
I've been using this method for awhile now but never managed to dedicate an entire post to it.
Homemade gluten free breadcrumbs
For my folks who are gluten free and/or wheat free, you will know that how difficult it is to dodge and weave gluten in breading, especially when dining out.
I've heard the stories, but the good news is you can completely control that aspect in your own household, by making your own.
I love making my own breadcrumbs from scratch and you should too for the following reasons;
- You have complete control over what ingredients are used
- You can double, triple or quadruple the amount
- You can use it for sweet or savoury goods
- Free from additives or preservatives
- Most of the ingredients used are common in gluten free cooking
- You don't have to rely on using leftover bread
- It is significantly cheaper than store bought gluten free breadcrumbs
- It's suitable for gluten free, keto and paleo lifestyles
As you can see from the list above, those are some good reasons to try this recipe.
Add ins
These breadcrumbs work for both savoury and sweet dishes. You can literally add any herbs, spices or even sweetener.
Some of those include;
- Cinnamon
- Nutmeg
- Coconut/raw cane sugar
- Onion granules
- Garlic granules
- Dill
- Thyme
- chadon beni/culantro
- Parsley
- Nutritional yeast
- Sage
- Cumin
These are just a few ideas of what you could add to make your breadcrumbs accordingly to what you are using them for.
Recipe preparation
Before we get started, I'm going to walk you through the entire process so you are confident in making your own breadcrumbs.
I will forewarn you that there are 2 parts to this recipe. The first part involves cooking on the stove top and the second bit, involves the oven.
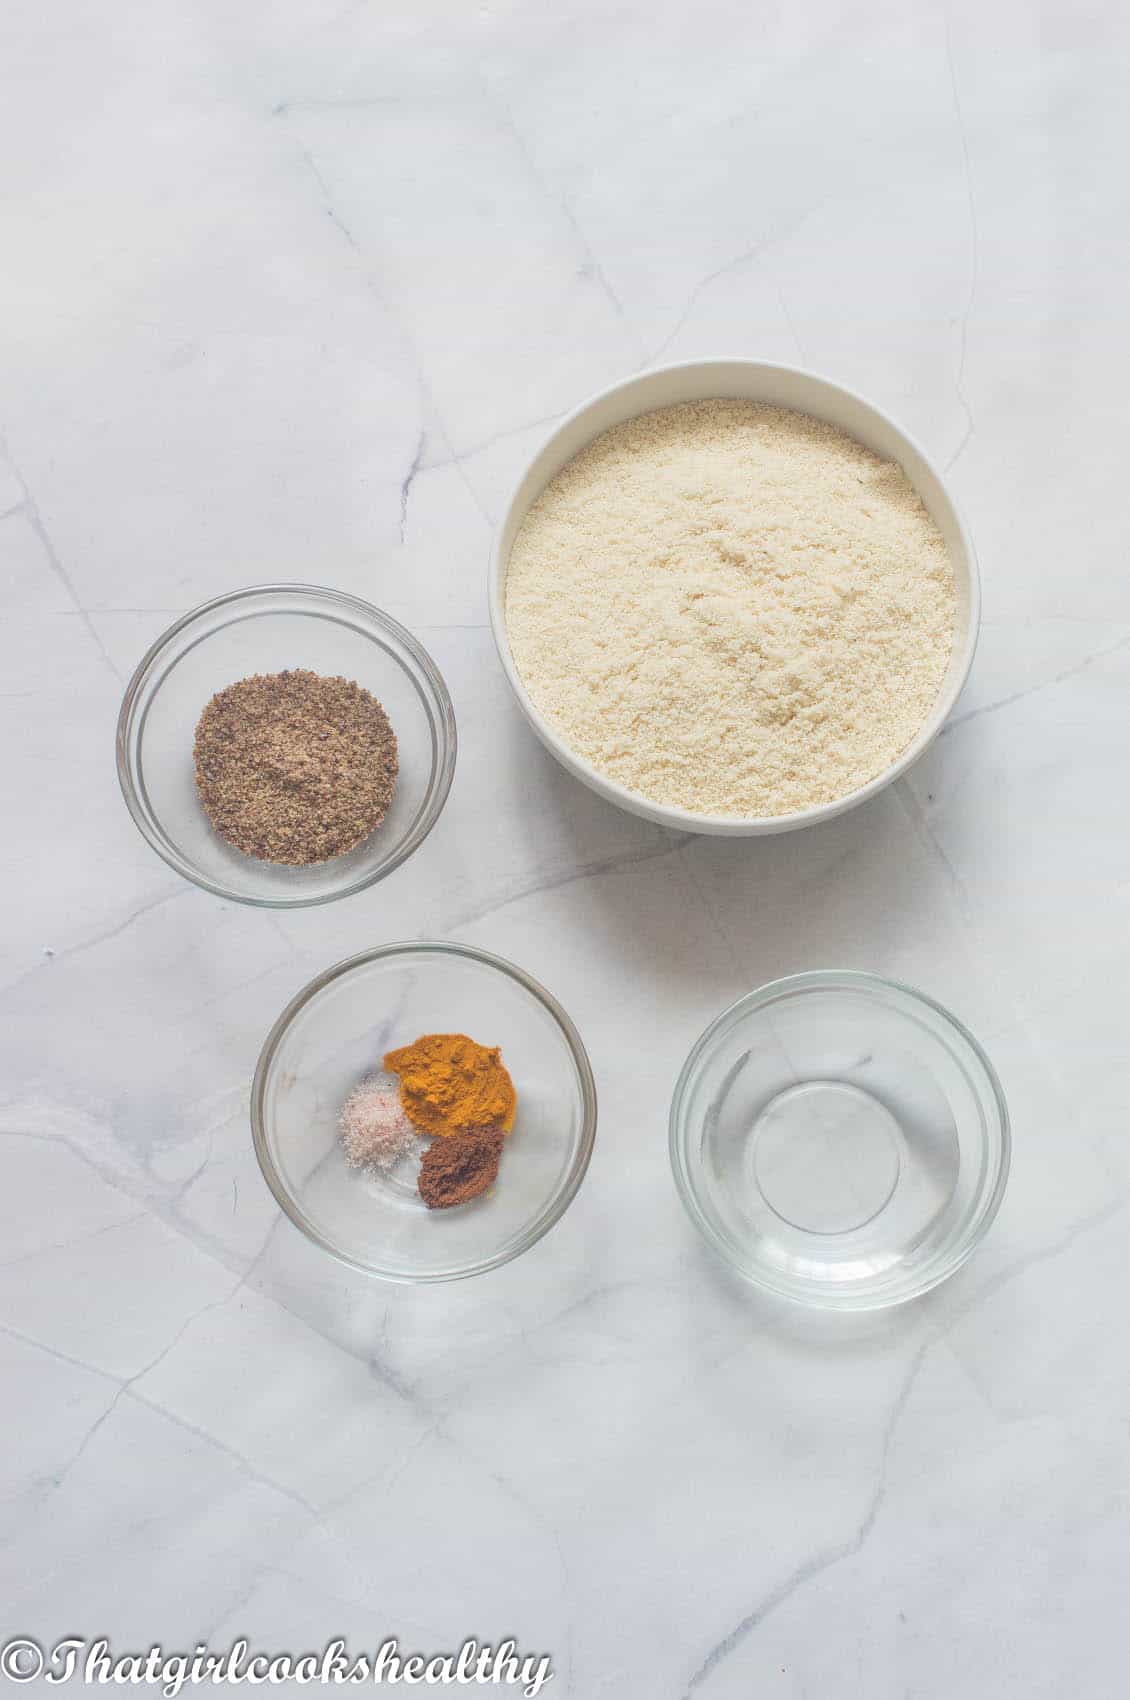
As you can see from the ingredients that you need, it's very much a minimalist recipe.
The first thing you need to do is create a soft, pliable dough ball with the almond flour, ground flaxseed and water.
I used ¼ cup of water, you shouldn't need any more than that, but it's always advisable to have more to hand, just in case.
Once the dough ball is made, it's time to transfer it to a non stick frying pan or skillet on the stovetop.
The ball needs to be broken down on medium-low heat, what we are doing here is evaporating the moisture from the dough and eventually creating dried breadcrumbs.
Start by breaking down the dough using a spatula and as the moisture draws out, the dough will turn to breadcrumbs (this is an in between stage).
I personally like to use my pastry cutter to further breakdown the breadcrumbs.
For me I'm able to get the consistency I need without having to mill the breadcrumbs in my spice grinder/food processor.
Don't worry if your breadcrumbs are chunky because you have the option of breaking them down even further in a food processor/spice grinder.
The entire process of drawing out the moisture will take anything from 20-30 minutes so some patience and babysitting the pan is required.
Once the breadcrumbs start to form, about 80-90% of the moisture should be gone, you will know when the breadcrumbs are ready because the texture will be crumbly and dry.
Inspect a few by removing a few and rolling them around in between your finger tips.
Even though the breadcrumbs may seem bone dry, they will be transferred to the oven.
To ensure that the breadcrumbs are completely dry and optimise the taste by toasting them.
Before placing the breadcrumbs in the oven, it's best to add whatever herbs, spices and other add ins before toasting.
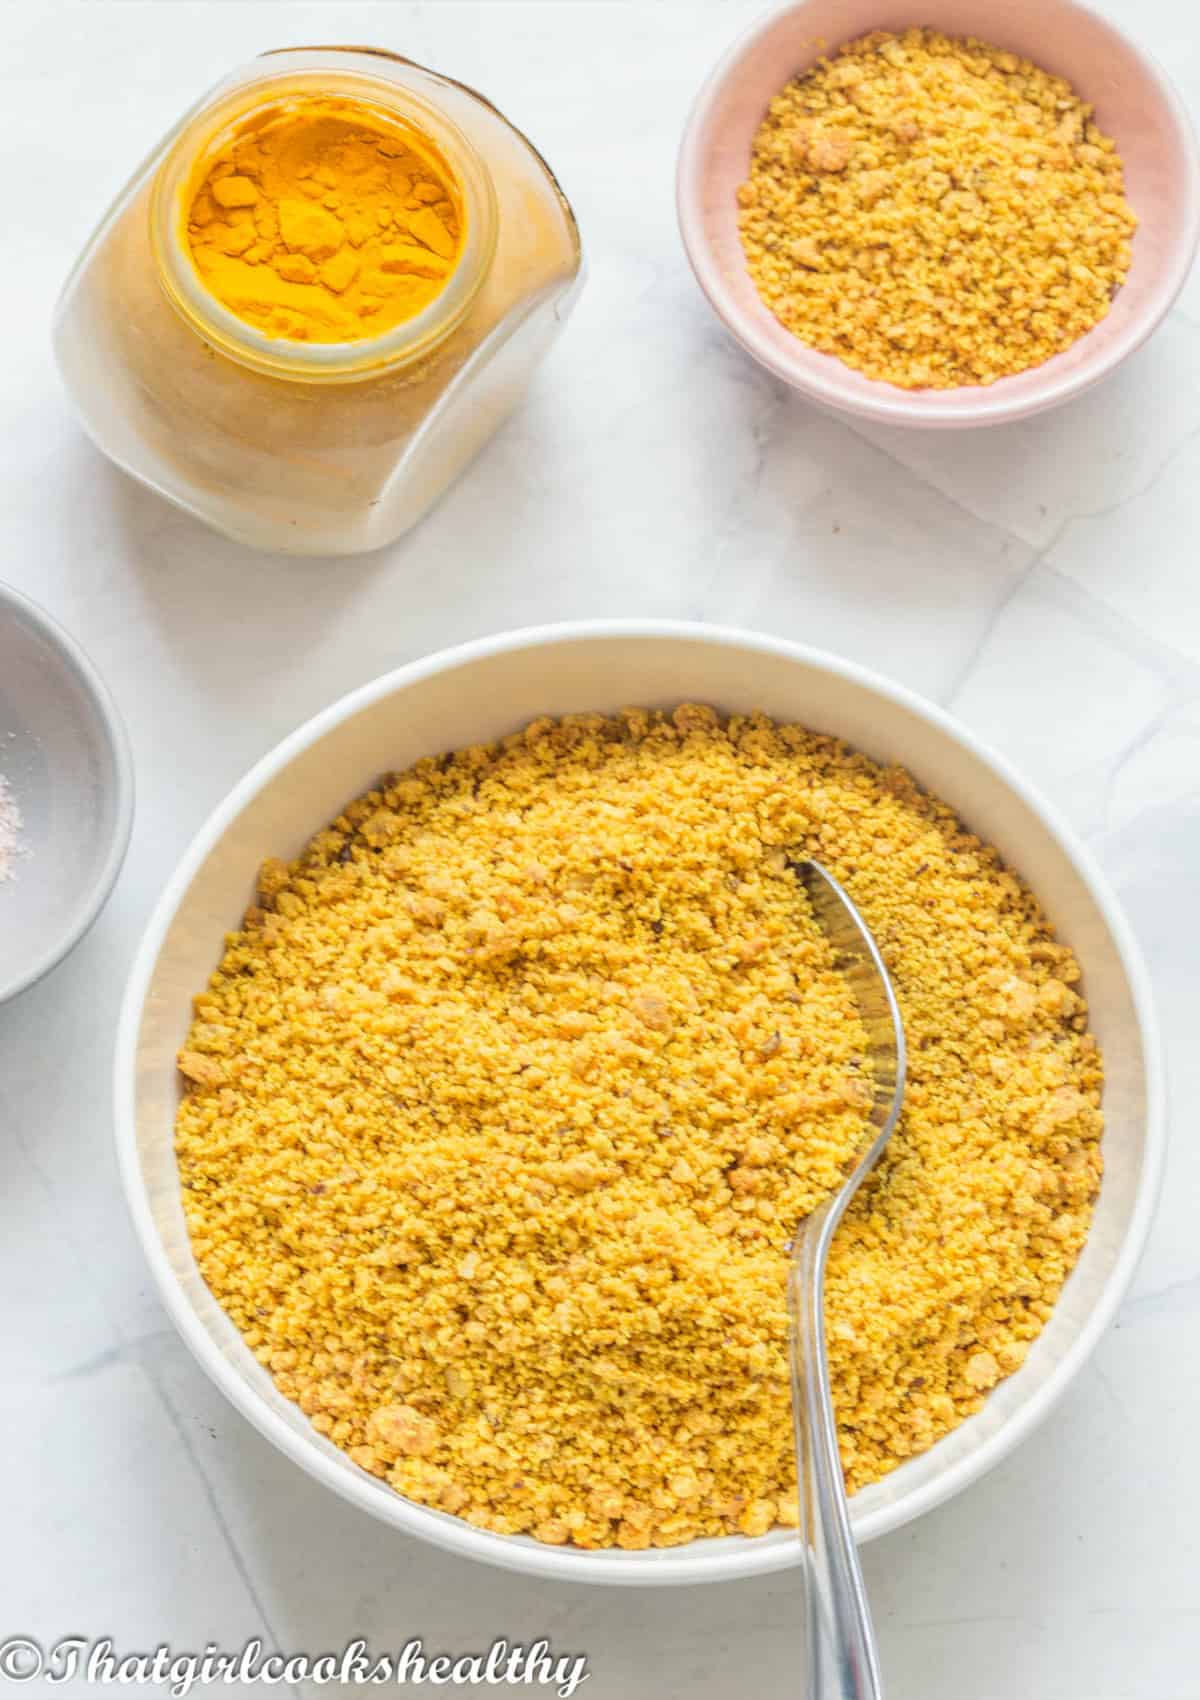
I used a small amount of paprika, turmeric and pink salt for taste and to add colour. If you want golden breadcrumbs then adding the paprika and turmeric is essential.
The amount isn't overpowering nor does it compromise that taste in terms of what you will be using the breadcrumbs for.
To be on the safe side, it's best to do a taste test and adjust or modify, if at all, according to your preference.
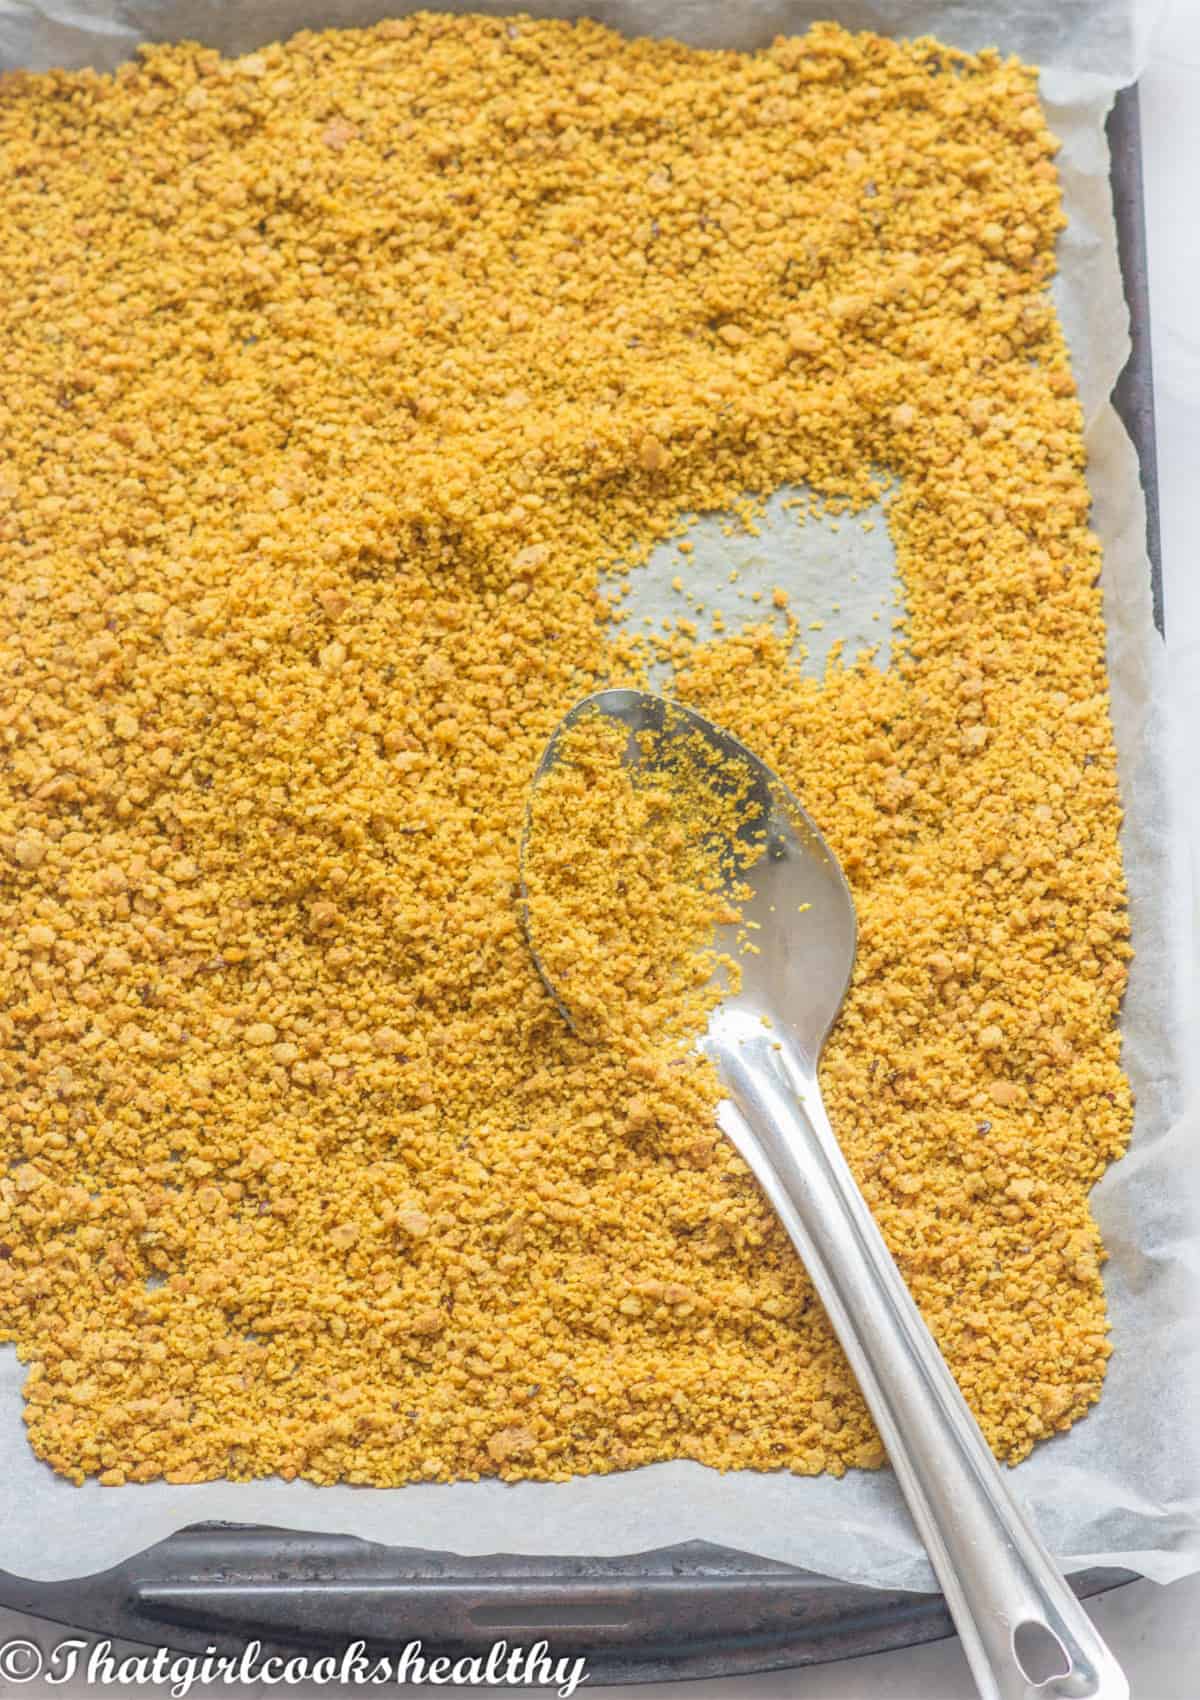
Once you are satisfied with the taste, then you will need to place the breadcrumbs on a baking tray lined with parchment and complete the drying process while toasting them until they are golden.
It should take 15-20 minutes to yield a more in depth colour, you will already have some colour from using the paprika and turmeric spices but the oven will heighten this.
The steps
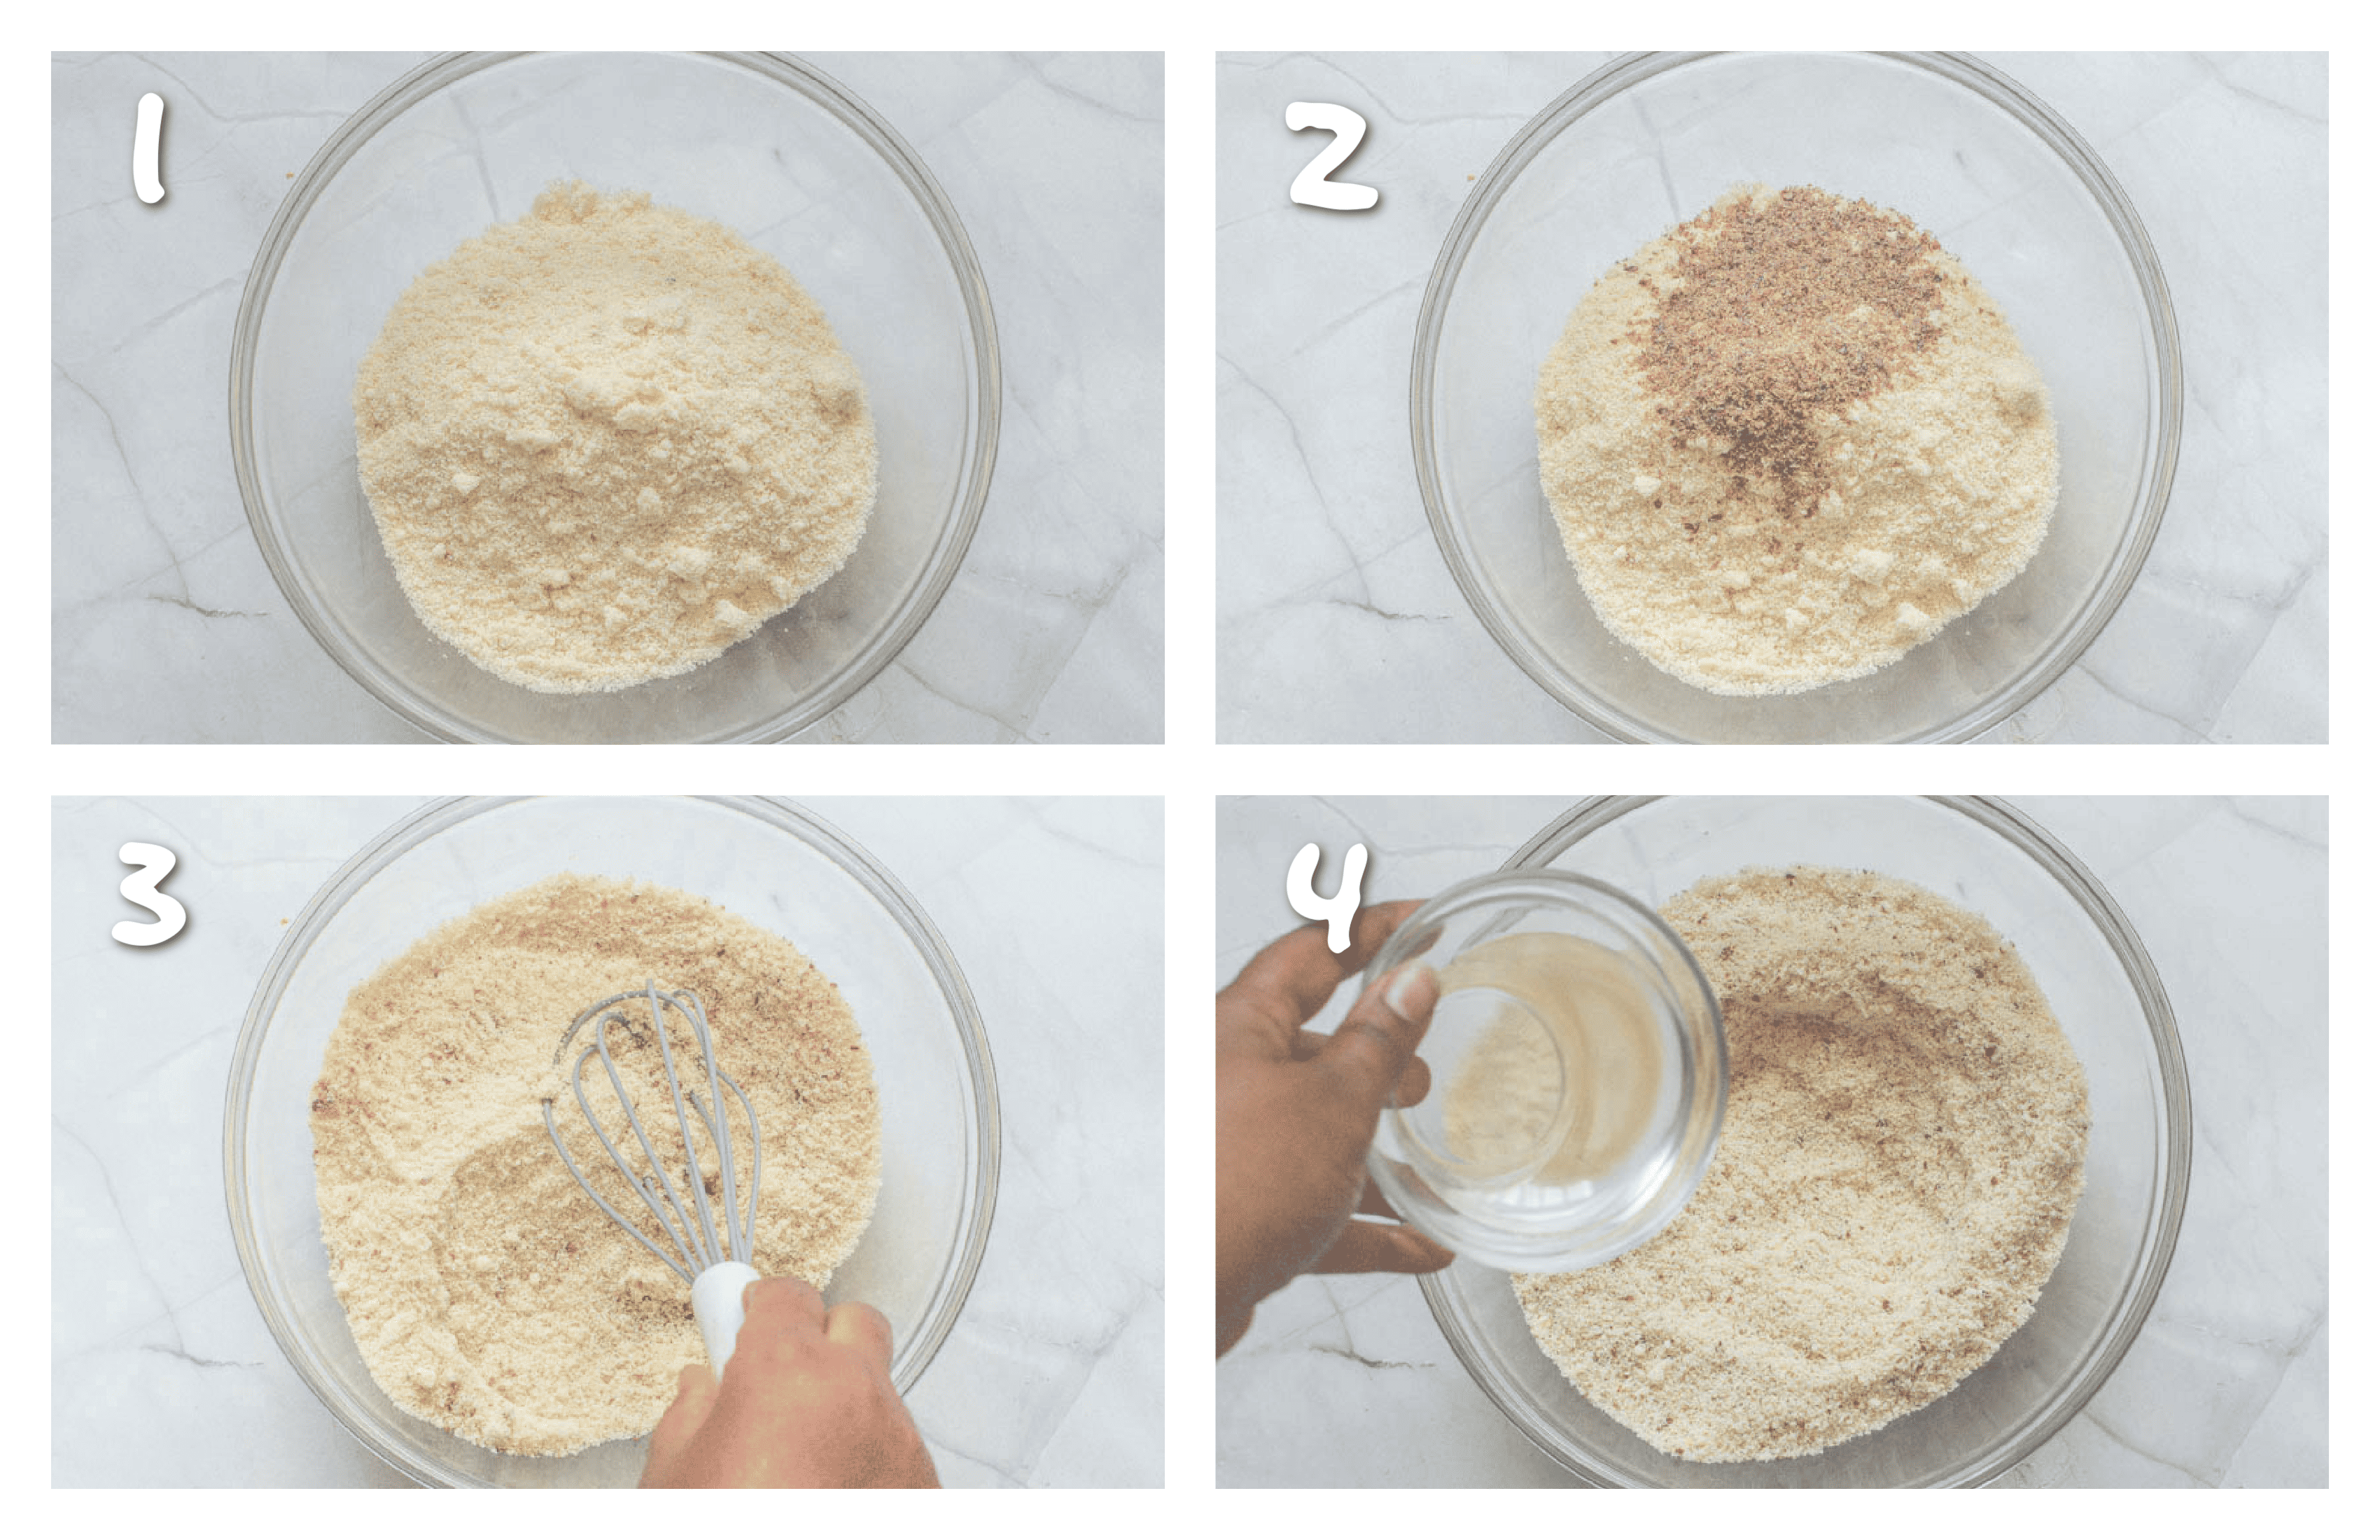
- Place the almond flour and ground flaxseed in a large bowl.
- Whisk to thoroughly combine and make a well in the centre of the bowl.
- Pour the water into the centre of the bowl.
- Use your hands to knead into a pliable dough ball (it shouldn't be dry nor too sticky).
- Preheat a large non stick frying pan or skillet on medium heat.
- Place the dough ball in the centre of the pan/skillet.
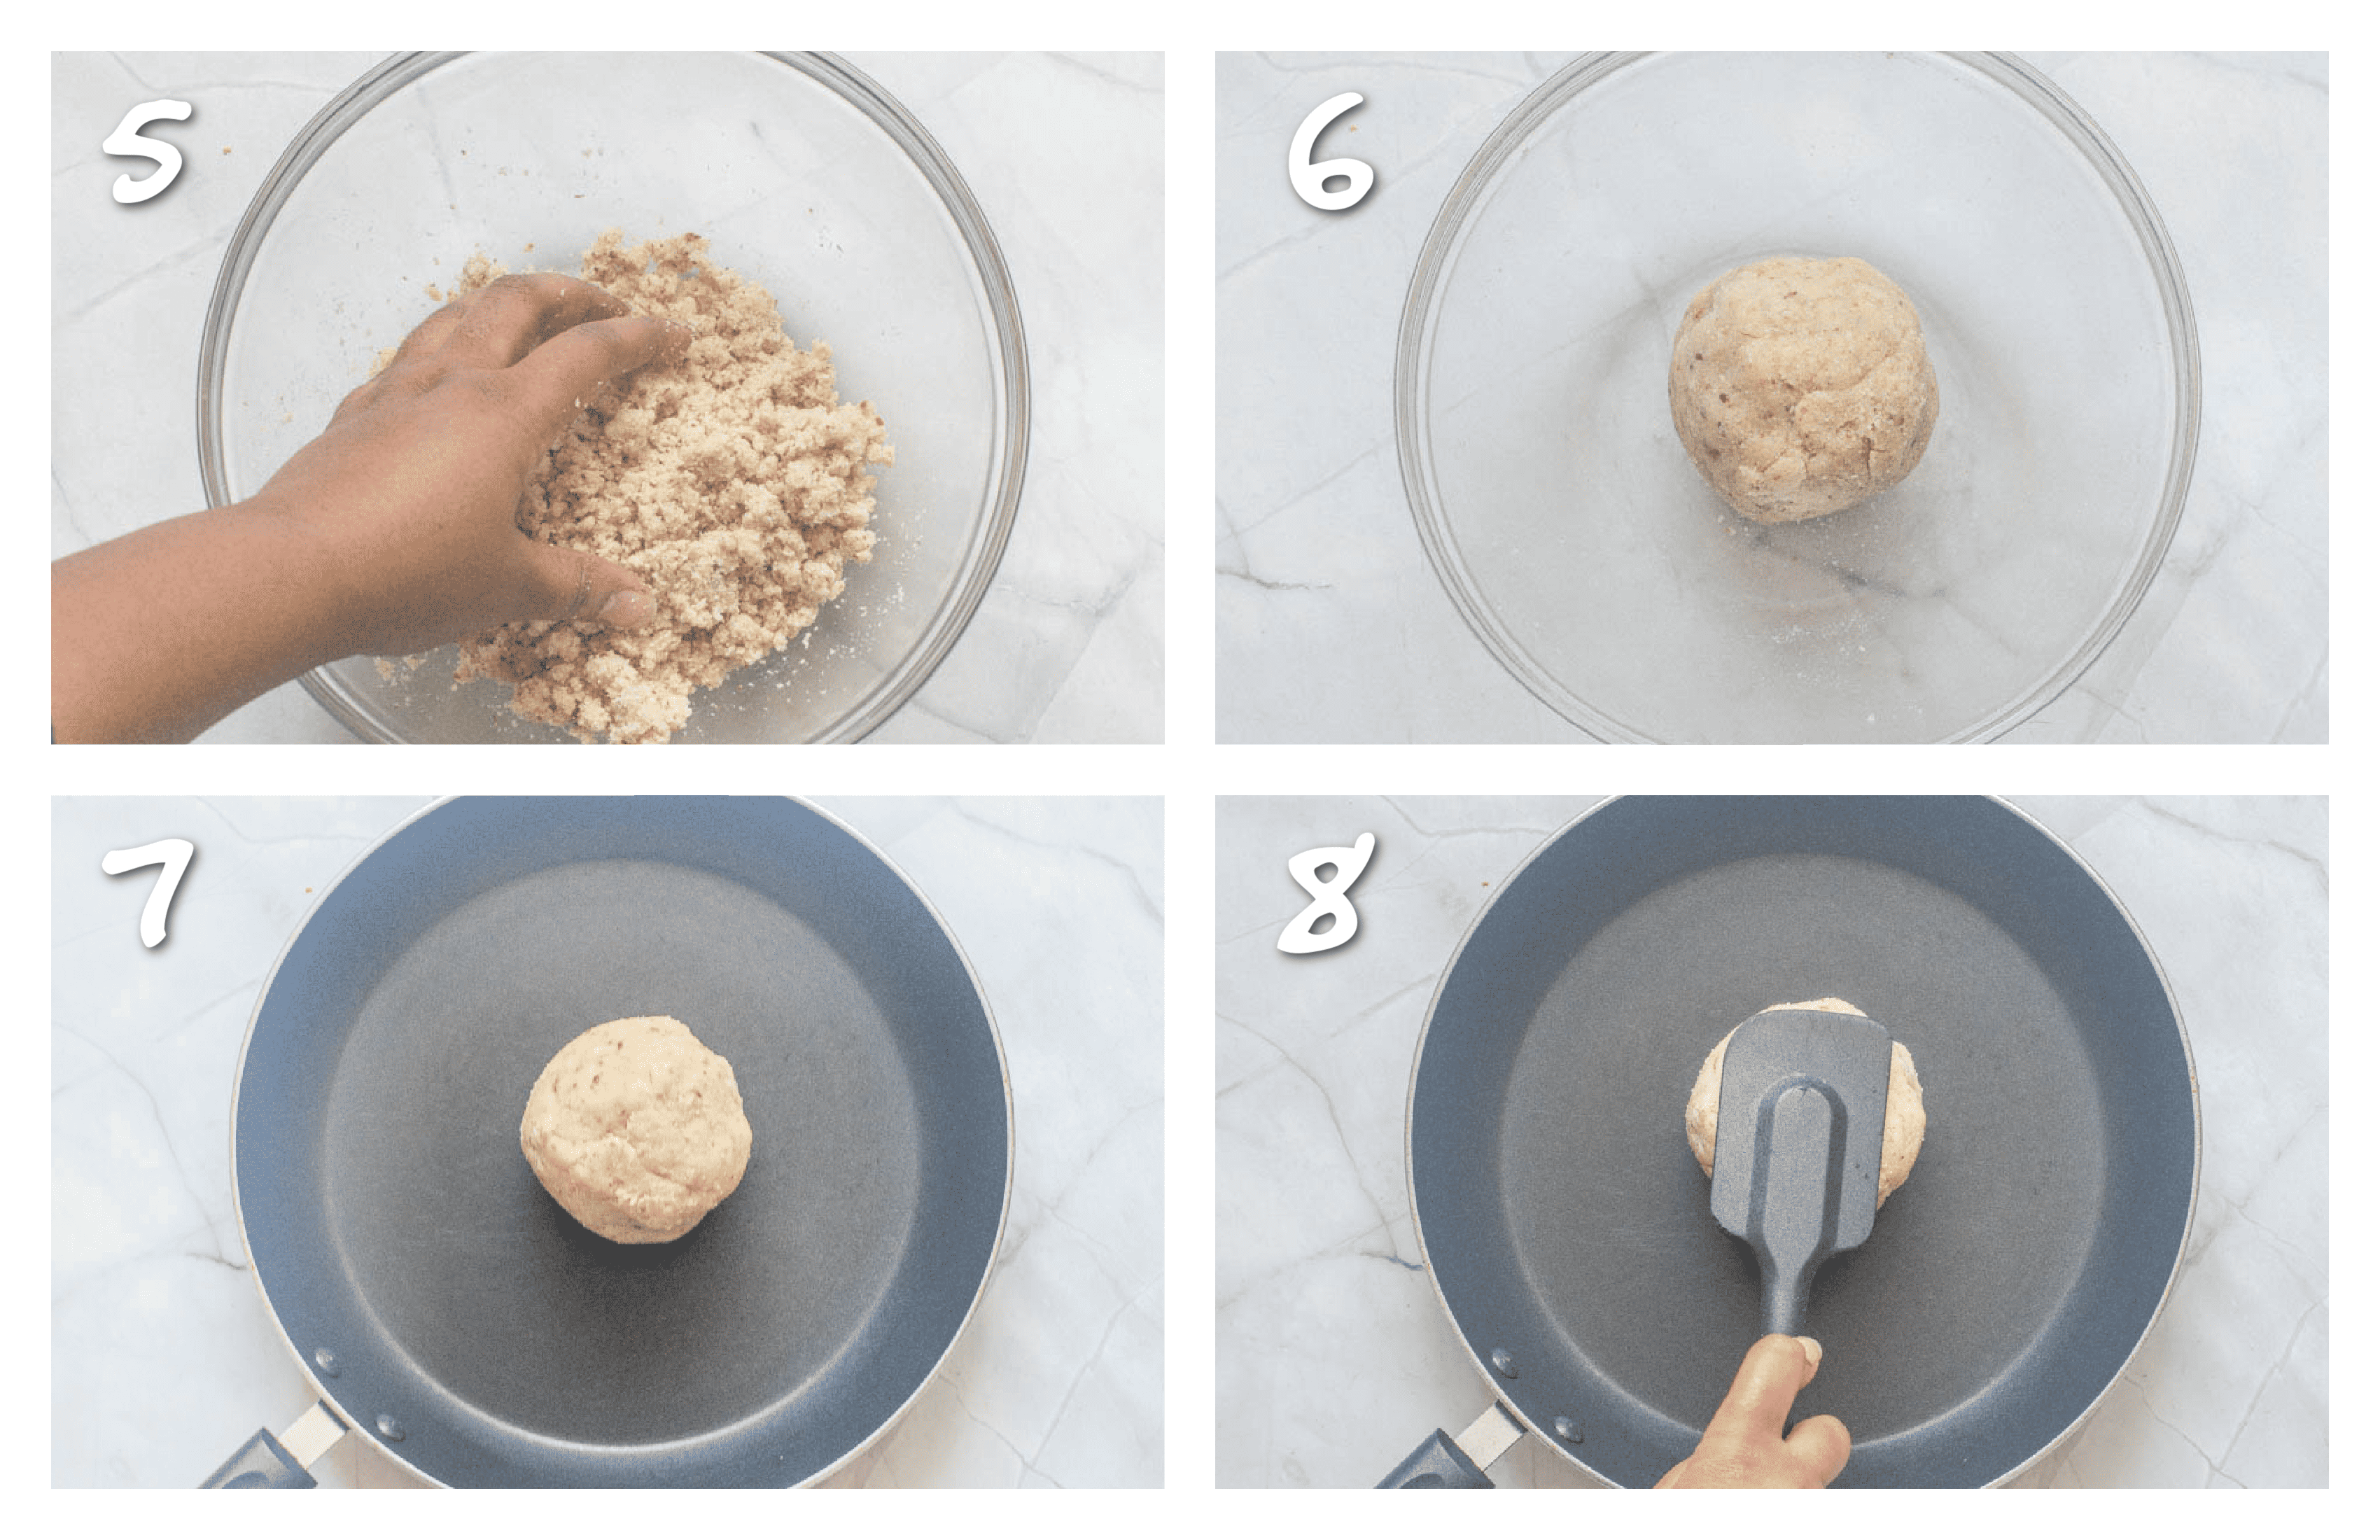
- Use a spatula to breakdown the dough ball as it cooks, stirring and mixing to prevent any sticking.
- Continue to cook until the dough transitions from pieces to breadcrumbs (this should take 20-30 minutes) as the moisture draws out, spreading them in an even layer so they are exposed to the heat underneath.
- As the breadcrumbs begin to form and become drier, use a pastry cutter to break them down into a finer consistency.
- Preheat the oven to 180C/356F and line a baking tray with parchment paper and set aside.
- As you come closer to the finishing time, most of the breadcrumbs will have dried out, now is the time to add the paprika, turmeric and pink salt.
- Stir the spices into the breadcrumbs to form a more uniformed yellow hue.
- Do a taste test and adjust accordingly, if required.
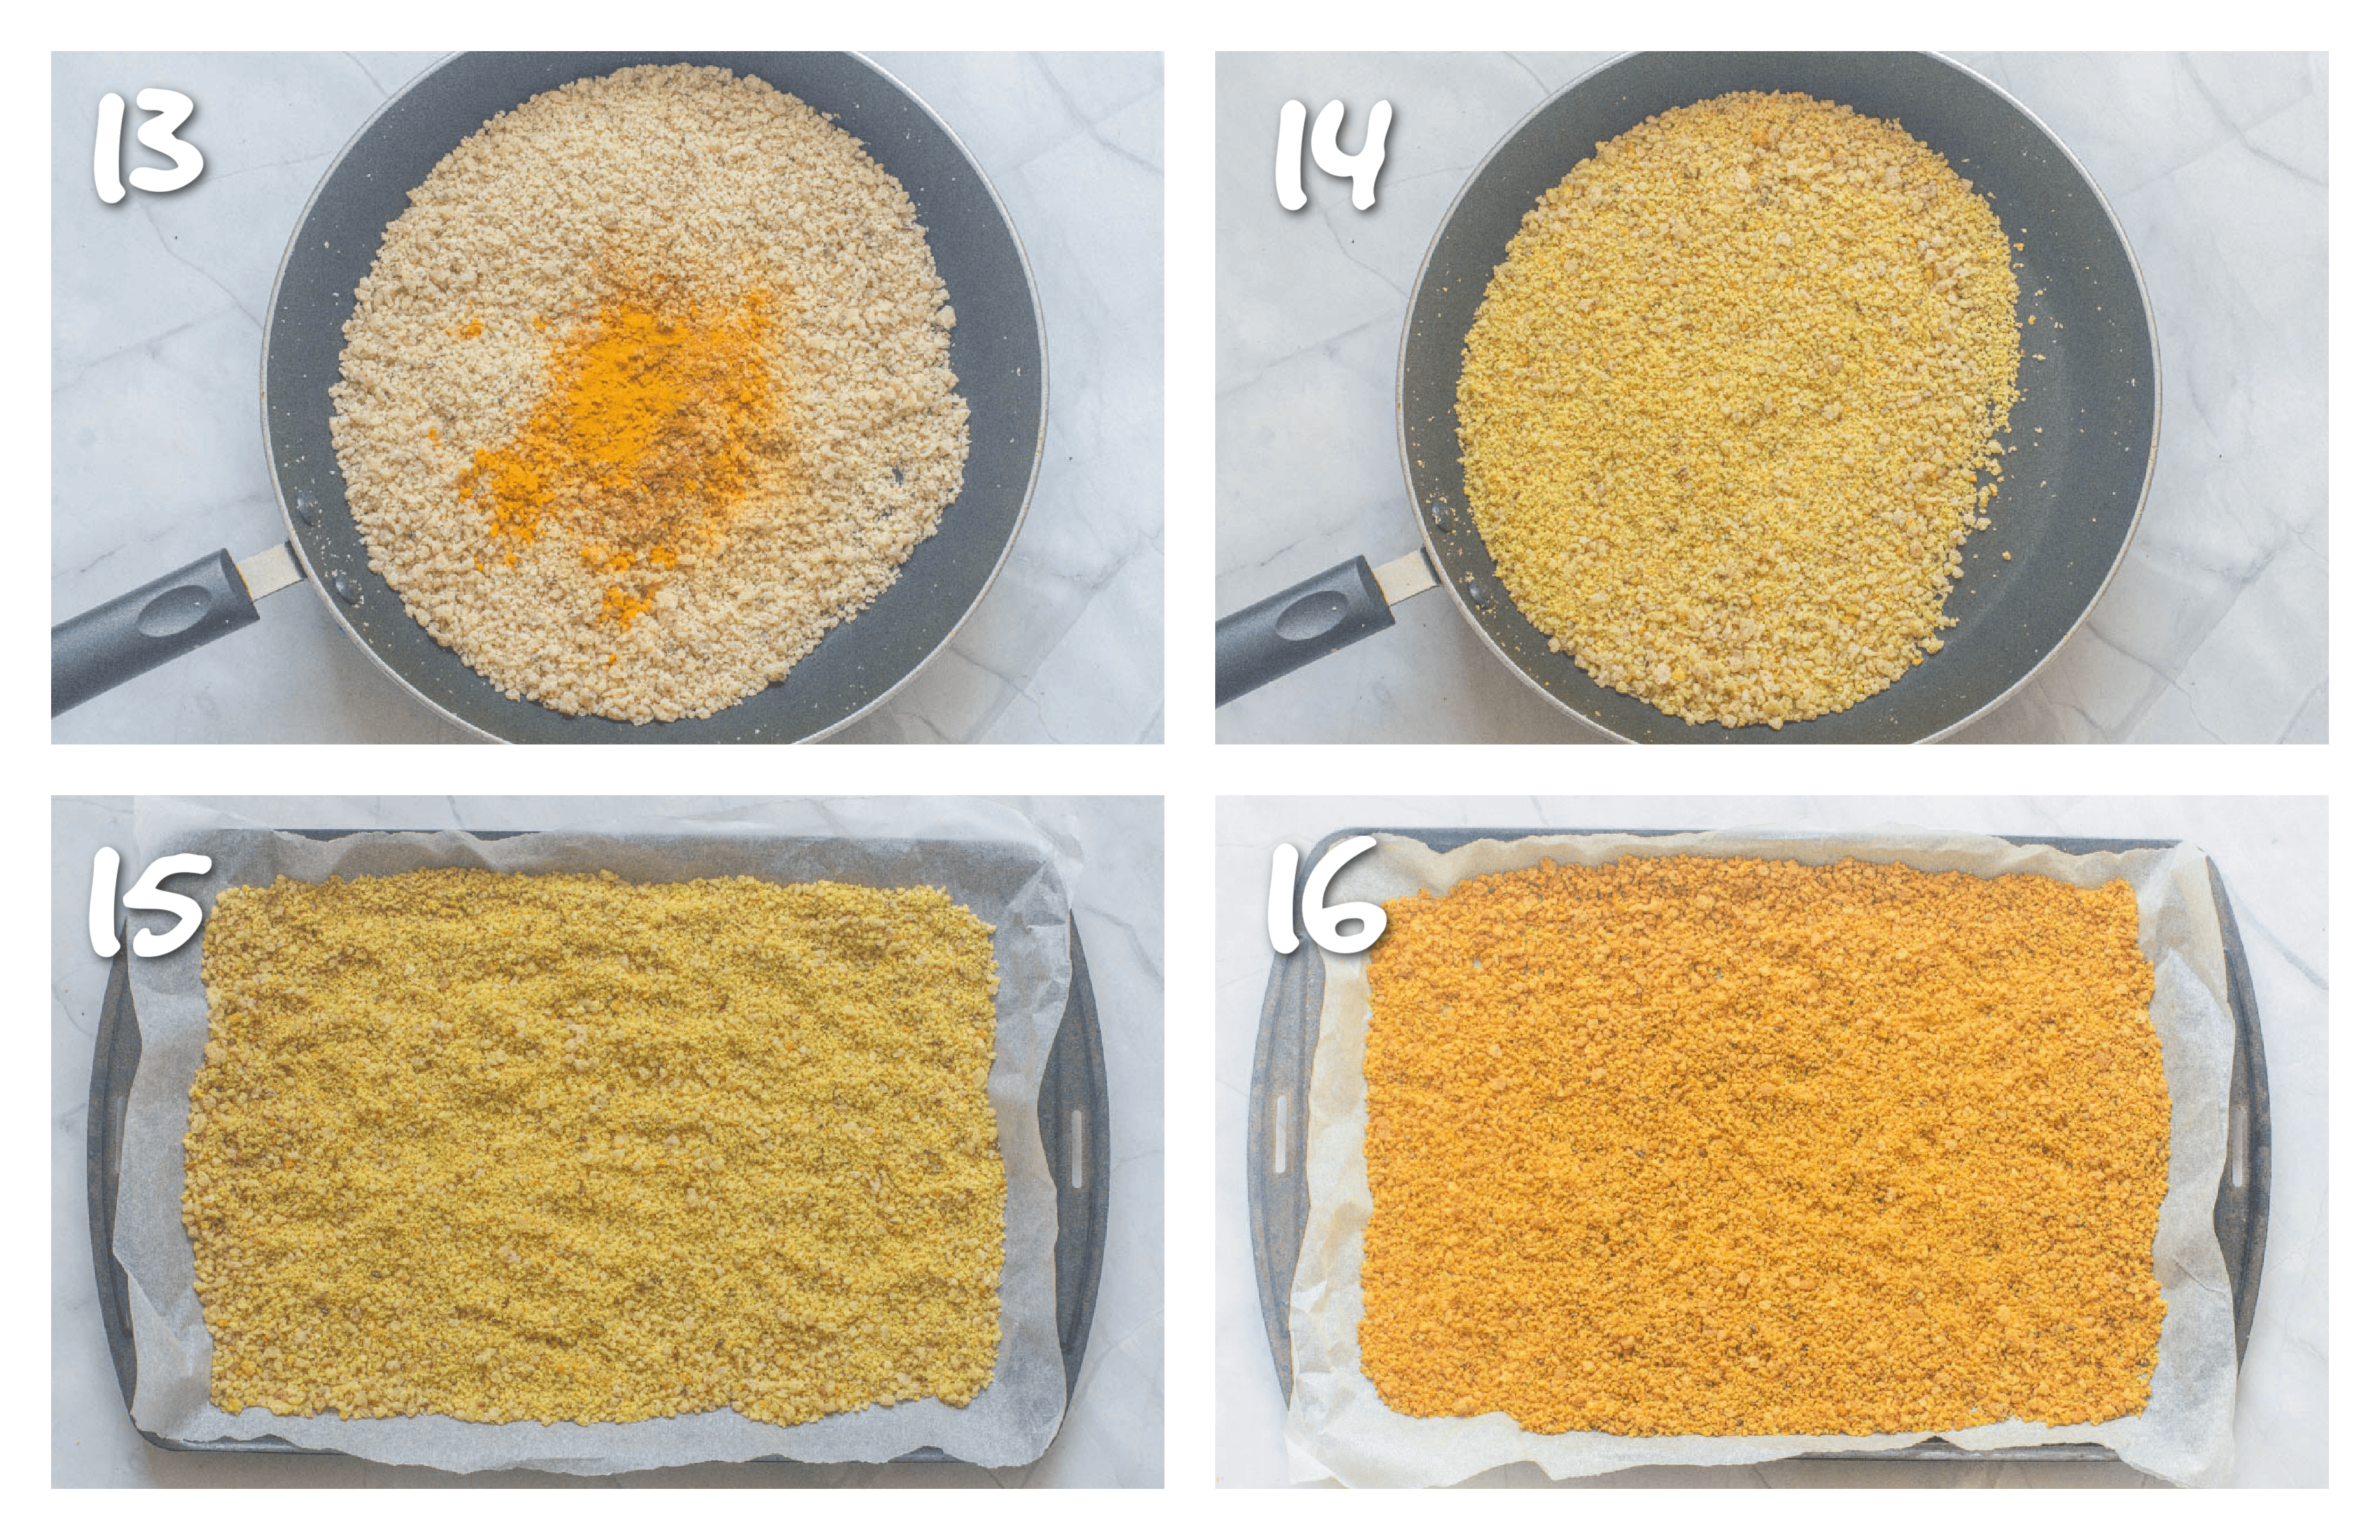
- Spread the breadcrumbs in an even thin layer on the baking tray.
- Toast in the oven for 15-20 minutes until golden, stirring frequently.
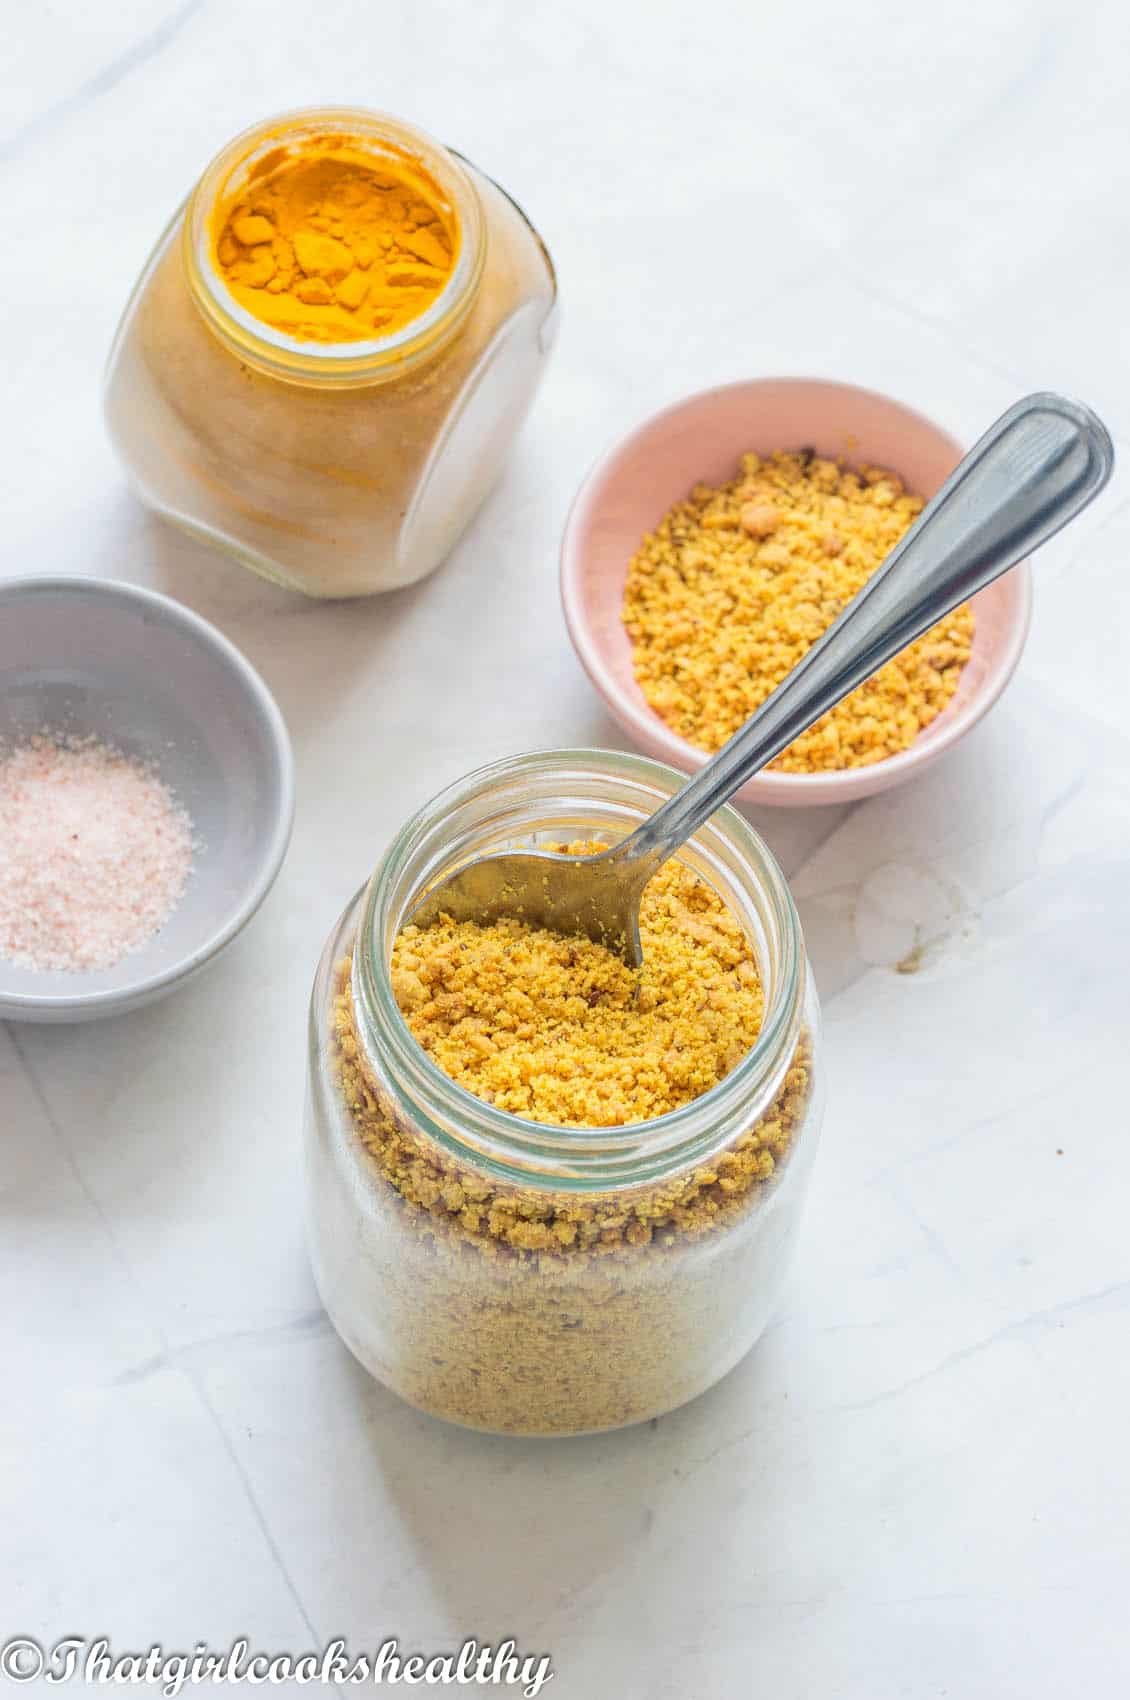
- Once toasted, remove from the oven and allow to completely cool down (if you need to mill into a fine consistency then use a food processor/spice grinder and do so now) before transferring into a mason jar.
Notes and tips
- Keep the breadcrumbs in an air tight container i.e mason jar in a cool dry place.
- I have only tested this recipe for up to a week (so far) but will update the longevity soon.
- You will need to use ALMOND FLOUR NOT ALMOND MEAL for this recipe.
- If you don't plan to use the breadcrumbs at time soon, place them in a freezer friendly zip lock bag and freeze for up to 3 months.
- Feel free to double, triple or quadruple the recipe if you need to.
- To make panko breadcrumbs, keep the breadcrumbs quite large.
- If you want your breadcrumbs to be very golden be sure to add the paprika and turmeric.
- Feel free to add any additional herbs/spices/even sugar, you will add them when you add the paprika and turmeric.
- The ground flaxseed acts as a binder, do not skip adding it or use ground chia seeds instead..
More recipes to try
- Gluten Free Flour Recipe
- Gluten Free Vegan Pie Crust
- How to make Date Paste
- Homemade Browning Sauce
- How to Dehydrate Peppers
- Sea Moss Gel
- Annatto Oil
Recipes to use these breadcrumbs in
- Jamaican Fried Chicken
- Chocolate Crumble
- Chayote Fries
- Air Fryer Apple Wedges
- Air Fryer Lemon Chicken Breast
**Please comment below and star rate if you have tried my recipes. Support my website by leaving a donation through Buying Me a Coffee. A site to show your appreciation of my hardwork over the years. Let's be friends and engage on YouTube, Facebook and Instagram I also like to pin on Pinterest, where you can find more amazing recipes.**
How to Make Gluten Free Breadcrumbs
Ingredients
- 2 cups almond flour (475g)
- 4 teaspoon ground flaxseeds (8g)
- ¼ cup water (60ml)
- ¼-½ teaspoon turmeric (0.5g)
- ¼ teaspoon paprika (0.5g)
- ⅛ teaspoon pink salt (0.75g)
Instructions
- Place the almond flour and ground flaxseed in a large bowl.
- Whisk to thoroughly combine and make a well in the centre of the bowl.
- Pour the water into the centre of the bowl.
- Use your hands to knead into a pliable dough ball (it shouldn't be dry nor too sticky).
- Preheat a large non stick frying pan or skillet on medium heat.
- .Place the dough ball in the centre of the pan/skillet.
- Use a spatula to breakdown the dough ball as it cooks, stirring and mixing to prevent any sticking.
- Continue to cook until the dough transitions from pieces to breadcrumbs (this should take 20-30 minutes) as the moisture draws out, spreading them in an even layer so they are exposed to the heat underneath.
- As the breadcrumbs begin to form and become drier, use a pastry cutter to break them down into a finer consistency.
- Preheat the oven to 180C/356F and line a baking tray with parchment paper and set aside.
- As you come closer to the finishing time, most of the breadcrumbs will have dried out, now is the time to add the paprika, turmeric and pink salt.
- Stir the spices into the breadcrumbs to form a more uniformed yellow hue.
- Do a taste test and adjust accordingly, if required.
- Spread the breadcrumbs in an even thin layer on the baking tray.
- Toast in the oven for 15-20 minutes until golden, stirring frequently.
- Once toasted, remove from the oven and allow to completely cool down (if you need to mill into a fine consistency then use a food processor/spice grinder and do so now) before transferring into a mason jar.
Notes
- Keep the breadcrumbs in an air tight container i.e mason jar in a cool dry place.
- I have only tested this recipe for up to a week (so far) but will update the longevity soon.
- You will need to use ALMOND FLOUR NOT ALMOND MEAL for this recipe.
- If you don't plan to use the breadcrumbs at time soon, place them in a freezer friendly zip lock bag and freeze for up to 3 months.
- Feel free to double, triple or quadruple the recipe if you need to.
- To make panko breadcrumbs, keep the breadcrumbs quite large.
- If you want your breadcrumbs to be very golden be sure to add the paprika and turmeric.
- Feel free to add any additional herbs/spices/even sugar, you will add them when you add the paprika and turmeric.
- The ground flaxseed acts as a binder, do not skip adding it or use ground chia seeds instead..


Gianne says
I've been looking for gluten-free bread crumbs for a while now and saw this. Really easy and amazing! Saving this recipe.
Charla says
Thank you Gianne.
Sara Welch says
This was such a unique and unexpected recipe that does not disappoint! Easily, a new favorite recipe!
Charla says
Glad you like it Sara.
Kristine says
So many great tips in this post! And the breadcrumbs are tasty. I'm finding all sorts of uses for them, thank you!
Charla says
Yay! That's what I like to hear.
Andrea says
These homemade, gluten free, breadcrumbs sound delicious. I love the flavors and am already thinking of ways to use them.
Charla says
Yay!!
Kushigalu says
This gluten-free breadcrumbs sounds amazing. Thanks for the recipe.
Charla says
You are very welcome.